Archives for June 2012

Canon 5D Mark III Initial Impressions

Finally got my 5D Mark III today! Spent the last 2.5 hours on updating the firmware and setting it up the way I use to use Canon bodies and did some initial tests. For the curious and impatient: it’s a 8 out of 10 body in my opinion.

What I like:

  • Construction. Feels more like an 1D than a 5D. No flexing and squeaking parts when you squeeze it. Also like that it is a bit heavier than the Mark II was – it fits my large hands much better.
  • Speed and responsiveness. This camera really reacts fast. Feels even faster than my aging 1D Mark II.
  • In the few shots I made colors seemed more natural than the Mark II, but I think future versions Capture One should improve their handling of the files.
  • The ability to reverse the top and back dials for manual mode. I usually shoot in Av, and prefer to use the mail (top) dial for setting aperture even in M mode. This was always working on the 1 series, and finally it is available on the 5D!
  • Like that Canon went forward in the level of customization – it’s still quite limited, and not enough for me, but at least the direction is good.
  • Depth of field preview button is finally on the right side.
  • The remote release socket is moved down to the position where it was on the original 5D. Mark II was a pain to use in the portrait position with a RRS L-bracket. I really appreciate this change.
  • The live view/movie mode switch. I don’t care about movie shooting at all, so it’s great that all the movie related stuff is moved away in still image mode.
  • The LCD. It is way better that the old one was. Finally Canon made and LCD with the aspect ratio of the images the camera produce.

All in all, it’s light years ahead of the 5D Mark II. Does it reach the level of the 1 series? Not really. There are few things that I strongly dislike (some are shared with the 1DX and I would dislike them even on that body):

  • No dedicated mirror lock-up button. This is ages old… Maybe sometimes somebody will listen… I would love to set mirror lock-up to the M-Fn button!
  • The USB port is a joke. It’s not deep enough, the cable does not sits in it snugly. I had to push it in a couple of times to make a secure connection.
  • Don’t like the on/off switch’s position. I managed to turn off the camera twice while changing the exposure mode.
  • Virtual level. Imprecise, and pain in the ass to use. I’ll continue to use the 3D level in eFinder Tools of my Viewfinder app or a simple 2-axis bubble level.

I dislike several things about the AF system from the user interface design point of view, some are cosmetic, some are pretty serious. It might be that I’m overly sensitive to UI design (this is what I do part time for a living), but these annoy me too much.

  • Illumination is worthless against bright backgrounds. I don’t see that the points are illuminated at all. I would prefer the strong illumination on the former 1-series bodies.
  • They way the grid is implemented. I always disliked this feature on Nikons and preferred the interchangeable focusing screen approach (I use the grid screen on my older bodies). The fact that the gridlines flash red annoys the hell out of me. Especially when I move the active focusing point with the joystick. Of course I can turn off illumination completely, but then I loose it completely…
  • Not to mention the infamous ‘AF point does not illuminate in AI Servo mode’ issue.
  • I ended up using the mode where all 61 points are always displayed (just to know where they are without fiddling with the selection around). When I leave the camera idle for a while (that is, when the bottom part of the viewfinder is not visible) then non-cross-type points are starting to flash. This is OK when I select them, but in this mode it is downright annoying. Imagine you are watching a bird to do something and the camera starts to flash the AF points (all of them except the central region with an 500/4 and 1.4x attached)…

All in all I like the camera – it definitely worth it’s price – but will stick with my 1D Mark II for occasions where the UI of the new AF system does not make me happy. Hope that Canon will fix the AF UI issues in the rumored upcoming firmware update.

Stay tuned for more as I use the camera regularly.

The Sensor vs the RAW File

Your camera’s sensor records a lot more than finally appears in your master TIFF file. Actually it might have more pixels than those appearing in the RAW file.

Last year I did a little research about this topic, and the following graphic shows the “big picture”. There are two distinct regions on the sensor: uncovered, regular pixels, and ones covered with a black mask. The black mask is used to determine the black level (i.e. how black is black with regards to thermal noise and sensor design).

One step of processing a RAW file is scaling – mapping all the values between the sensor’s black level and white saturation level into the 0-1 interval. Yes, the blackest black on a sensor is not represented by a zero readout from a pixel. For example, on a Canon 5D Mark II, which is a 14-bit camera and thus each pixel theoretically can be of any value between 0 and 16383, the black level is 1023 and white saturation level is 15600. So you lose a bit at each end.

How the black level is determined varies by vendor to vendor – or Canon vs everybody else. Canon puts the entire image into its RAW files (including the black masked pixels) so a RAW converter have the opportunity to calculate the black level from these pixels on its own. On every other camera I tested (a bunch of Nikons, Leicas, Sonys and Phase One backs) the camera determines the black level and subtracts it from every pixel. That is, the camera does the black half of scaling.

This have severe effect on some applications – astrophotography for example – where one creates multiple exposures and averages them. With a Canon RAW file and proper processing noise in the darkest tone will oscillate around the black level. So noise from multiple averaged exposures will cancel out. With black scaled files however, half of the noise oscillation is cut down and there are no negative values that cancel out positive ones around the black level. All in all, a Canon is theoretically better for averaging than any other camera.

But why the default crop is needed? Why don’t we get all the pixels from the active sensor area? Because RAW conversion algorithms need a startup area. In other words most RAW conversion methods produce ugly artifacts around the borders. So the solution is to simply crop these out.

  ☕ ☕ ☕

Did you enjoy this post? Consider buying me a coffee if so.

Climbing the Stromboli

In early June we spent a week long holiday in Sicily. The highlight of the trip for me (both as an experience and as an opportunity to take images) was the ascent to the craters of Stromboli.

We arrived to the island late afternoon, and our host mentioned that we can climb the volcano if we want with the last group that day. This was a fascinating opportunity – to climb the mountain in the best light. The funny thing was that we had no proper equipment – we just grabbed some shoes and pullovers. I always had a Petzl headlight with me, but the girls hadn’t, so I rented a couple of lights and joined the – mostly – properly equipped group.

I had only my vacation equipment with me – a Canon 5D Mark II with three lenses: a 24mm f/2.8, an 50mm f/1.4 USM and a 100mm f/2 USM. I used the 24mm almost exclusively – really like that little lens.

There We Go

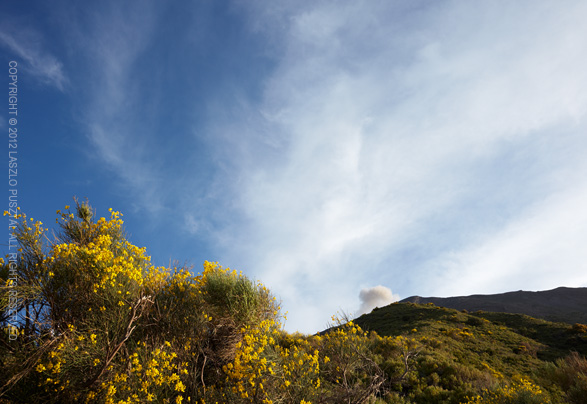
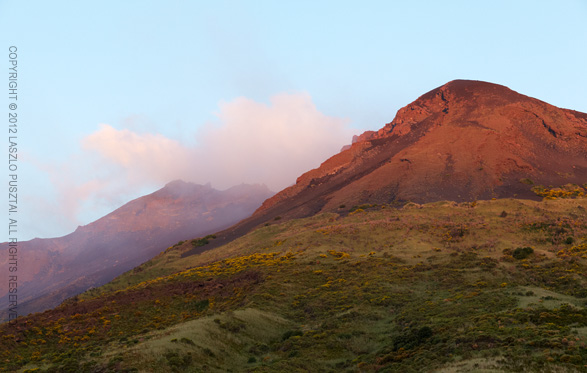
Stromboli is an active volcano and it’s not shy to show off. You can see the ash clouds it pumps to the air from the beginning of the trip.

Speaking of the trip itself. The first 400-450m of the ascent is relatively easy. There’s vegetation everywhere, and you walk on soil. After our second break, at around 450m height, things start to get tough. There’s no vegetation from that point, just ash, rocks and wind. Wind that can be furious at times. This was the time to put on all the warm clothing and prepare for another 1-1.5 hours of walking on steep ash-covered slopes.

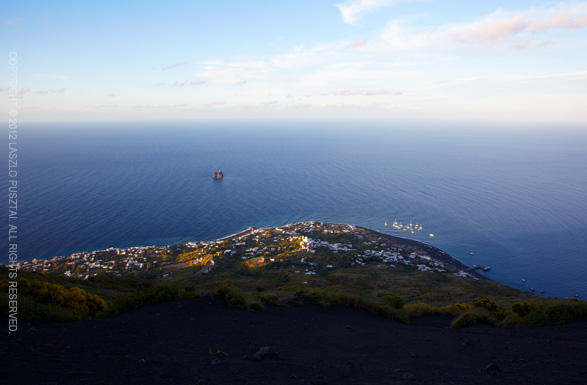
But the vistas were incredible.

Looking Back at the Village

So much, that I – being the only serious photographer – usually tailed off the group. Fortunately (or not) I had no tripod with me, so composing images was quite fast compared to my usual working methods.

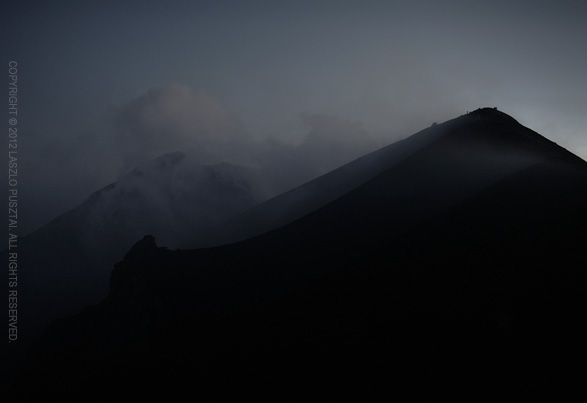
As we approached the last slope, the view behind us turned incredible. Some ash clouds from the crater just floated above the tip of the volcano’s shadow – as if the shadow created them. Took some 10-15 images of the shadow from different angles and turned towards the final slope.

Smoking Shadow

Just about a minute before we reached the flat region before the summit, the Sun dipped below the horizon. Lights were still great, but as the night started to fall a foreign, surreal and hostile world started to materialize in front of my eyes. Squat down behind a rock, trying to stabilize my camera (and protect it from the furious wind).

The following minutes touched me deeply. I felt completely alone, with the wind, the smell of the volcanic fumes and the approaching darkness. The resulting image is my favorite from the entire trip.

Darkness Approaching

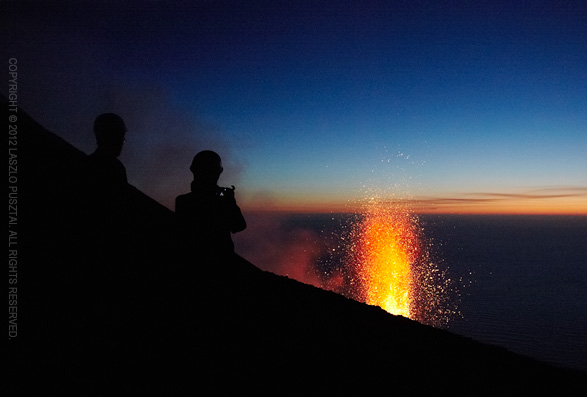
Then I heard a huge explosion. This was a complete surprise for everyone. The volcano shot up a huge fountain of molten lava. I had little time to change settings on my camera, so run up to the edge of the wall separating us from the craters – taking pictures on the way.

The following one is the second frame from the series. This one with my fellow group-mates is way stronger that the subsequent ones showing just the volcano and the lava.

The First Surprise

We spent a short hour on the summit, witnessing 3 or 4 eruptions. I really missed my tripod at that time.

The descent was easier physically but harder ash-wise. We literally “skied” down on ash-covered slopes. We had to unload the ash from our footwear twice during the downward part of the trip.

We heard several eruptions during the night, and went down to the port early next morning. The last frame was taken with the 100mm f/2 lens.

First Light

I definitely want to go back to photograph Stromboli – but that time with real photographic equipment (which dictates real climbing equipment because of the sheer weight of my camera bag).

Backing up Lightroom with ChronoSync

ChornoSync is what I use on my Mac for backing up user data – including my images. Although I don’t use Lightroom nowadays as much as I used to, backing up the database is important. There’s one gotcha, however. Preview images are stored in something called a bundle. A bundle is a directory that OS X handles as a single entity. For the catalog named Something.lrcat the preview bundle is named Something Previews.lrdata. So if one single preview image is changed, OS X thinks that the bundle is changed and ChronoSync happily copies the entire multi-hundred-megabyte conglomerate, not just the changed (or new) previews.

There’s a simple solution to this issue, shown on the image below.

Check the Dissect packages checkbox on the Options tab, and the Previews bundle will be treated as a regular directory, and ChronoSync will just synchronize newly added or changed previews.

  ☕ ☕ ☕

Did this post help you? Consider buying me a coffee if so.