As I find myself under dark skies quite often, I carry not one but two flashlights in my bag. One of them is a Petzl Zipka headlamp, used for close range work, such as setting up the camera or finding something in the bag. But there are several other usage scenarios that a headlamp won’t fit into: navigation while you are getting to a location or walking home, searching, warding off uninvited visitors (be they curious humans or hungry animals), and even light painting.
I used several different sized flashlights with different feature sets during the last decade (I’m using the Zipka for more than a decade and it’s still running off of the original batteries), but more than a year ago I found a light that is quite possibly the ultimate in features and durability.
Enter the Nitecore SRT7
The high-end of the flashlight business in dominated by Chinese companies. But these are not the usual low-quality knock-off products you might associate with China. They are top of the class both in design and in manufacturing (the SRT7 is so simple and elegant that it could even carry an Apple logo).
Nitecore is one of these manufacturers, with some unique features in their lights. First of all, the SRT7 is part of their tactical offerings. Nowadays I tend to gravitate towards tactical and military products because of their durability and well thought out features. Not that I would need pistol magazine stabilizers in my pants’s pockets or uninterrupted light during shotgun recoil for a flashlight… Well, actually those magazine holders are pretty darn useful for holding various items…

The Nitecore SRT7 flashlight
You can see the light above. It is waterproof, shock proof (I exercise both features regularly) and in all aspects built like a tank. It feels well balanced in my hand, and have enough grip on the surface even when wearing heavy gloves.
Along with a very powerful white LED (960 lumens – easily outshines my car’s headlights), you have three colored LEDs: a red, a green, and a blue one. I was interested in the red one when I bought the lamp, and use it heavily during astrophotography. Never used the blue or the green one. The white LED in on the cool side.
But it’s user interface is why I bought it in the first place. It consists of a switch, a rotating ring and a LED. The switch is on the tail of the lamp, and is used to cut power off completely, so that it won’t drain the battery while sitting in the bag. The red LED starts to flash when the battery is starting to run out of juice. The ring is the centerpiece of the user interface.
It is used to switch between the different modes, as well as to continuously adjust the light’s brightness. The continuous adjustment is smooth, with good perceptual uniformity. Turn the ring to the right to increase brightness. At the end of the scale is a “turbo” mode as well as a stroboscope mode (the latter can be useful in self-defense situations). Turn the ring to the left to access the red, green, blue, police-like red/blue flashing and beacon modes. It’s that simple.
Powering the flashlight
The SRT7 can be powered with two CR123 lithium batteries or with a rechargeable 18650 battery. The latter is a standard industrial battery type with added protection circuitry – and is a quite common flashlight power source among Chinese manufacturers. I bought two Nitecore NL189 3400mAh batteries along with the lamp.
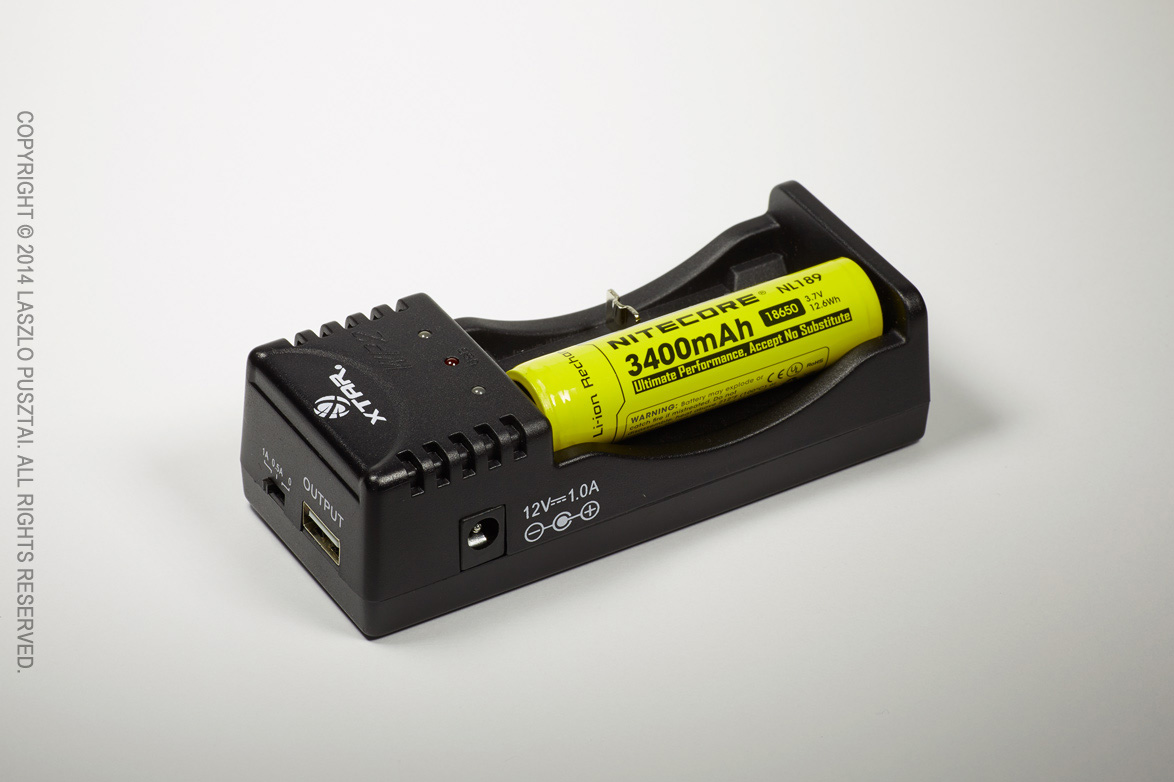
18650 battery in an Xtar WP2 II charger
I’m using an Xtar WP2 II charger for those, as it can provide 1A charging current (compared to the 0.5A of most other chargers). The 1A current is well within the battery’s specifications, and I don’t like to wait for batteries to charge…
This charger has another neat feature: you can turn it into a power source to charge any USB-connected device (such as emergency recharging your phone). The output is a standard 500mA USB port.
Conclusion
It’s hard to add anything else for a flashlight – it’s just a flashlight. Albeit a good one. Highly recommended.
 Beginning with version 4.1, we’ll utilize the iOS provided data until we can do the measurements. On newer phones the iOS provided data is much more accurate than it was in the past. This way you could immediately use the app on new devices.
 Version 4.1 introduces full text searching for both the camera and back selection screens, accessible through the search icon.
 Just type the first few characters of your camera’s manufacturer and/or model name, and the Mark II will present a list of matching names. Simple as that.