Archives for February 2016

Kuuvik Capture 2.2 Released with Wi-Fi Support

The latest update to my Kuuvik Capture camera remote control app went online earlier today. Although it looks like a small update on the surface, there’s a huge change under the hood. This version contains the 3rd generation of my digital camera library – with full Wi-Fi and Ethernet connection support.

You may remember that we had dropped the network camera option during the beta, because Apple’s PTP-IP (the protocol used to talk to the camera over Wi-Fi and Ethernet) implementation turned out to be unreliable under heavy load. Not to mention the side effect that Image Capture started every time we connected a camera.

So I took the challenge and developed a completely new PTP-IP transport component, debuting in Kuuvik Capture 2.2. If you think that it’ll appear in other apps in the future, then you’re on the right track… But let’s concentrate on Kuuvik Capture now.

Connecting your camera via Wi-Fi (or Ethernet)

First of all, you’ll need either a Wi-Fi equipped camera (6D, 70D), a built-in Ethernet socket (1D X, 1D C) or a separate Wireless File Transmitter (5D Mark III, 5DS, 5DS R, 7D Mark II, 1D X, 1D C) for this to work. Only Canon’s transmitters are supported, third party Wi-Fi remote control boxes will not work. Please check the tech specs for the full list of compatible equipment.

Canon cameras provide connectivity in several ways. The most complete is the EOS Utility connection mode. For this mode a camera needs to be paired to a given app on a given computer. Using two apps on the same computer? You need to pair the camera to them separately, and only one can be active at a time.

The computer side of this pairing process is dramatically simplified in Kuuvik Capture 2 compared to both version 1 and Canon’s EOS Utility.

Kuuvik Capture now needs to be “pairing mode” to accept a pairing request coming from the camera. This mode is accessible through a new menu item (or by pressing F2).

networkPairing

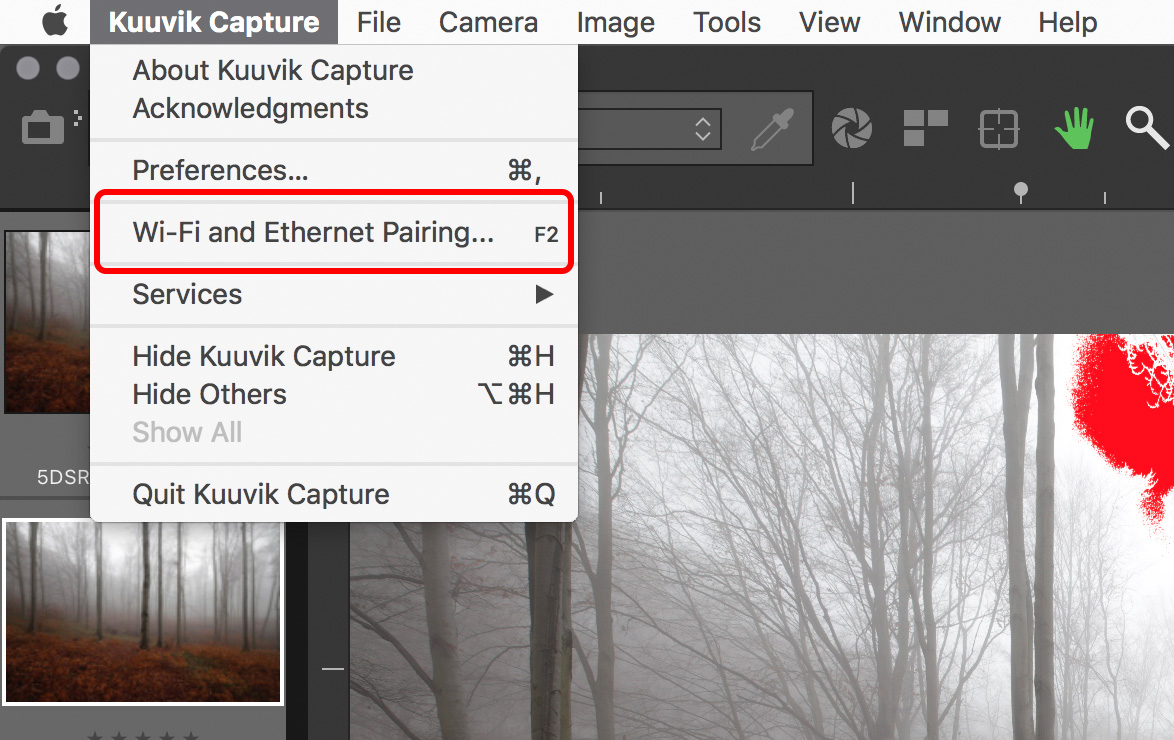
Pairing can be initiated from the menu.

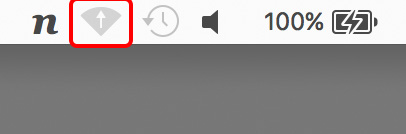
Kuuvik Capture displays the pairing window (shown below) while in pairing mode. This window also shows your computer’s name, which will appear on the camera’s LCD during the last pairing step, so you can double-check that you are pairing to the computer you were intended to.

networkPairingWindow

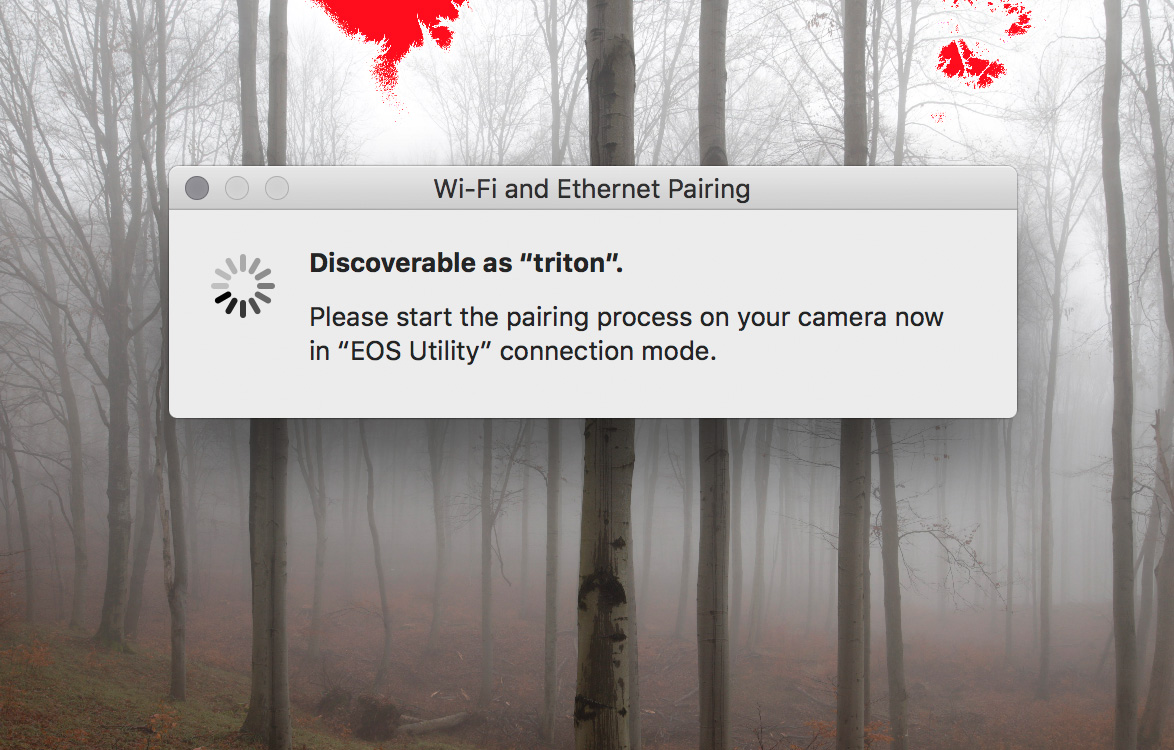
The pairing window. Kuuvik Capture is ready to accept pairing request only when this window is displayed.

And that’s all you need to do on the Mac.

Once in discoverable state, you can start the configuration process on your camera. The process consists of three large steps:

  1. Choose a connection mode.
  2. Configure your network.
  3. Do the actual pairing.

They are documented in your camera’s or wireless transmitter’s user manual, but there are a few important points to consider.

First, please don’t start any Canon app that may be mentioned in the manual. You are now pairing to Kuuvik Capture, and not to Canon’s apps.

For step 1, you must use the Connection Wizard on cameras where it’s available (e.g. 5-series, 7-series with the external brick), otherwise you won’t be able to complete step 3. On the 6D and 70D choose the Remote Control (EOS Utility) mode. On other cameras choose EOS Utility mode in the Connection Wizard.

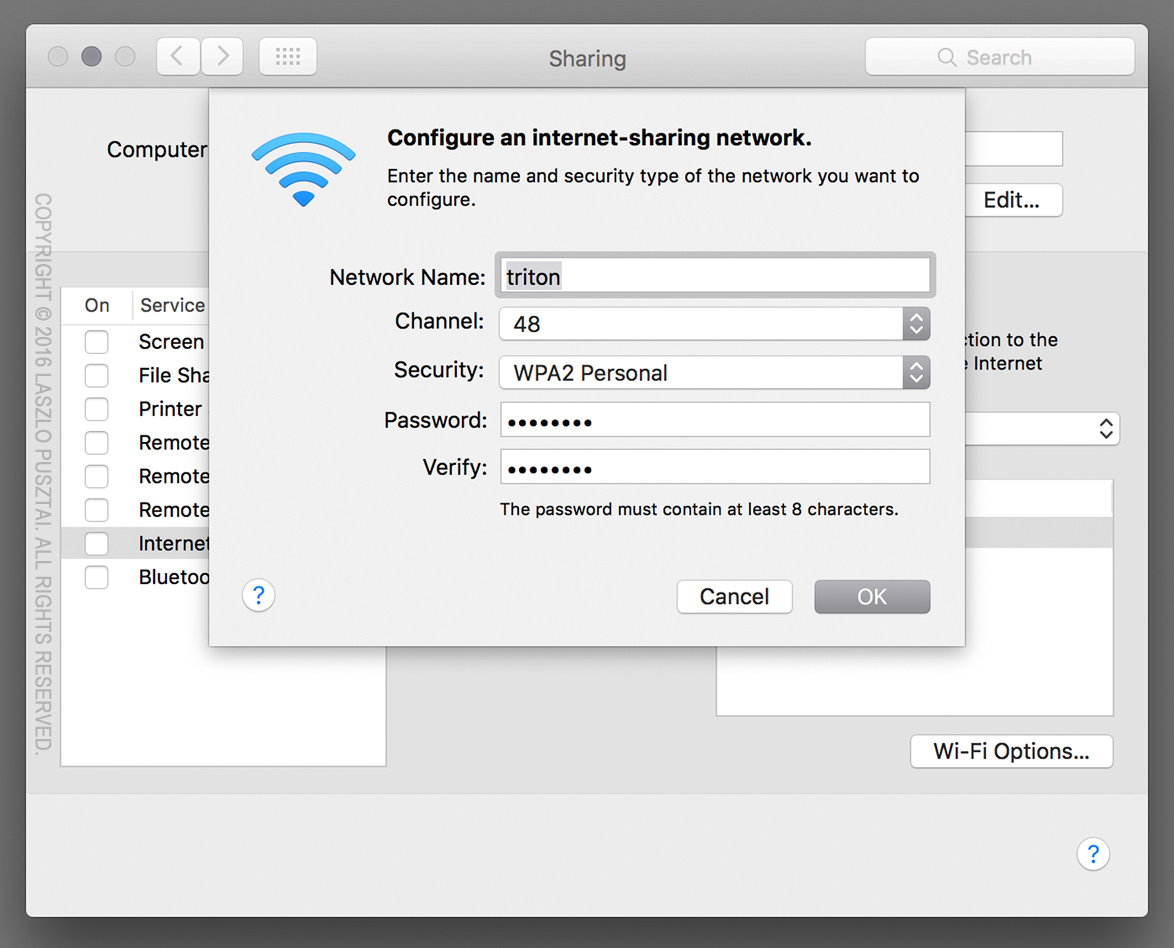
In step 2, the camera will ask for network specific parameters (whether it’s wired or wireless, plus various options and a password specific to your network). This is the most complicated part of the entire process, but Wi-Fi setup is such a thing… I’d recommend to study the camera/transmitter manual beforehand.

Out in the field with no network to connect to? My previous post shows you how to create a fast and secure Wi-Fi network on your Mac!

The last step is the actual pairing. As the LCD indicates, this is your last chance to put Kuuvik Capture into pairing mode. It may take up to 1.5 minutes for the camera and your Mac to find each other.

camerapairing1

This is how the camera’s LCD will look like as soon as they found each other:

camerapairing2

Pairing should be done once (unless in the meantime you paired your camera to another app, another computer, or used another network). To deal with these different scenarios, the very last screen in the process (after clicking that OK button) lets you save up to 5 (3 for 6D/70D) setups into your camera’s memory. But if nothing has changed, Kuuvik Capture will find your camera automatically the next time you turn it on and connect to the network, so the pairing is not necessary every time you want to use a Wi-Fi or Ethernet connection.

When pairing has successfully completed, the camera’s LCD will turn black, the pairing window will disappear, and the camera’s name will show up in Kuuvik Capture’s camera selector.

Notes on Wi-Fi speed

It seems that Canon implements one of the lowest speed classes for each of their Wi-Fi implementations. This is 150mbps for the external 802.11n bricks (using only one spatial stream), and a shockingly low 60mbps for the 6D and 70D (despite they advertise it as 150). So don’t expect miracles and be prepared for 12-15 second downloads on these slower cameras. On the other hand, the external bricks are fast enough to be perfectly usable when the network signal is good.

Well, speaking of bad, flaky networks. While I absolutely hate to add new configuration options (one more thing for you to deal with), this time it was a must.

Wi-Fi networks can become unbeliveably slow (think longer distances and/or interference), causing the camera to disappear from Kuuvik Capture. A longer network timeout (a longer time allowance for intermittent network errors to clear) may solve this, but at the expense of delaying the detection of actual issues (such as when the battery dies). So the Preferences window now has an option to control this.

ntoPreference

The default is 10 seconds, which we found to be suitable for most Wi-Fi networks. You can go as low as 5 seconds or as high as 30 seconds. My personal preference is to go with the lowest number, and raise it in the presence of connectivity issues.

Other new features

There are two of them. Customers have asked for more, longer time options for mirror lock-up auto-release. So we’ve added 8s, 10s and 15s to the palette. Also the new white priority white balance mode introduced with the 5DS/R is now available on the white balance control.

Availability

The update is free for existing Kuuvik Capture 2 customers. New users can download Kuuvik Capture 2 from the Mac App Store.

For more information about the app, please visit it’s microsite, or check out my posts.

Preventing Photos Auto-Start

If you are a photographer using anything but an iPhone for your work, chances are that the Photos app drives you nuts. I mean its aggressive nature to jump on any media or camera connected. Although you can disable this auto-start for cameras one by one, CF and SD cards are still an issue, as there’s no way to disable the auto-start for them on the user interface.

So here’s the trick: disable it globally. Open Terminal and copy & paste the following commands:

On OS X 10.10 (Yosemite):

defaults -currentHost write com.apple.ImageCapture2 HotPlugActionPath -string ""

defaults -currentHost write com.apple.ImageCapture2 LastHotPlugActionPath -string ""

On OS X 10.11 (El Capitan):

defaults -currentHost write com.apple.ImageCapture disableHotPlug -bool YES

You may need to log out and back on for the changes to take effect.

Creating a Wi-Fi Access Point on OS X

With Kuuvik Capture 2.2 around the corner, I’m going to post a few short tutorials on wireless “tethering” setups. Yes, the wireless connection option will make a return in version 2.2!

So let’s start with a solution to one of the most aching issues.

Imagine the following situation: you are out in the field, photographing an old castle. You want to place the camera on a crane to photograph from a high vantage point. The crane is higher than your longest USB cable can reach, so wireless connection would be the most appropriate solution.

First obstacle: all Canon Wireless File Transmitters (both built-in ones and external bricks) require an existing network to connect to in EOS Utility mode. Yes, it’s utterly stupid, since in other modes they can operate as an access point and create their own network. But other modes simply suck in terms of remote control features.

Back to our example: there’s no phone coverage (for the Personal Hotspot trick), there are no nearby networks of any kind to connect to. You could create an ad-hoc wireless network on your Mac, but setup is complicated and error prone (needs manual TCP/IP configuration on both the computer an on the camera), and in the last few versions of OS X there’s no way to create a secure Wi-Fi network (another utter stupidity). The lack of security is a total showstopper, so this isn’t the appropriate way to make the connection work.

There’s a neat trick, however. OS X has a built-in Internet Sharing feature that practically creates a Wi-Fi access point to share an existing network connection. The next obstacle is that you need the network you want to share to be in the “connected” state (think cable plugged in both to the computer and into a router). Unfortunately the built-in loopback interface (which is always connected and provides access to the local computer only) is not accessible from the Network preference pane in System Preferences (one more stupidity).

The key to the trick is to make the loopback interface appear in the Network pane. Actually, it’s pretty straightforward: launch the Terminal app and copy & paste the following two commands (working on both Yosemite and El Capitan):

sudo networksetup -createnetworkservice Loopback lo0
sudo networksetup -setmanual Loopback 172.20.42.42 255.255.255.255

Enter your password to allow these modifications if OS X asks for it.

Now your Network preference pane should list the brand new Loopback service:

network-loopback

It’s still listed as “not connected”, but don’t worry, that’s just a bug.

Side note: if you use multiple “network locations”, you need to repeat the above commands for each location. If you just use the Automatic location, then you can move to the next step.

Go to the Sharing preference pane, and on the list of services click Internet Sharing. If the service is already on, turn it off. Choose the Loopback service as the one you want to share your connection from. And share to computers using Wi-Fi.

sharing-1

You can set up the shared Wi-Fi network (the network we’ll connect the camera to) by clicking the Wi-Fi Options button. Here is the Wi-Fi Options screen:

sharing-2

The network name is your computer’s name by default, but I’d recommend to enter a simple alphanumeric name (containing no special characters), as Canon cameras have issues with displaying characters outside of the simple letters and numbers range.

All other options are the usual Wi-Fi setup options. A few notes though. Channels 1-11 use the 2.4 GHz band, while 36-48 use the 5 GHz band. Transmitters in the 70D and 6D only operate on the 2.4 GHz band, while the external WFT-E7 brick operates on both. The 5 GHz band is faster and generally has less interference from other networks and appliances operating in the crowded 2.4 GHz band. For security, choose WPA2 Personal (the other option is None, which is unacceptable).

Once the Wi-Fi options are entered, you can start the sharing service. To do it, click the check box in front of its name in the list. OS X may ask to turn on your Wi-Fi radio if it was off, and will ask your confirmation to start the sharing service. After the service has been successfully started you’ll see a screen similar to the one below:

sharing-3

IMPORTANT: due to an OS X bug, your selection in the share from list may change to another (random) network service. So you must check whether it still shows the Loopback service after each start!

The Wi-Fi icon on the menu bar will change to the sharing icon once the sharing service is ready to accept connections.

sharing-on

And that’s it! Your personal access point is now ready. The steps to configure your camera will be discusses in an upcoming post.

  ☕ ☕ ☕

Did this post help you? Consider buying me a coffee if so.

Zeiss Otus 1.4/28 First Impressions

Today’s arrival of the Otus 1.4/28 completes the last large piece of the 5DS R induced lens kit revamping puzzle. And it’s large is several ways…

My new core kit consists of the following lenses: Zeiss Distagon T* 2.8/15, Otus 1.4/28, Otus 1.4/55, Apo Sonnar T* 2/135 and Canon EF 500mm f/4L IS II USM as well as Canon’s 1.4x III extender.

But back to the 28mm. This may be one of the first production lenses available, which I bought for my own use. I mention this because I’m increasingly getting tired of photo equipment reviews where the reviewer gets a lens or camera from the manufacturer for a short period of time to form conclusions that should (in theory) drive sales. Sorry, but I don’t believe people who tell me to buy a lens that they haven’t purchased for themselves. It’s a bit stinky for me. Buying an expensive instrument is almost always a revelation: “I spent a lot on this item because I trust the manufacturer, the instrument is that good and it’s definitely worth it.”

So, the 28mm Otus is that good and it’s worth every (euro)cent I spent on it. If you know me, you know that these are from someone who’s picky to the extreme. No, it’s not perfect, but it’s the best wide angle lens I’ve ever used. That is, there’s no point in doing pixel peeping. If you are curious, I’d recommend to subscribe to Lloyd Chambers’ site for detailed aperture series and tons of sample images. I’m a long time subscriber and Lloyd’s site is one of the few I trust these days. Another review I’d recommend is a veteran Otus user Ming Thein’s.

Given my tight schedule, I only had a few hours today to do initial checks. Light was totally lousy, so no images made with the lens today. But here’s one of the lens, with which I’m going to jump right in the middle.

The Otus 28 with LEE's push-on filter holder

The Otus 28 with LEE’s push-on filter holder

And this is about using filters on the 28. I’ve switched to LEE’s 100mm square filter system a few years ago – and never looked back. The 28 has a 95mm filter thread, for which LEE has a normal adapter ring (no wide angle option is available). Unfortunately, my two-slot filter holder vignettes at the corners when rotated to 45 degrees using the normal ring. I was really disappointed by this, but for who knows what reason, I’ve tried to fit LEE’s 100mm push-on holder on the lens. To my greatest surprise, it was a perfect fit. My jaws literally dropped when I took a closer look on the front of the lens. There’s a small recess in front of the hood bayonet for the push-on holder. Absolutely marvelous. To the marketing guys at Zeiss: you should advertise this. It’s a huge plus.

You get a tiny bit of corner darkening even with the two-slot push-on holder, but you can either remove one of the slots or get rid of the vignetting in post.

Side view showing the holder's fit and how large the Otus 28 is

Side view showing the holder’s fit and how large the Otus 28 is

The 28mm is on the larger and heavier side of optics. Some would say that it’s extremely large and heavy, but to anyone accustomed to carrying and using super telephoto lenses, its manageable. But you need to watch out for the weight. There’s no tripod collar, so you’ll need to hang the lens off the camera’s mount. Which will put more than usual stress on both the lens mount and on the tripod screw. Since my 1D Mark II’s tripod screw socket suddenly separated from the L-plate, and the rig hit the ground with the 24-70 mounted, I’m giving suspicious looks to mounting screws. Fortunately the 5DS R has a strengthened base place, and I’m using a Kirk L-plate that is secured to the camera in two places (with the tripod screw and fastened to the strap lug). Ball head sag could also be a problem (but it’s not with the geared heads like the Arca-Swiss d4 I’m using).

Focusing experience is great, images pop to sharp when using Kuuvik Capture‘s live view. A word of caution though (this is omnipresent with all high performance lenses and the huge 50 megapixel resolution of the 5DS R). You can’t focus 100% perfectly using the minified live view image. Not even in 6x magnification (16x is just 6x blown up in software, so forget about that). It may show that you nailed focus perfectly, which could fall rather unfortunate planes on the final image. Even at f/5.6. So it is advisable to check images at 100% magnification after they were taken. I’m doing this in Kuuvik Capture after each capture, and for shots I think would be final, I also do a check in Capture One. Yes, you need a notebook for this, but heck, the 11″ MacBook Air weighs about 2/3 of the Otus and fits in the pocket of my trusty Domke photo vest…

Speaking of f/5.6. It seems that I will definitely need focus stacking if I need front-to-back sharpness. It would be a cardinal sin to kill the lens’ resolution and wonderful micro-contrast with diffraction, and at f/5.6 depth of field is definitely not enough for making everything sharp on the image. Or look for another composition where there’s no front-to-back sharpness needed. This isn’t new with the 5DS R, just be prepared to do some extra work to extract every last ounce of quality from this beast.

I did a quick comparison of the other wide lenses I have now: with the Canon 24/2.8 IS and 35/2 IS. The tiny 24 was known to blow even the TS-E 24mm away for center sharpness. Well, the Otus is better in the corners than the 24 in the center. Even at f/5.6. While the 35mm has more uniform image across the frame, it’s simply not in the same leagues with the Otus. I found that basically there’s no point in comparing the lens with anything except another Otus. Although I had no time (nor intention) to do side by side comparisons, the 28mm shows the same clean, transparent, airy images that the 55mm and the Apo Sonnar 135 are known for.

That’s all for now, after the first half day with the lens (this is a first impressions post after all). More when I will have chance to use it for actual work. But just like with every other lens in my current kit, it’s love at first use. I’m completely confident that they’ll bring home tons of great images during the coming decades (yes, decades).

  ☕ ☕ ☕

Did you enjoy this post? Consider buying me a coffee if so.