Archives for March 2016

Zeiss Distagon 2.8/15 After the Surgery

I bought the 2.8/15 last December with the specific intention to use it with my LEE filter system. The stock lens doesn’t allow this, because of the integrated, non-removable hood. The plan was to get the lens, play a little with it, and send it back to Zeiss for a hood removal surgery if it turns out to be a keeper.

As I wrote in my first impressions piece, it was a love at first use. So the lens went back to Zeiss in January. They offer the hood removal modification for 250 Euros (+VAT).
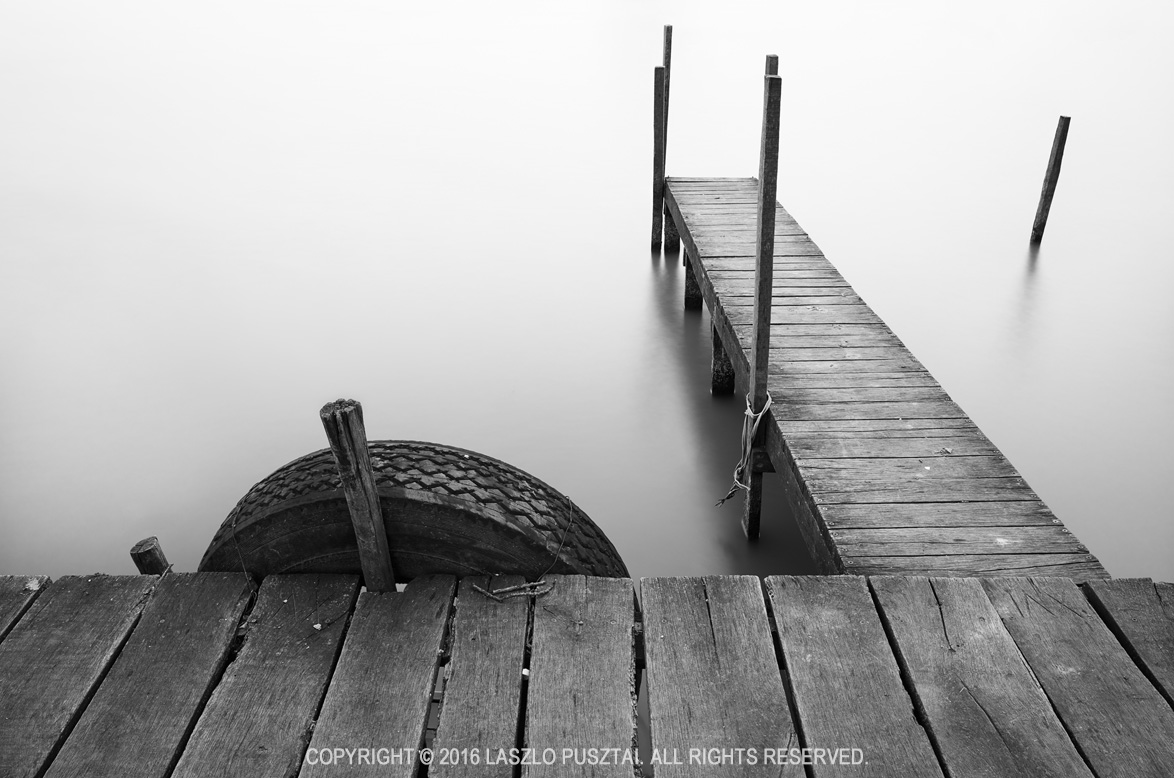
Snowless Winter

Snowless Winter

A couple of weeks later I got the modified lens, but I noticed during the very first test that left side performance has dropped considerably. I know, the 5DS R is a merciless beast, but I also knew that the lens could perform better. So immediately contacted Zeiss about the issue.

What followed is a story of exemplary customer service. I’ve sent a few test images, and after a bit of discussion they recommended a focal flange distance adjustment to let the lens focus a little beyond the otherwise hard infinity stop.

A short technical explanation why this was a good idea: all my Zeisses have pronounced field curvature – ie. when I set the focus for the image center, sides may become soft, and when focusing for the best corner performance, the center goes out of focus. This is business as usual with the 5DS R and high performance lenses.

The 15mm Distagon’s image field is arching away from the camera on the sides, meaning that I would need to focus beyond infinity to bring the corners into focus. But the hard infinity stop did not allow this. This is something you won’t see on twenty-something megapixel cameras, but the 5DS R is more than demanding.

The lens went back to Zeiss again, and after some more discussion we agreed to stick with the original plan: adjust the focal flange distance. During which I received way more information than a usual service would ever send. Focus variation test results from their lab and such. The goal was to extract every last bit of performance possible while obeying the laws on physics and the realities of manufacturing tolerances.

With the fine-tuned lens in my hand, I was curious to find out the results.

Distagon 15mm with no hood

Distagon 15mm with no hood

Honestly, I’m impressed. Left side performance is better than ever. Although there’s still a bit of difference in optimal focus distances between the left and right, that’s nothing I can’t mitigate with proper depth of field selection and focus bracketing. What surprised me is that peak center performance is also higher now.

The moral of the story: when you approach a service with such a claim, they usually tell you that the lens performs “within specifications” (which is a polite way of saying that they don’t care). Been there, done that. But not Zeiss. They were keen to provide me the best possible instrument for my ultra wide angle photography – and they succeeded.

Oh, and regarding the surgery – the hoodless lens have some 6mm smaller diameter than the original. It’s a better fit in my bag now. A screw-in metal front lens cap was also included in the modification package, but I’m using a 95mm Otus lens cap instead. It’s much easier to handle, and the risk of scratching the front element is way less with a plastic lens cap.

  ☕ ☕ ☕

Did you enjoy this post? Consider buying me a coffee if so.

My Epson 4900 Starved to Death

4900-head-error
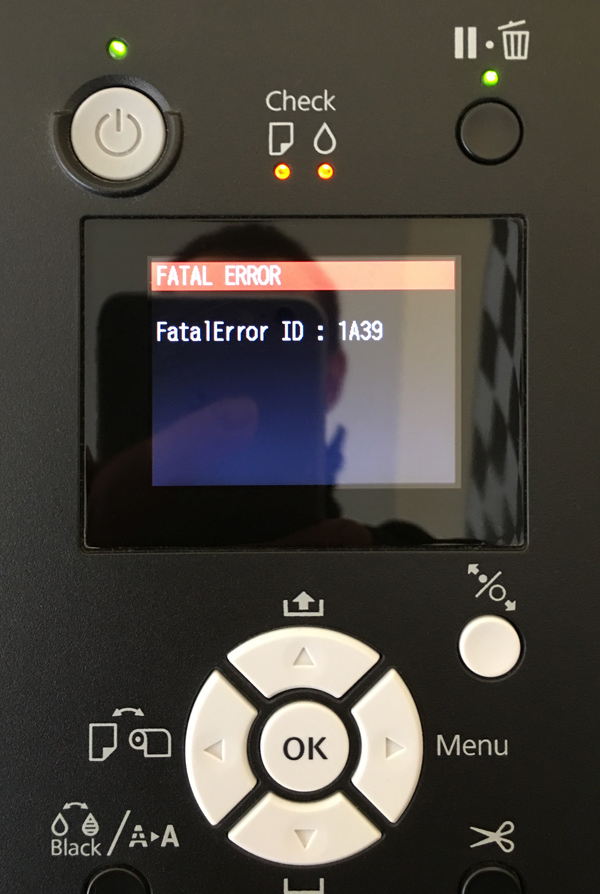
When I turned on my Epson Stylus Pro 4900 a few days ago to do the regular maintenance cycle, the dreaded fatal error 1A39 appeared on the LCD. Kudos to Epson for these descriptive error messages. Not.

A quick search on the net as well as phoning the service and I had a complete diagnosis: the print head went dead. Replacement (including the pump unit) would cost about 80% of a new printer. Oops.

This is the fourth occurrence of such a problem in my circles. The urban legend says that when left turned off for a while, ink dries up from the head and since it is also used for cooling, being inkless repeatedly (no cooling at startup) will fry something in the head assembly. This seems to affect Epson’s current TFP heads (used in the 4900/7900/9900 – those models me and my acquaintances had issues with). The legend also tells that in newer heads (the ones that you get if you go the replacement route or buy a x900 printer these days) had been redesigned and free of this problem.

This theory is somewhat supported by the fact that most of the printers having this problem were used sporadically. I had no issues with the 4900 during the 3 years I used it heavily, but during the last one and a half years it had been sitting mostly idle, only doing a small print every two to four weeks.

In other words, it’s been starved to death.

Since my printer already made much more profit than it’s cost, I’m just mildly irritated. But saying that it’s not irritating to run into a design flaw (in case the legend holds true) that costs me money would be a lie.

Anyway, I’ll need a new printer. My use in the future will continue to be light, so I’m not going the TFP route again. Yes, the legend says that this problem had been fixed in the new heads, but Epson also publicly stated several times that new printers are not susceptible to clogging – which was far from truth with the 4900. So no TFP, thank you.

I’m looking into two printers now: the 17″ Epson P800 (which uses the previous generation AMC head), and Canon’s 24″ iPF6450 PRO 2000. The 17″ PRO 1000 had been quickly ruled out by not having a straight paper path, not supporting some heavy media I use, and it’s ridiculous margin handling (I can’t print a 30×45 on an A3+ paper). Epson’s new P7000 was considered for a fleeting moment, but it uses a TFP head, so I stopped thinking about it.

Fortunately I’m not in a hurry to get a printer immediately, so I’ll have time to do some evaluation before making the decision. I’ll start with a first look on the P800 towards the end of next week.

But there’s a gift in every problem: since the only thing I used Windows for was printing, I could finally eliminate the very last (albeit virtual) Windows machine in the company! And man, this is a huge time saver. Based on this, I’ll take the opportunity to reimplement my printing workflow purely on OS X. I badly needed this, but there were always more excuses important things. Now I ran out of them.

Postscript: I’m selling the remaining consumables (inks, cutter blade, maintenance tank) as well as fully operational parts (roll spindle, roll unit, paper tray, or any other parts you may need) from the dead printer. Please let me know if you are interested.

  ☕ ☕ ☕

Did this post help you? Consider buying me a coffee if so.

Focus Stacking with the Otus 1.4/28

Last weekend I had a little time to play with the Otus 1.4/28. I was at Lake Tisza, but the light was suboptimal to put it mildly. So I decided to make a test shot to check how focus stacking will work with the Otus 28.

Why would you need focus stacking in the first place with such a wide angle? Well, if you have a brutal 50 megapixel sensor, with a lens that’s sharper in the corners than most lenses in the center, you don’t want to throw that resolution away by stopping down below the diffraction limit.

For this test I ended up using f/6.3 and taking 6 slices.

Early Spring Pier, Lake Tisza

Early Spring Pier, Lake Tisza

It was a quite a bit windy, and I wanted to smooth out the waves using the 10-stop LEE Big Stopper. I had to realize that I ran out of gaffer tape (unfortunately the Big Stopper on the Otus 28 leaves quite a gap at the sides), so I used my heavy cotton dark cloth to keep unwanted light from hitting the front element.

The dark cloth covered the entire camera, but it was quite easy to focus on the 11″ screen of my MacBook Air using Kuuvik Capture. The images were focus stacked in Photoshop CC.

And the result? Perfect front-to-back, corner-to-corner sharpness. It’s simply amazing.