Archives for October 2017

Change Your Canon’s Daylight Saving Time Easily

I prefer to keep the clock in my cameras set correctly, so I have to go through all of them twice a year to set and reset the daylight saving time setting (which they don’t do automatically for some strange reason). At this time I manage five Canon DSLRs we use exclusively for software development and testing in addition to my three cameras that I also use for my photography – and updating this setting was always a royal pain for me. This is why the Synchronize Date/Time function was born in my apps.

It is available in Kuuvik Capture as well as the Plus Pack add-on for ShutterCount (both the Mac and iOS versions). Just turn the synchronization on in Preferences, and the next time you connect a camera all time-related settings will be updated to reflect that of your Mac (or iPhone/iPad).

My previous posts (here and here) discuss time synchronization for both apps.

Kuuvik Capture Inside Out Updated

It took a while to update all the screen shots and stuff, but I’m happy to announce that the long awaited update to my eBook Kuuvik Capture Inside Out is now available.

It covers all new features introduced in Kuuvik Capture 3.2 and 3.3.

It is distributed in a PDF file, optimized for viewing on iPads. Because it’s a PDF, you can read it on any device, be it a tablet, a Mac or a PC, and in numerous PDF reader applications.

As usual, you can download it free of charge from the Kuuvik Capture web site.

Enjoy!

Kuuvik Capture 3.3 : Live View Performance

Performance is a feature. This is something I take very seriously and strive to maintain the highest performance and power efficiency possible. In this post I’ll show the huge gains attainable with carefully crafted code, and hopefully shed some light on why one wants to spend money on Kuuvik Capture, despite Canon has a free tethering app. Well, if the myriad features wouldn’t be enough reason…

What you are going to see is the comparison of processor utilization and power consumption during a live view session between Kuuvik Capture and EOS Utility. Live view is one of my favorite performance test cases, since the continuous picture stream stresses image decoding and display components.

Let’s begin with the processor utilization figures. They were obtained with Activity Monitor on my Mid-2012 15″ Retina MacBook Pro (2.6GHz, 16GB, dual graphics) running macOS 10.12.6. The camera was a Canon EOS 7D Mark II, connected via USB 3. All tests used the same scene under the same lighting and same exposure. Live view windows were maximized to occupy as much screen real estate as they possibly could. 100% means one of the processor cores is fully utilized, 200% means two cores, etc. Since the values oscillate a bit, what I show is an average of several minutes.

Kuuvik Capture had sharpening, focus peaking and clipping warnings enabled, while EOS Utility have no such features at all.

OK, it’s a brutal difference, but how does this translate to battery life? Power consumption was measured with coconutBattery 3.4. Again, you see an average of several minutes.

The orange line at 10 watts is the idle power consumption of my MacBook Pro (you know, display, SSD and stuff when the computer does nothing useful).

Live view in EOS Utility burns through your battery in less than half of the time that it would last with Kuuvik Capture.

And if you turn off sharpening, focus peaking and real-time clipping warnings in Kuuvik Capture (just to be fair), it’s power consumption drops to a mere 16 watts. This is at the level of lightweight web browsing with Safari.

In real world situations it means that you could work all day on a single charge with Kuuvik Capture. A happy user recently told me that one day he forgot the charger at home, and had to do the whole-day architecture shoot on battery. His 13″ MacBook Air not just accomplished that, but it had some charge left at the end of the day.

Performance and power consumption are important for those who would like to tether their cameras away from power. And for those who care about our planet. We invest a lot into optimizing performance and efficiency, and the above figures reflect all that effort – and make me incredibly proud.

Kuuvik Capture 3.3 is available on the Mac App Store. It is a free update for users who purchased the app earlier from there. You can see the complete list of new features and changes in the release notes.

Kuuvik Capture 3.3 : Block Artifact Reduction

When displaying RAW files, Kuuvik Capture uses the preview JPG embedded into the file. Unfortunately, these preview JPGs aren’t the highest quality – cameras try to save space by lowering JPG compression quality. The downside is that when one sharpens such an image, 8×8 pixel JPG compression block boundaries may become visible, as you can see on the magnified image below. It is especially distracting on large homogenous dark and light surfaces, and makes judging image quality a harder task.

JPEG compression block artifacts

To combat this, Kuuvik Capture 3.3 introduces a new function, block boundary artifact reduction. Let’s see first what it does.

Block artifact reduction active

Most of the artifacts are gone. Of course permanent damage done by low quality JPEG compression can’t be reversed completely, but the magnified image is certainly less problematic this way.

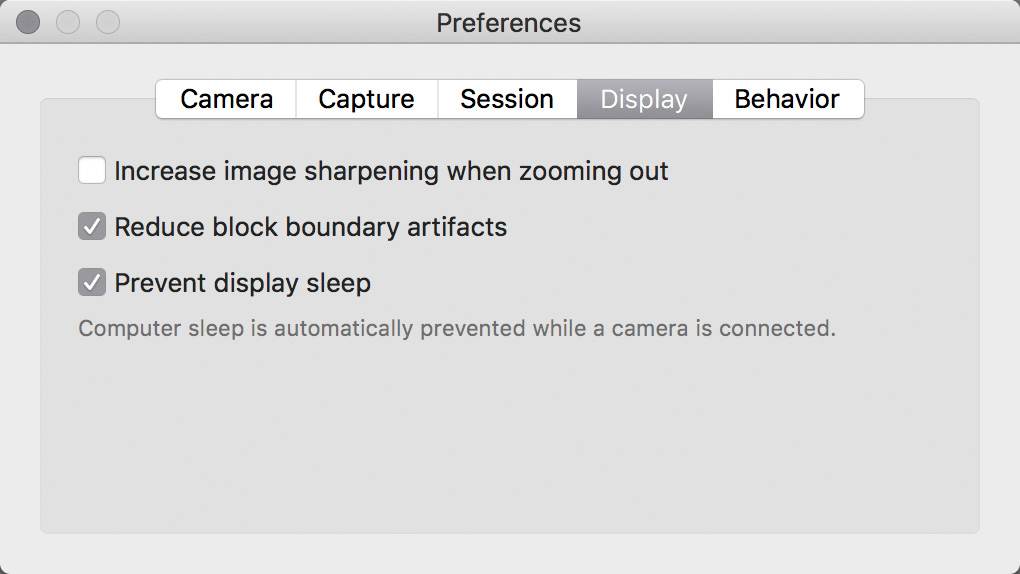
The function is active by default, but can be turned off in Preferences if you don’t need it. Yes, there are situations, like hard straight edges in architecture and product photography, where the reduction might introduce its own artifacts. It is a tool useful in most situations, and not useful in some. Use it accordingly.

When turned on, the function activates for RAW files between 75% and 100% zoom levels and if sharpening is also active – block boundaries are eliminated by the interpolation process, and not visible at all when you zoom out. It is automatically disabled for JPG files and live view.

Kuuvik Capture 3.3 is available now on the Mac App Store. It is a free update for users who purchased the app from there. You can see the complete list of new features and changes in the release notes.