Being an iPad app, gesture support in Kuuvik Capture takes center stage. Let’s dive right in!
Long Press
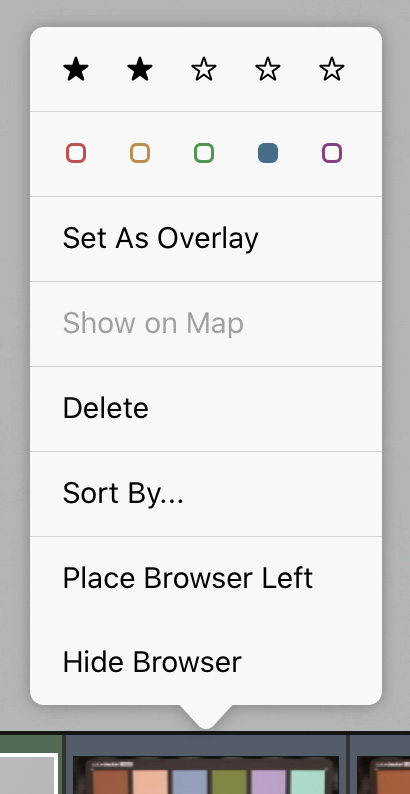 Where you normally would right-click in the Mac version, use a long press on iPad. It brings up context menus on browser thumbnails (shown on the screen shot), on the displayed image, on live view and on the bracketing monitor. It opens the corresponding option panel for the Live View, Clipping Warning, Marker, Sharpening, Focus Peaking, Guide and Image Overlay icons on the toolbar. Long pressing the camera selector in the top right corner will show the Wi-Fi and Ethernet Pairing dialog.
In Pan (Hand Tool) Mode
While an image is displayed, double tapping will toggle between 100% and Fit zoom levels. Otherwise use pinch and spread to zoom in and out. Drag the zoomed image around with a single finger, or flick it for faster movement. Swipe left or right with two fingers held together to show the next or previous image in the session, respectively. Note that the app will change the image when you lift your fingers.
In live view things work a bit differently. You can use flick-zoom (a fast, flick-like pinch and spread) to change zoom levels. And then drag the zoomed image around with a single finger. What a double tap does can be configured in the menu: initiate AF or toggle medium or high magnification levels. Swiping up and down with two fingers will pull focus. Step size for focus pulling depends on the magnification: Kuuvik Capture uses small steps for zoomed-in levels and medium steps at Fit zoom level.
Use the rotate gesture to rotate both displayed images and live view (the latter when live view auto-rotation is disabled). Rotation happens at 90 degrees. Once the app recognizes the rotation gesture, it will highlight the corresponding rotation icon on the toolbar. Let the screen go at this moment, and the image will be rotated.
In Marker Tool Mode
Tap the image/live view to place a marker, and tap an existing marker to remove it. A single-finger left or right swipe can be used to move between the markers. Two finger swipe is also recognized in this mode, just like in pan mode.
In Reposition Overlay Mode
You can resize and rotate the overlaid image with two fingers, and drag it with a single finger. Simple as that. Double-tapping the displayed image will toggle between 100% and Fit zoom levels, to facilitate precise overlay placement.
Guide Dragging Takes Precedence
When you tap a guideline (and it becomes a dashed line), then all other gestures are ignored while you hold or move that line around, regardless of the current tool or mode.


