Version 5.0 of my Mark II Artist’s Viewfinder app is now available on the App Store. It took quite a bit longer than I first planned, but if you look at the sheer number of new stuff, you’ll understand why. More work went into this update than it took to develop the original version 1.
I wrote about the black & white mode and exposure compensation, and the question of RAW capture in former posts, now it’s time to reveal everything else. I’ll touch a few new things in this post, and highly recommend to take a look on the complete list in the release notes. And pay attention to the “Changes” section.
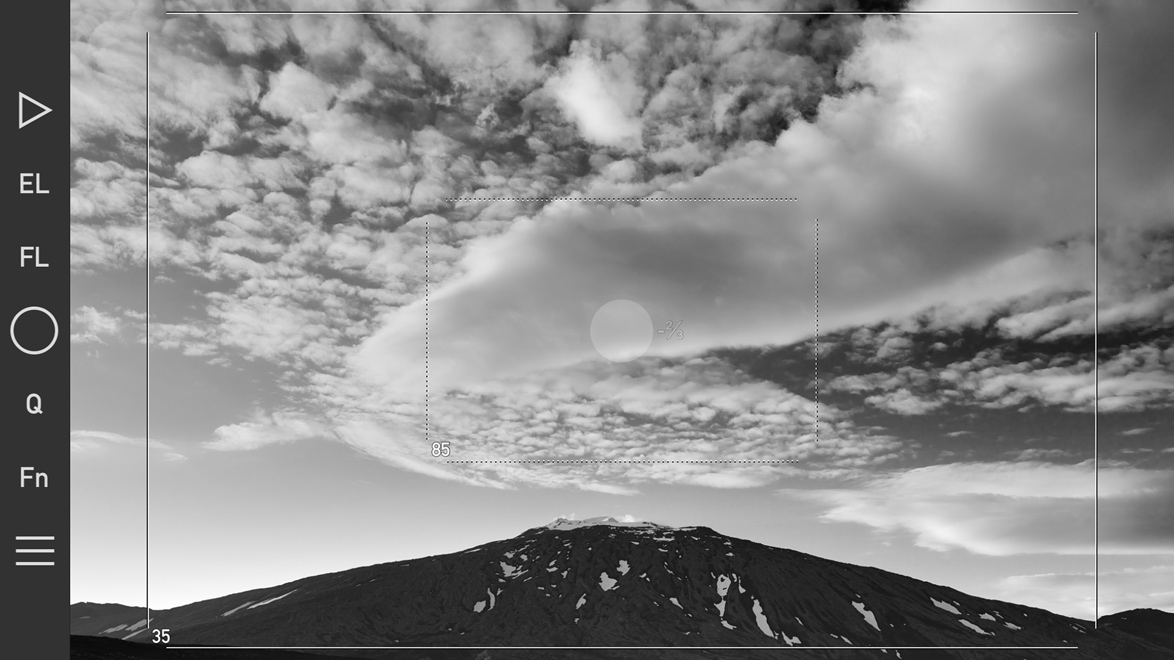
Quick Control Screen
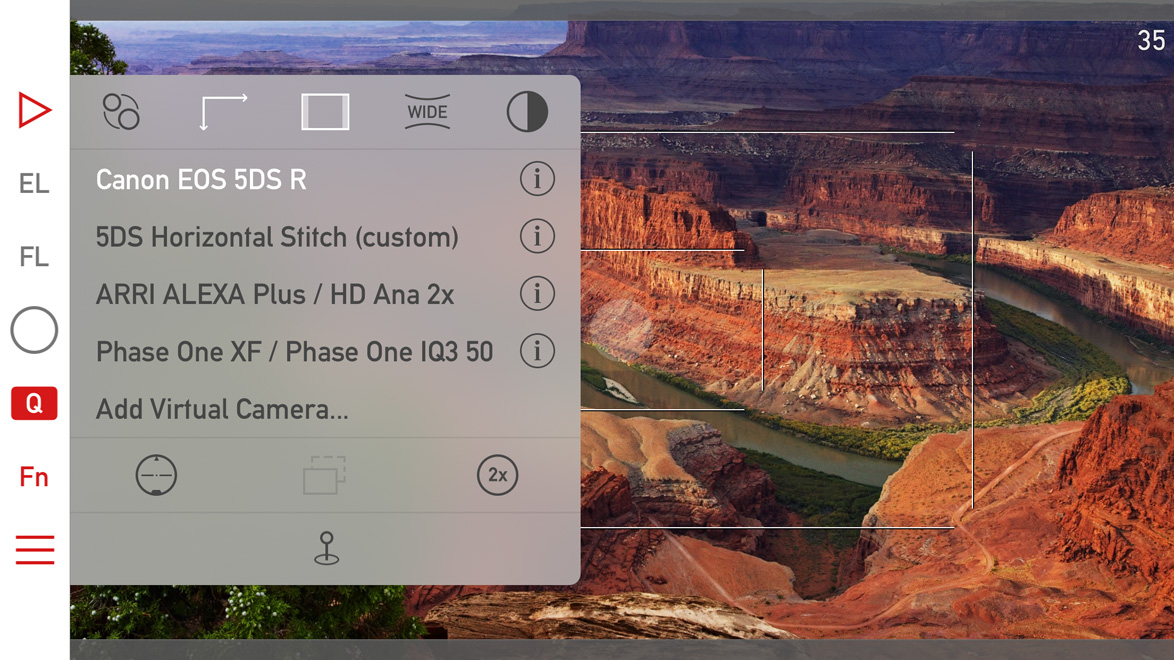
The are a few subtle visual changes to make it less cluttered, and to make room for two new icons. The half dark/half light icon in the upper right toggles black & white mode. The 2x icon switches to the telephoto camera if you have an iPhone 7 Plus. The telephoto camera and wide converter use are mutually exclusive (as one would logically expect).
Icons for parallax correction/shift simulation and aspect ratio changing are now white when a non-default value is set for these (in the above example I set the 5DS R virtual camera to 16:9 aspect ratio).
Album -> Catalog
We had to rename the Album to Catalog to avoid a name clash with the thing that Apple calls an album in the Photos app. Now ours is named Catalog, since it would be extraordinarily hard to convince Apple that they should change…
And while we are talking about the Catalog, there are performance improvements here and there, meaning that an update may be required to the new format. The app automatically detects if this is the case, and will update the Catalog automatically.
Availability
This is a free update for existing Mark II Artist’s Viewfinder owners. New user can purchase the app from the App Store.
We offer upgrade bundles for former Viewfinder Basic/Pro/Cine edition owners, so they can upgrade for a reduced price.
The Viewfinder Handbook was also updated to cover all the new features.