ShutterCount for the Mac Released

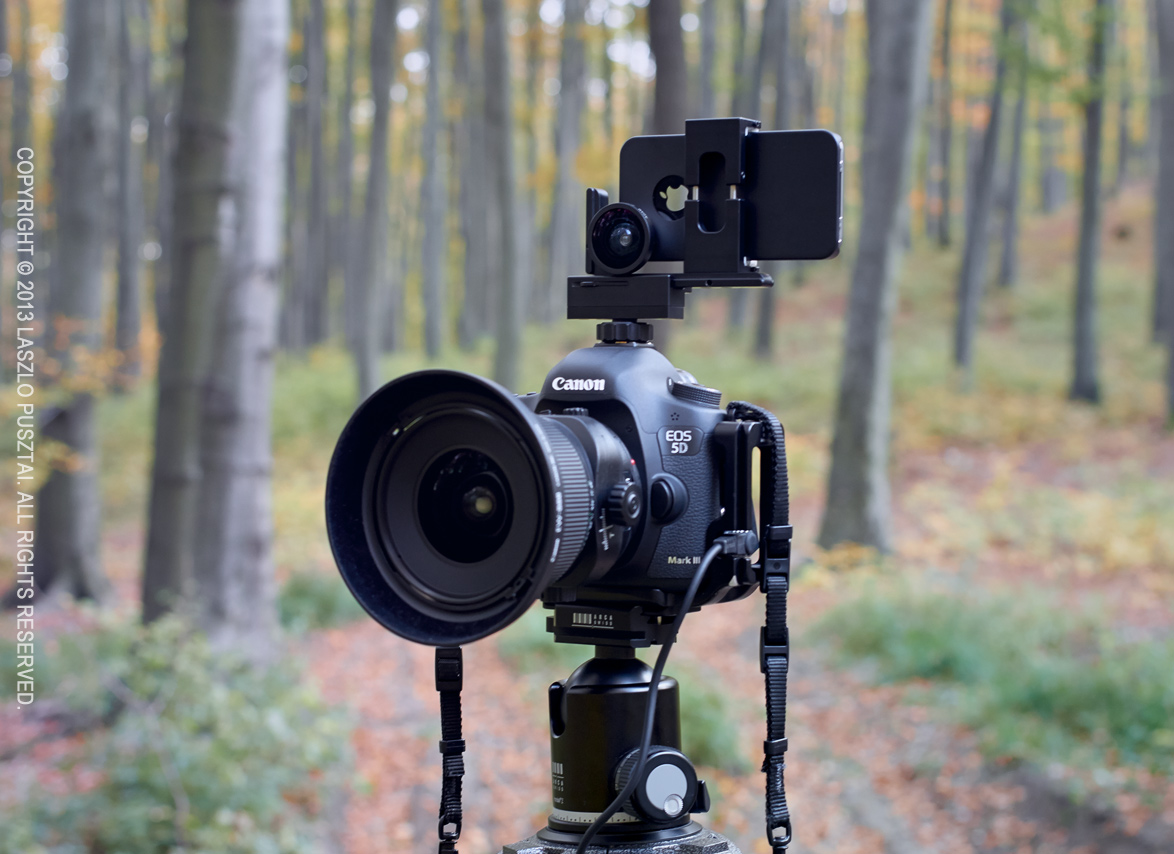
My newest Mac app, ShutterCount displays the number of shutter actuations (the shutter count) of your Canon EOS digital camera. The shutter count is read directly from a USB-connected camera, and thus provides accurate numbers that are not attainable with simple EXIF-based methods.

ShutterCount

Simple is that. You can skip the trip to Canon for a reading, and you don’t have to pay every single time you want to check the count. Note however, that video clips recorded are not included in the number. For a separate mirror movement reading (that includes videos) you should still have to visit a Canon service center.

Speaking of money, you can grab the app at a special introductory price from the Mac App Store. This promotion runs until the end of October.

Supported cameras are the following:

  • Canon EOS-1D X
  • Canon EOS 5D Mark II
  • Canon EOS 5D Mark III
  • Canon EOS 6D
  • Canon EOS 7D
  • Canon EOS 60D
  • Canon EOS 70D
  • Canon EOS 100D / Rebel SL1 / Kiss X7
  • Canon EOS 600D / Rebel T3i / Kiss X5
  • Canon EOS 650D / Rebel T4i / Kiss X6i
  • Canon EOS 700D / Rebel T5i / Kiss X7i
  • Canon EOS 1100D / Rebel T3 / Kiss X50

Composing Stitched Images Made Easy

As you probably noticed from my posts, I’m a huge fan of Canon’s TS-E 24mm f/3.5L II lens. One of the reasons is that I can make pixel-perfectly stitch-able 2.4:1 wide panoramic shots – like the one below – with it. The only difficulty in making those images was composition: it isn’t easy to visualize a shot when you only see half of it.

This image is a stitch of two frames: one taken with the lens shifted all the way to the left, while the other with the lens shifted to the right. Extreme edges cropped.

This image is a stitch of two frames: one taken with the lens shifted all the way to the left,
while the other with the lens shifted to the right. Extreme edges cropped.

But that difficulty is past now.

A couple of weeks ago I received a package from ALPA, containing their brand new ACAM Super Wide Converter. They sent it for certification with our upcoming Mark II Artist’s Viewfinder app, and also for my personal use. It was like Christmas for me. Quick first tests showed that the adapter has a conversion factor around 0.5x, which number was later confirmed with formal measurement in our lab. In other words, you can simulate a 17mm lens attached to a full frame 35mm using that. Or you can view almost the whole wide frame that will result from the TS-E stitch!

This is no small feat: you can walk around carrying a finder and checking lots of stitched composition without actually setting up the camera. And the actual capture needs less than half of the time it used to require.

The whole setup

The following image shows the setup I use for taking the images for pano stitches.

My stitched pano setup

My stitched pano setup

The camera and lens is nothing special, however the thing on top is. Attached to my iPhone is the ACAM wide adapter. The phone is held in position (note that the lenses are centered to avoid horizontal parallax) by an ALPA iPhone Holder. This is the Mark I, they now sell the Mark II complete with the wide angle adapter. As the holder was designed to be used on ALPA cameras, thus I also use an ALPA hot shoe mount adapter.

How much? – you might ask. You should log in to ALPA’s site to see their current prices, but as a guide: this whole viewfinder setup will set you back around $1150 (including the holder, hot shoe adapter, ACAM wide adapter and our Viewfinder iPhone app). If you think that’s a lot for a viewfinder, I recommend you to check out prices on a Linhof 45 Multifocus Viewfinder, for example (hint: it is around $2000 for way less functionality).

The ACAM wide adapter itself selling for less than $60 is extremely affordable considering what you get in exchange. I recommend every serious landscape and architecture photographer to check out this solution. Paired with our upcoming Mark II Artist’s Viewfinder it offers unprecedented value and functionality.

Update 11/20/2013

Today we announced the beta of Mark II Artist’s Viewfinder that sports real-time distortion correction for the ACAM SWC, making the above rig much more valuable. Read my post about it.

Bataflae 32L – Is It The Ultimate Photo Backpack?

Like most photographers, I had many photo bags over the years. But only a few of those were truly great. In this post I’ll tell you about my reasons to get, and my initial experiences with what I consider the ultimate photo backpack for my needs: the Gura Gear Bataflae 32L.

My Bag Story

My first camera carrying solution was a Canon gadget bag. With a huge red “steal me” kind of logo on the side. It was awful, but was able to carry the D60 and a single lens.

Later on as my lens collection grew I needed a larger bag, and made my first mistake: bought a Lowepro DryZone 200 backpack. It was heavy and it was painful to get access to the main compartment – not to mention that I rarely shoot in an environment where I need a totally waterproof bag. It was an overkill for me. So I sold it just to fund my second mistake: a Lowepro Stealth Reporter 650W. Although it was good when shooting from the car, I realized that this was a mistake while hiking to the Delicate Arch. My conclusion was that I would definitely prefer a backpack to shoulder bags.

The next bag, which is one of those I consider to be a great one, was the Lowepro Mini Trekker (which had been discontinued since then). It was able to hold all my gear those days, as you can see on the picture below.

My Lowepro Mini Trekker in 2004

Lowepro Mini Trekker in 2004

It was a lightweight backpack, with only one downside: wasn’t able to carry a notebook computer. So an upgrade to its bigger brother, the (also discontinued) CompuTrekker AW was a logical step. The brother was also a bit more spacious, so 1-seriers bodies put less stress on the zipper.

Over the years I hauled the CompuTrekker around the globe from Antarctica to Iceland and it served rather well. In it I was routinely carrying: 1D Mark II and 5D (Mark II) cameras; 17-40 f/4L, 24-70 f/2.8L, 70-200 f/2.8L IS and 400 f/5.6L lenses; 1.4x and 2x teleconverters plus both extension tubes in the main compartment. A flash with its external power pack and cables, batteries, and a GPS in the outer pocket. An up to 14″ notebook in its dedicated compartment. I was truly happy with this backpack. Really. So much that I thought I found the ultimate carrying solution.

More Lenses Need More Space

The bag problem resurfaced with the arrival of the 500 f/4L IS. It was huge, just used it for birding, and a separate pack seemed a good solution – mostly because I didn’t want to part with the CompuTrekker. I ended up using a Kinesis L311 long lens case to store and carry it for seven years. Yes, this way I had to carry two bags, but was happy with them – and still have fond memories of this combo.

Until – guess what – my next lens purchase, which was the TS-E 24/3.5L II. I thought that I would carry the TS-E along with the zooms, so I would need a bigger pack again. At that time (late 2011) the best solution seemed to be the Lowepro Pro Trekker 400AW. I got one, and my DryZone memories came back… It is an expedition quality pack, that would definitely withstand lots of abuse – an overkill for my needs. And that toughness comes with a price – it weighs 3.3kg empty. Despite the weight used this pack for two years.

To be honest, I regret buying it: I don’t hike that much with photo gear, so its hiking-oriented features seen no use during those two years. What made my situation even worse is that I replaced my zooms with primes, and the Pro Trekker was half-empty. Even the old Mini Trekker would be too big for those. Putting the 500 f/4L IS into the bag wasn’t an option, as its divider structure didn’t allow that. All this resulted in thinking about replacing the Pro Trekker with a backpack more suitable for my current needs.

Enter the Bataflae

Recently I came across Gura Gear’s new Bataflae product line. One of my friends has a Gura Gear Kiboko, so I knew their quality and design. I didn’t like the butterfly-only opening design of the Kiboko, but the Bataflae promised full opening (which is a must if you want to carry a notebook). My last concern was the configurability of the strap system. The Pro Trekker being excellent in this regard, I had fears that I will not able to configure the Bataflae for my body size, resulting in some rather painful experiences.

After two weekends of measurements, thinking and hesitation I decided to get the biggest Bataflae, the 32L, in black. Although I think the gray one looks better, “black makes your bag look thinner”, which is a huge plus during air travel.

Man, this bag is a pleasant surprise. The experience is kind of getting your first Mac(Book) Pro or Gitzo Systematic tripod: it is so well though out and solves your problems so genuinely, that there’s no going back.  Now I can believe those raving reviews.

It’s Bigger Inside

The empty bag is a tad smaller on the outside than the Pro Trekker, but swallows way more gear. This is because of the divider structure (two huge compartments in the Bataflae vs. three smaller in the Pro Trekker), the slightly taller side walls and the thinner dividers.

And the Bataflae today

Gura Gear Bataflae 32L today

On the right is a picture of my fully packed Bataflae. The left side compartment holds the 5D Mark III and the 650D; 24 f/2.8 IS, TS-E 24 f/3.5L II, 40 f/2.8, 50 f/1.4, 100 f/2, 135 f/2L  lenses with their hoods; 1.4x II and 2x III teleconverters and extension tubes; 600EX flash under the hoods; and a few filters tucked under the 24/2.8.

In the right side compartment is the 500 f/4L IS (after the weight reduction treatment it went through last winter); extension cord and battery pack (under the 500) for the flash; and to my biggest surprise I was able to find a place for the Mongoose M3.6 head – which clearly show how deep is the bag.

As you can see I still have plenty of free space.

Pockets on the flap are large and easily accessible (as they were on the CompuTrekker – much better than the Pro Trekker). These and the outer pockets hold all those small gadgets such as batteries, remote switches, shoulder straps, cleaning supplies, and so on.

My fully loaded bag weighs just shy of 16kg. Honestly, I’m not really calibrated to carry more on my back.

Carrying Comfort

All my worries vanished the instant I put the bag on my back. Despite the less padded strap, it feels more comfortable than the Pro Trekker – even fully loaded. There’s only one difference between the strap systems of the two bags: you can’t adjust the Bataflae to your torso’s length (here the PackJack tool of the Pro Trekker is a plus). Fortunately the 32L Bataflae fits me just perfectly, so there’s no height adjustment necessary (this was one of the reasons I went with the largest one).

A rather nice addition to the strap system are the strap keepers: small velcro strips with which you can get rid of those dangling straps.

Quite a few reviews of the Bataflae tout how easy it is to strap a tripod to the bag (you can do it two ways – to the side and to the back). Well… This is bullshit in my opinion. Yes, you can strap a toothpick-legged tripod to it, but I’m completely sure that if you buy this kind of bag then your gear demands heavyweight support. I have a Gitzo 3532LS with an Arca Swiss Z1sp head, and would never-ever strap it to this bag. Even if the elastic pouches on the sides could withstand the tripod’s weight (which I doubt), it would protrude too much above the bag (and my head). So I still carry my tripod separately.

Working from the Bag

99 percent of time I work from my bag in the following situations:

  • The bag is on the back seat of a car. Usually I’m sharing the car with another photographer, who also puts his/her bag on the back seat. I found opening larger backpacks (like the Pro Trekker) to be problematic in these cases, while the smaller CompuTrekker was just fine – there’s a top flap collision when both of us try to open the bags. The butterfly opening here is a big help.
  • On a smallish boat, sometimes shared with others. The butterfly opening here helps to keep a small equipment footprint, leaving room for other supplies (food/water) and also for my legs. It is also great to have the bag half-closed but accessible all the time, as accidents can happen (from birds dumping their load on the boat and the bag, to larger fishes jumping into the boat – both happened to me).
  • Out in the field, where I must put down the bag on whatever ground happens to be there. I don’t know about you, but I really hate to put a wet or muddy pack on my back, so previously I carried a piece or nylon or closed cell foam sheet to lay under the bag. The Bataflae has a detached rain cover, which can be used as a ground cloth for this exact purpose – and can also be lost because it’s detached. Anyway, I will still bring a cheap piece of nylon sheet as a ground cloth, not risking to lose or damage the expensive cover/sheet of the Bataflae. In this case the butterfly opening is a plus too, as reduces the equipment footprint and hides the bag’s content from passersby.

To summarize: I find the butterfly opening a truly usable feature that makes my life much easier. Actually I use full opening in just one situation: when I carry a notebook.

Where to Put a Notebook?

There’s no dedicated notebook compartment, so what to do? Of course you can carry a dedicated notebook bag (as a personal item while traveling by air, for example). But there’s a more compact method, one that I started to use back in the Pro Trekker days.

Observation: there’s no ideal place for a notebook compartment on a photo backpack. If one places the compartment to the back, then the whole weight of the bag’s content will push on the laptop’s lid when the pack is laid on its back. I had some display panel damage from this in the past. Or one can place the compartment on the outside of the front flap, just like the Pro Trekker does. This also has drawbacks: the notebook can hit the ground if you quickly open the flap, and the laptop’s weight will act on a longer level arm, so you will feel it heavier.

To counteract these I started to put the notebook inside the main compartment (within its sleeve, of course). It is even easier to do this with the Bataflae, because the higher walls leave enough clearance for my sleeved MacBook Pro.

Conclusion

As you might have noticed: I really like the Bataflae. On the level I liked the CompuTrekker. But what will I do when I get more gear? Well, as I can’t carry more than 20kg (backpack, tripod, notebook combined), something will have to leave the bag.

All in all: I highly recommend the Bataflae 32L.

Making It Easier to Put Your Cap On

Manufacturers usually go for “good enough” solutions, even if they can make something significantly more usable with just a bit of more expense. Case in point: Canon rear lens and body caps (I’m citing Canon here, because I’m a Canon shooter, but it also applies to most other manufacturers).

If you ever shoot in marginal light (if you are a landscape or nature photographer, I bet you do it most of the time), then probably run into the hassle of putting your caps on. To comply with Murphy’s law, you’ll always try to attach it in the wrong position at the worst possible moment (I even have a cap at the bottom of Bryce Canyon because of this).

We have a red alignment dot on the lens mount and on lenses, but the stock caps only contain a small, shallow hole marking the attachment position – which is pretty hard to see. And the solution is pretty simple: fill that hole with white (or your color of choice) paint! It can be done in a few minutes for your entire lens collection (after you mastered the technique – I’m using a thin wire to put just a drop of paint there).

My lens cap mod

My lens cap mod

I’m using this trick for almost a decade and haven’t had any issues with putting on the caps since then.

Canon EF 24mm f/2.8 IS USM First Impressions

My sister bought my beloved 24mm f/2.8 lens a couple of months ago (and is making some pretty impressive images with it, this one being my favorite). My good old 400mm f/5.6L USM also have a new owner, so I was thinking about what new equipment should all this money fund.

The first idea was to buy a Fuji X100S, but after trying it I decided that it would require me to accept far more compromises than I’m willing to, so turned back to get some good Canon glass. The 24/2.8’s successor to be exact.

The lens arrived yesterday and just put it through the initial tests and autofocus microadjustment calibration with FoCal. Here are my initial observations.

Image quality

It’s pretty damn good – as was the old 24. A little more resolution (+), a little more distortion (-), but very similar looking images. The center is crazy sharp (much better than my TS-E 24mm). Corners aren’t that sharp, but are still very good. No surprises here. Autofocus consistency is a bit down from 99.1% to 98.6% – they are practically the same in field conditions.

What surprised me pleasantly is the aperture sharpness profile of the new lens (after the AFMA calibration I usually do a focus consistency test as well as an aperture sharpness test).

as-24-old

Aperture sharpness of the old 24/2.8

Above is the old lens’ profile. Numbers from the vertical scale were removed intentionally, as they can’t be used outside of a single measurement (to compare lenses).

And here is the new lens’ profile.

as-24-new

Aperture sharpness of the new lens

Much better at f/2.8, and the sharpness is more consistent through the entire aperture range I routinely use (up to f/11).

Build quality

There’s a night and day difference between the 25 years old design and the contemporary one. The 24 IS’ build quality is on par with my 135/2L. Both utilize engineering plastic as the outer shell, and are tough, but still lightweight. The focusing ring is smooth and well dampened. The lens hood is, well…

Canon does not ship a lens hood with it by default. So it’s a separate purchase. With a lens in the L territory in many aspects (image quality, build quality and and also price), it would be nice to include the hood in the box. Heck, they can even put a red ring on this lens!

The hood itself is the best design I’ve seen from Canon yet. The only drawback is that you can’t remove the lens cap when it’s attached. You have to remove the hood to access the cap. Again, for this price I would expect to get the new center-pinch lens cap. So I might finally pull the trigger and buy a bunch of center-pinch Mark II lens caps.

Image stabilization

The lens belongs to my “travel trio“, so it will be used mostly handheld, sometimes in marginal light. I routinely do landscapes in those conditions and need larger depth of field, so a larger (f/1.4 for example) aperture isn’t a solution for me. But image stabilization is!

Did a couple of low light tests last evening: with a bit of patience I was able to handhold the lens up to half a second! 1/4 second exposures were a piece of cake (the test was done with a 650D, but I expect similar results on my 5D3).

I should also mention that the IS is so silent that I have to put my ears close to the lens to hear it. Also there’s no jump in the viewfinder image when IS is engaged. Light years ahead of the IS systems in my older lenses.

Conclusion

This lens is a winner. If you are into landscapes and want a lightweight and great lens, do yourself a favor and try one. I bet you’ll be immediately hooked.

Recently Canon refreshed their short non-L prime range (24/28/35) with great lenses. I can hardly wait for a similar refresh in the normal/short telephoto range (50/85/100). And may I ask for an image stabilized 135/2L?

Canon WFT-E7 First Impressions

There are situations when you need remote camera control. No, I’m not speaking about the “let’s control the camera from an iPad two meters away” kind of pointless exercises, I’m talking about real needs. Think about cameras mounted on the roof of the stadium, situations where you would scare wildlife away with your presence, or downright dangerous places where you don’t want to spend more time than absolutely necessary.

I bought Canon’s Wireless File Transmitter WFT-E7(B) to assist in implementing some of my photographic ideas, and also to develop network (both wired and wireless) tethering support for Kuuvik Capture. While it’s clear that Canon’s transmitters are not standing in the forefront of today’s technology, if you could live with their quirks and limitations, then they could do the job well.

The Pricing Issue

Well, I paid 520 EUR (roughly $675, excluding taxes) for the WFT. Although this is some $175 less than the list price, it is pretty expensive. The bill of materials for this device is hardly more than $50, so this asking price is a bit irritating. As a comparison: an Apple Airport Extreme base station that packs comparable amount of software costs $179. Considering the functionality of the WFT, my opinion is that Canon could sell huge amounts of these at $199 or even at $299. But the $849 list price is simply unrealistic.

The bad news is if you need full, 100% USB-equivalent remote control functionality, then you have to swallow the price, and buy the device. There are some products, such as Camranger, that offer partial solutions, but you need a WFT for the whole thing.

Integrated Wi-Fi (and WFT software) on the 6D certainly points to a good direction, and I hope more cameras with integrated WFTs will follow. This is how it should be done in 2013.

The Hardware

When the first wireless transmitters had appeared for Canons, they were ugly bricks that connected to the camera with a cable, but in exchange they supported multiple cameras. Then Canon made their mind, and started to sell dedicated transmitters for each camera model (think 5D2 and 7D). With the WFT-E7, the ugly brick returns. In theory it will support future cameras, but I found no sign on the Net whether it works with anything except the 5D3. I plan to investigate this in the near future.

Its exterior finish acts like a dust magnet, and also files off small skin particles of your hand, so it’s a challenge to keep it clean.

Mounting the WFT is another challenge. I’m using Arca-Swiss compatible tripod heads/plates, so screwing the WFT under my camera is not an option. As a short term solution I simply attached a keyring to the supplied neoprene case, and hung the device on my tripod hook. In the long term the keyring will be replaced with a carabiner that will attach to that hole on the tripod base. Canon packages two cables with the device: one is too short and the other one is too long for me. This is why I reel up and velcro the longer cable to the case.

The good news is that the WFT is powered by the same LP-E6 battery that powers the 5D3.

Operating Modes

You can choose from the following operating modes (which are mutually exclusive):

  • Remote camera control (EOS Utility).
  • WFT Server, which is a web-based remote control facility.
  • You can upload your shots to an FTP server.
  • Show your images on a DLNA compatible TV set.
  • Can sync time between cameras.

The only mode that gives you full remote control is the EOS Utility mode. This is what I’m using, so will skip the others.

Network Configuration

This is the first quirk. For some unknown reason, the device can’t operate as an access point. So you either connect it to an existing network; bring your own access point (another box, batteries, etc); or create and use an ad-hoc Wi-Fi network (which can work only in “g” speed, and its WEP encryption isn’t something considered secure). This is a major oversight on a $675 device.

I won’t talk about basic network configuration, because you can find pretty good and detailed guides at Canon’s Digital Learning Center. I will, however, talk about another quirk: pairing.

Pairing

To control a WFT-equipped camera, you have to pair it to the computer and application you plan to use it from (I’ll call this computer/application pair an endpoint).

You must configure your networks settings on the 5D3 using the Connection wizard. No matter how experienced you are in IP network configuration, this is the only way you can get your WFT to do the pairing at the end.

Below is a screenshot of the network camera manager in the private beta version of Kuuvik Capture 1.1 showing my paired (and connected) 5D Mark III.

Network camera manger in Kuuvik Capture 1.1 beta

Network camera manager in Kuuvik Capture 1.1 beta

Working with the WFT

This is the best part: once paired and connected, you can forget about the WFT. Everything looks and works as if your camera was connected via USB. Yes, Wi-Fi can be slow (especially ad-hoc “g” speed networks), so large RAW file downloads can take a while. But otherwise the functionality is completely identical.

You only have to pair your WFT to Kuuvik Capture once, but you must watch for the connection sequence later on. WFTs advertise themselves on the network using Bonjour. When you turn on a paired WFT, it will advertise itself for a minute. During this time Kuuvik Capture (or another software) must connect to it. If the camera does not receive a connection request within a minute, it will shut down the WFT! From this point on things become pretty stochastic. Sometimes after a while the camera turn the WFT on again, sometimes you have to disable and re-enable EOS Utility mode on the camera to retry the connection.

The recommended sequence is:

  • Start Kuuvik Capture.
  • Turn on the paired camera. It might need half a minute or so to start advertising itself. When it appears in Bonjour, Kuuvik Capture will automatically connect to it.

Conclusion

During the last few weeks of testing the WFT-E7 worked as expected – offering stable, completely USB-equivalent connection. I don’t have a reason no to be satisfied with it. I just try not to think about its price.

Oh, I’m sure 6D owners will break into a smile seeing the ugly brick hanging under my tripod…

  ☕ ☕ ☕

Did you enjoy this post? Consider buying me a coffee if so.