Kuuvik Capture 3.0 Supports Movie Recording

Version 3.0 of my Kuuvik Capture tethering app is now available on the Mac App Store. There are three major (and a bunch of smaller) features.

The first is movie recording support. All the app’s tools (display sharpening, focus peaking, guides, etc) are available in movie mode as well. Some of the guides (all expect grids and custom ones) are aspect-relative, meaning that for example 4:3 guides will be relocated to show the correct crop when recording 16:9 HD movies. Due to the multitude of ways Canons handle movie recording related stuff, we only support those that passed our validation (the list is available on the Kuuvik Capture Tech Specs page). Other cameras may work, but use them at your own risk.

Kuuvik Capture 3 in Movie Mode

The second feature is a brand-new multi-point live view implementation, which enables this killer feature on the 5D Mark II, 5D Mark IV and the 1D X Mark II. We’ll continue checking cameras for which the feature is not yet available and enable it if the camera passes the check.

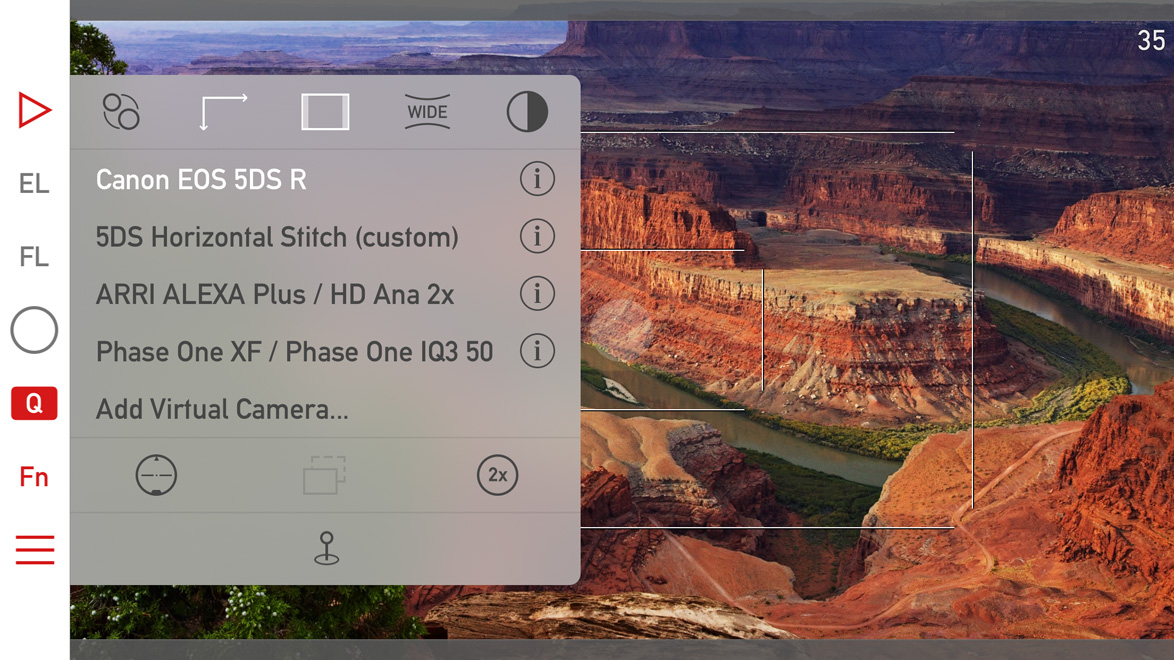
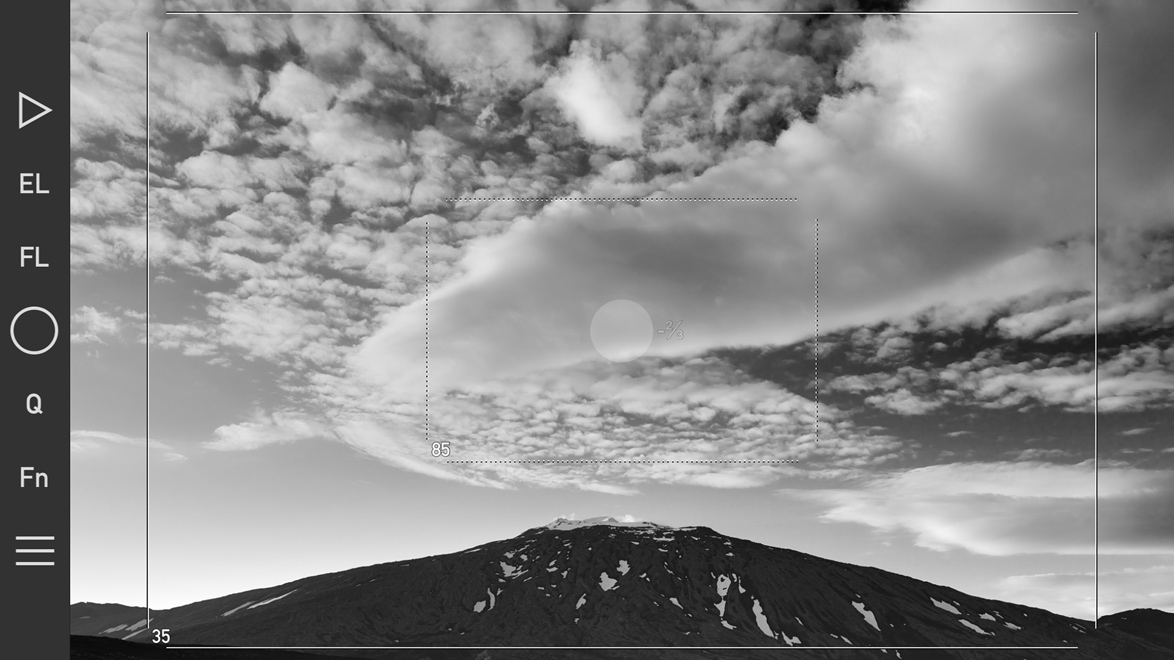
Third is the Point of Operation indicator. Canon cameras use the Point of Operation for several things: this is the place that zooming/focusing/metering uses as the starting point. The app now indicates this point with a rectangle by default (can be turned off).

All other features, changes and fixes are listed in the release notes. One thing I should mention, though. The new W-E1 Wi-Fi adapter is supported with the 5DS/R, but not with the 7D Mark II. This is because the current 7D Mark II firmware is rather unstable with the W-E1, and locks up the camera here and there (it happens with Canon’s own software as well). The 5DS/R works fine.

Version 3.0 is a free update for existing Kuuvik Capture 2.x users. New users can purchase the app from the Mac App Store.

Mark II Artist’s Viewfinder 5.0 Available

Version 5.0 of my Mark II Artist’s Viewfinder app is now available on the App Store. It took quite a bit longer than I first planned, but if you look at the sheer number of new stuff, you’ll understand why. More work went into this update than it took to develop the original version 1.

I wrote about the black & white mode and exposure compensation, and the question of RAW capture in former posts, now it’s time to reveal everything else. I’ll touch a few new things in this post, and highly recommend to take a look on the complete list in the release notes. And pay attention to the “Changes” section.

Quick Control Screen

The are a few subtle visual changes to make it less cluttered, and to make room for two new icons. The half dark/half light icon in the upper right toggles black & white mode. The 2x icon switches to the telephoto camera if you have an iPhone 7 Plus. The telephoto camera and wide converter use are mutually exclusive (as one would logically expect).

Icons for parallax correction/shift simulation and aspect ratio changing are now white when a non-default value is set for these (in the above example I set the 5DS R virtual camera to 16:9 aspect ratio).

Album -> Catalog

We had to rename the Album to Catalog to avoid a name clash with the thing that Apple calls an album in the Photos app. Now ours is named Catalog, since it would be extraordinarily hard to convince Apple that they should change…

And while we are talking about the Catalog, there are performance improvements here and there, meaning that an update may be required to the new format. The app automatically detects if this is the case, and will update the Catalog automatically.

Availability

This is a free update for existing Mark II Artist’s Viewfinder owners. New user can purchase the app from the App Store.

We offer upgrade bundles for former Viewfinder Basic/Pro/Cine edition owners, so they can upgrade for a reduced price.

The Viewfinder Handbook was also updated to cover all the new features.

Mark II Artist’s Viewfinder 5.0 is Coming

The biggest update to my Mark II Artist’s Viewfinder app since its introduction three years ago is around the corner, so I’m going to post quite a lot about the new features. Let’s start with what I consider the most important: black & white mode.

The new black & white mode and exposure compensation in action.

The new black & white mode and exposure compensation in action. Click the image for larger view.

Luminance only black & white

The ability to view in black & white was the single most requested feature – so here it comes. It works by showing luminance information from the scene (just like when you convert to Lab in Photoshop and turn off the a and b channels leaving just L). There’s a new button on the Quick Control Screen to switch it on or off, and of course you can assign this function to the Fn Key (or to the EL/FL override). It’s that simple. But there’s more… The app now applies both the black & white conversion filter and wide converter distortion correction to the saved high resolution JPGs, not just to the preview image!

Exposure compensation

Since day one there was the EL key to cope with difficult lighting conditions, but now you can also set exposure compensation. Tap the main screen until the number right to the AF/AE point lights up, and then slide your finder up and down to set the actual compensation. You can set it in third stop increments. When you finished, the compensation number on the screen will become transparent. To quickly reset compensation back to 0, press and hold the screen for a second.

— ooo —

This is just two of the 18 new features version 5.0 will bring to the table – more on the remaining 16 in later posts :)

When and for how much?

Version 5.0 will be released soon. It’s feature complete at the moment, but needs to pass testing, validation and Apple’s review. It will be a free update for existing Mark II Artist’s Viewfinder users! But with the release we’ll increase the price slightly, so it’s worth buying it now and get the free update later on.

Why iPhone RAW is a Big Deal

iOS 10 brought the capability to get the RAW image data from the camera and save it as a DNG file. It elevates the quality of iPhone images to a whole new level (for those who care). The following image tells it all.

Click the image for actual pixels display on non-Retina screens

Click the image for actual pixels display on non-Retina screens

On the left is how the iPhone renders the image, on the right my version converted from DNG and tweaked to taste in Capture One. Both show the actual pixels (100% magnification). Red areas are the overexposed parts. The images were captured as RAW+JPG in the upcoming Mark II Artist’s Viewfinder 5.0, so they represent the exact same moment.

With shooting RAWs you can avoid most of the pitfalls of iPhone image processing (I know them from experience):

  • Over-sharpening, which ruins images with already high contrast edges, such as tree branches against the clear sky.
  • Excessive noise reduction – usually on an unnecessary level, even at ISO 25. You know, the blotchy look at 100% which looks downright ugly.
  • Unrealistic color. Apple processes the images for punch, which is good for making your friends envious on social networking sites, but is a problem when you want to actually use them (the images, not your friends) as real photographs.
  • Sometimes overdone light falloff correction. You know, when the sky is brighter in the corners than in the center.

You also get more headroom for recovering overexposed areas (they are also better by default because of the lower contrast), but on the other hand you need to correct corner light falloff by hand.

To my eye the difference is so large that I won’t use JPGs any more when I’m photographing with the iPhone (which happens a lot, since it’s always in my pocket). No, they are not challenging DSLR (or even large sensor point and shoot) quality, but are way more usable than the JPGs.

Kuuvik Capture 2.5 with 5D IV Support Available

The latest update to Kuuvik Capture is now available on the Mac App Store. It brings complete Canon EOS 5D Mark IV support, including the ability to shoot and display Dual Pixel RAW files. I’d recommend to check out my former notes on 5D Mark IV RAW files.

This release also boosts RAW decoding and camera communication performance – you can find more details on these improvements in my previous post.

A new preference

As a first step toward JPG support, you can now shoot RAW+JPG (Large/Fine) in the camera. Since Kuuvik Capture works from the RAW file only to display the histogram and highlight/shadow warnings, just the RAW files are downloaded even if you shoot RAW+JPG. JPG files are saved to the memory card.

The new "Image quality" preference

The new “Image quality” preference

You can switch between RAW (the default) and RAW+JPG Large/Fine in Preferences.

Notes on macOS 10.12 Sierra

Usually I’m not doing this, but this time I highly recommend NOT to upgrade to macOS 10.12. At the time of writing the new OS has way too many bugs, two of which affecting Kuuvik Capture users specifically.

1) Connecting the 5D Mark IV via USB to an app, and then quitting the app will leave the camera in an inconsistent state, and no app will be able to connect to the camera until the USB cable is disconnected and plugged in, or the camera is turned off and back on, or the memory card door opened and closed.

This only happens with the 5D Mark IV and on macOS 10.12 with the USB connection. The same camera on 10.11 works fine, all other cameras we’ve tried on 10.12 work fine. Even the Wi-Fi connection works fine – well, it’s not a surprise since it doesn’t use the flaky macOS PTP/IP stack.

It seems that macOS forgets to close the session with the camera. There is no workaround to the issue, other than the things mentioned above that actually break the session on the camera side.

2) On some computers (MacBook Pro 15″ Retina Mid-2012 for example) 5DS/R files are not displayed at all.

Update 10/30/2017: The new display engine in Kuuvik Capture 3.3 is immune to this issue.

Availablity

The update is free for existing Kuuvik Capture 2 customers. New users can download Kuuvik Capture 2 from the Mac App Store.

For more information about the app, please visit it’s microsite, or check out my posts.

Dual Pixel RAW and Kuuvik Capture

Dual Pixel RAW is Canon’s new invention that will see its first release with the EOS 5D Mark IV. There’s some vague marketing info floating around, but haven’t seen a concise description of these files yet. So while updating Kuuvik Capture’s (websitemy posts) RAW decoder to support the 5D Mark IV, I had a chance to dig deeper into Dual Pixel RAWs.

To understand the following discussion, you need to know how Canon’s Dual Pixel AF works, especially how these Dual Pixels are divided into two separate photodiodes. This article by Dave Etchells gives you a thorough explanation.

What is a Dual Pixel RAW file?

Normal CR2 files contain the following sections:

  • Metadata
  • Previews
  • RAW data

The DPRAW file is a CR2 file that contains one more additional section:

  • Metadata
  • Previews
  • RAW data
  • DPRAW data

This organization have a very important implication. Any RAW processing software that does support the normal 5D Mark IV files will be able to open DPRAWs. If the app is unable to interpret the DPRAW data part, it will simply ignore it and will work with the file as a normal RAW. There’s no risk or penalty in taking DPRAWs (besides the huge buffer drop from 21 to 7 frames).

The DPRAW file contains the normal RAW data section to make this compatibility possible, plus one side of each pixel in the DPRAW data section.

The RAW data section contains pixel values with the sum left and right sides of the photodiode, while the DPRAW section contains pixel values from just one side of each photodiode.

The RAW data section contains pixel values with the sum of left and right side photodiodes, while the DPRAW section contains pixel values from just one photodiode of the two.

But how do we get the other side of each pixel to let Dual Pixel aware processing apps do their tricks? It’s easy: since the RAW pixel value is the sum of left and right pixel sides, just subtract the DPRAW pixel value from the RAW pixel value.

This is an unusually clever implementation from Canon, where I’m used to see all kinds of inflexible hacks that look like as if they were designed in the 1980s.

Size-wise, DPRAW files are slightly less than double the size of normal RAWs (since metadata and preview images are stored only once).

How will Kuuvik Capture 2.5 handle DPRAWs?

Not being a RAW converter, Kuuvik Capture needs the RAW data for two purposes: the RAW histogram as well as shadow/highlight warnings (the image displayed on the screen comes from the preview embedded in each CR2 file). For these the RAW data section is totally sufficient, and the app will ignore the DPRAW data section if present in a CR2 file.

The app will display normal RAW and DPRAW files equally fast, but downloading DPRAW files from the camera will take almost twice as much time as normal RAW (because of their larger size).

I assume that there will be a possibility to switch the camera into DPRAW mode remotely (I can’t be sure until my rental unit arrives). If that is the case, then a new preference will let you specify whether you’d like to shoot RAWs or DPRAWs.