Composing Stitched Images Made Easy

As you probably noticed from my posts, I’m a huge fan of Canon’s TS-E 24mm f/3.5L II lens. One of the reasons is that I can make pixel-perfectly stitch-able 2.4:1 wide panoramic shots – like the one below – with it. The only difficulty in making those images was composition: it isn’t easy to visualize a shot when you only see half of it.
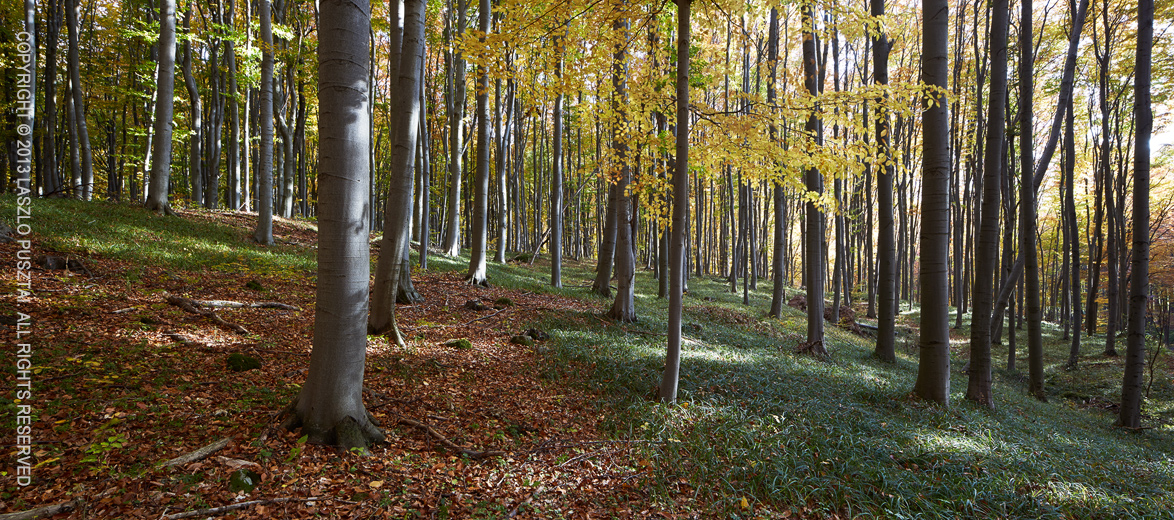
This image is a stitch of two frames: one taken with the lens shifted all the way to the left, while the other with the lens shifted to the right. Extreme edges cropped.

This image is a stitch of two frames: one taken with the lens shifted all the way to the left,
while the other with the lens shifted to the right. Extreme edges cropped.

But that difficulty is past now.

A couple of weeks ago I received a package from ALPA, containing their brand new ACAM Super Wide Converter. They sent it for certification with our upcoming Mark II Artist’s Viewfinder app, and also for my personal use. It was like Christmas for me. Quick first tests showed that the adapter has a conversion factor around 0.5x, which number was later confirmed with formal measurement in our lab. In other words, you can simulate a 17mm lens attached to a full frame 35mm using that. Or you can view almost the whole wide frame that will result from the TS-E stitch!

This is no small feat: you can walk around carrying a finder and checking lots of stitched composition without actually setting up the camera. And the actual capture needs less than half of the time it used to require.

The whole setup

The following image shows the setup I use for taking the images for pano stitches.
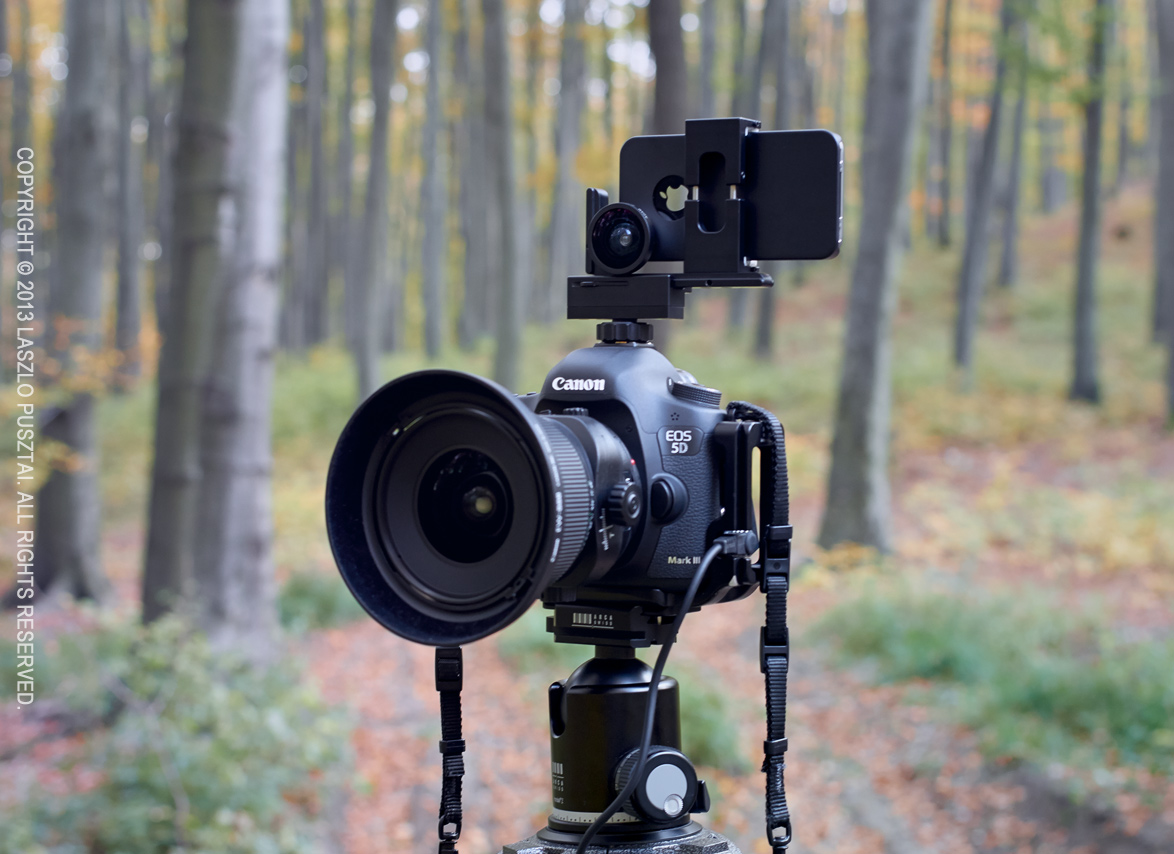
My stitched pano setup

My stitched pano setup

The camera and lens is nothing special, however the thing on top is. Attached to my iPhone is the ACAM wide adapter. The phone is held in position (note that the lenses are centered to avoid horizontal parallax) by an ALPA iPhone Holder. This is the Mark I, they now sell the Mark II complete with the wide angle adapter. As the holder was designed to be used on ALPA cameras, thus I also use an ALPA hot shoe mount adapter.

How much? – you might ask. You should log in to ALPA’s site to see their current prices, but as a guide: this whole viewfinder setup will set you back around $1150 (including the holder, hot shoe adapter, ACAM wide adapter and our Viewfinder iPhone app). If you think that’s a lot for a viewfinder, I recommend you to check out prices on a Linhof 45 Multifocus Viewfinder, for example (hint: it is around $2000 for way less functionality).

The ACAM wide adapter itself selling for less than $60 is extremely affordable considering what you get in exchange. I recommend every serious landscape and architecture photographer to check out this solution. Paired with our upcoming Mark II Artist’s Viewfinder it offers unprecedented value and functionality.

Update 11/20/2013

Today we announced the beta of Mark II Artist’s Viewfinder that sports real-time distortion correction for the ACAM SWC, making the above rig much more valuable. Read my post about it.

DoF Conversion Factor – The Exercise

In my previous post I described how easy it is to calculate apertures to get equivalent depth of field on different formats. I presented there all the equations needed for DoF calculation, but left the actual “paperwork” to you.

In this post I’ll do these calculations for those of you who did not do the homework ;)

Our goal is to get the same amount of depth of field for two setups. Object distance is also the same, so we can simply work with hyperfocal distances.

\(H \approx \dfrac{f_F^2}{N_F c_F} \approx \dfrac {f_C^2}{N_C c_C} \)

Where the index \(F\) denotes full frame and the \(C\) index denotes crop sensor cameras.

We also know how the required full frame and crop factor focal lengths relate (\(X\) denotes the crop factor), so:

\(\dfrac{X^2 f_C^2}{N_F c_F} \approx \dfrac{f_C^2}{N_C c_C} \)

Now let’s see how the circle of confusion changes with the format. Having the exact same print dimensions, magnification will be higher for smaller formats.

\(m_C = X m_F \)

Viewing distance and your eye’s resolution are also the same, so:

\(c_C = \dfrac{\tan (\frac{\pi}{180 R_e}) D_v}{X m_F} \)

\(X c_C = \dfrac{\tan (\frac{\pi}{180 R_e}) D_v}{m_F} = c_F \)

To summarize what we have:

\(\dfrac{X^2 f_C^2}{N_F X c_C} \approx \dfrac{f_C^2}{N_C c_C} \)

Which after simplification leads to:

\(\dfrac{X}{N_F} \approx \dfrac{1}{N_C} \)

That is, we arrive to the result:

\(X N_C \approx N_F \text{.} \)

The Depth of Field Conversion Factor

It is widely known how sensor size influences angle of view (the value describing this called focal length conversion factor, or field of view conversion factor, or simply crop factor). But what about depth of field?

You won’t find too much literature on depth of field equivalence on different formats. This is possibly because the majority of DoF calculators are inherently flawed, and you can’t arrive at the correct result using them. More on this later – now let me ask you a question:

I photograph a scene with a full-frame 35mm camera using a 50mm lens. The lens is focused to 10m distance, and the aperture used is f/8. I will print the image at 30x45cm size. What lens and aperture should I use on an 1.6x crop factor APS-C sensor camera if I want the resulting print to look the same? By same I mean identical framing and identical depth of field. Of course both prints are viewed from the same distance.

Please spend a minute thinking about it before reading further.

:

Ok, now we can discuss the results!

The focal length part is easy: just divide the full-frame focal length by the crop factor.

\(50/1.6 = 31.25\)

I tell you the correct answer to the aperture part before delving into the the details. You should do the same: divide the full-frame aperture by the crop factor.

\(8/1.6 = 5\)

That is, you have to use a wider, 31.25mm lens and open up the aperture to f/5.

So the depth of field conversion factor is same as the crop factor. Frankly, this simplifies how one can quickly calculate it in the field.

The Math

I’ll let you do the actual calculations as an exercise (optionally you can read my solution here), but definitely want to talk about the correct way of calculating depth of field. We usually start with determining the hyperfocal distance \(H\).

\(H = \dfrac{f^2}{Nc} + f\)

Where \(f\) is the lens’ focal length and \(N\) is the F-number. As the focal length is negligible compared to the hyperfocal distance, in practice we can safely use:

\(H \approx \dfrac{f^2}{Nc}\)

The problem child is \(c\), which denotes the circle of confusion. No it’s not a group of photographers arguing about depth of field, this number represents the amount of blur on the sensor plane that is still perceived as sharp detail on the final print.

\(c = \dfrac{\tan (\frac{\pi}{180 R_e}) D_v}{m} \)

Where \(R_e\) is the resolution of the viewer’s eye expressed in cycles per degree, \(D_v\) is the viewing distance in millimeters, and \(m\) is the print’s magnification (calculated as the print’s linear dimension divided by the sensor’s linear dimension).

As you can see the circle of confusion depends on the print’s magnification, the viewing distance and the viewer’s eye condition. Any depth of field calculator that doesn’t let you input these values is just a waste of time. Actually those unusable calculators just take a fixed \(c\) for some smallish print size and less than 20/20 eye condition. But to arrive at the correct depth of field equivalence factor you have to begin with a correct \(c\).

Note that sensor resolution does not play a role in circle of confusion and thus depth of field. It limits maximum magnification (that still looks good), however.

From here the near and far depth of field is calculated with the following equations (or their approximations).

\(DoF_n = \dfrac{H s}{H + (s – f)} \approx \dfrac{H s}{H + s}\)

\(DoF_f = \dfrac{H s}{H – (s – f)} \approx \dfrac{H s}{H – s} \text{ for } s < H\)

Where \(s\) is the subject distance.

Interesting Consequences

Diffraction limited depth of field is the same for any two sensors having the same number of megapixels. Even if they have different diffraction limited apertures. That is, the diffraction limited aperture is an 1.6x smaller F-number for an 1.6x crop factor camera than for an equal megapixel full frame camera.

f/5.6 maximum aperture zoom lenses on APS-C cameras are a joke. Who would want to shoot with a f/9 lens on a full frame camera?!?

You need wider maximum aperture lenses on APS-C cameras than you would on full frame. The new Sigma 18-35 f/1.8 lens is a good step in this direction.

You can capture the exact same looking image on an APS-C crop sensor camera that you could on a full frame one. You’ll just need a wider, faster (and higher resolution and more expensive) lens.

Everything But the Kitchen Sink

This is the most popular Kuuvik Capture video to date, showing most of the app’s features.

Click here to watch it on our YouTube channel.