ShutterCount Supports New Canons and More

“I’ve seen things you people wouldn’t believe. Attack ships on fire off the shoulder of Orion. I watched C-beams glitter in the dark near the Tannhäuser Gate…”

– Rutger Hauer in Blade Runner

Shutter count for new Canons

When you spend years on reverse engineering Canon cameras, you are bound to see things… Know things that only a few knows. Things that most people wouldn’t believe. As my better half used to joke: I know more about Canons than what would be healthy… On the other hand this knowledge paves the way for neat things.

Almost exactly two years ago, when I added support to our apps for the 5DS R, I had to realize that Canon did something to the camera’s shutter counter. That something rendered the way ShutterCount used to query the counter useless. We immediately started a research side project to determine what’s going on and to find a way around.

Since I wasn’t comfortable navigating uncharted waters with my 5DS R (and later 1D X II), we bought three 1200Ds for the purpose. So let me introduce the Suicide Squad – these cameras contributed a great deal in bringing you ShutterCount 3.

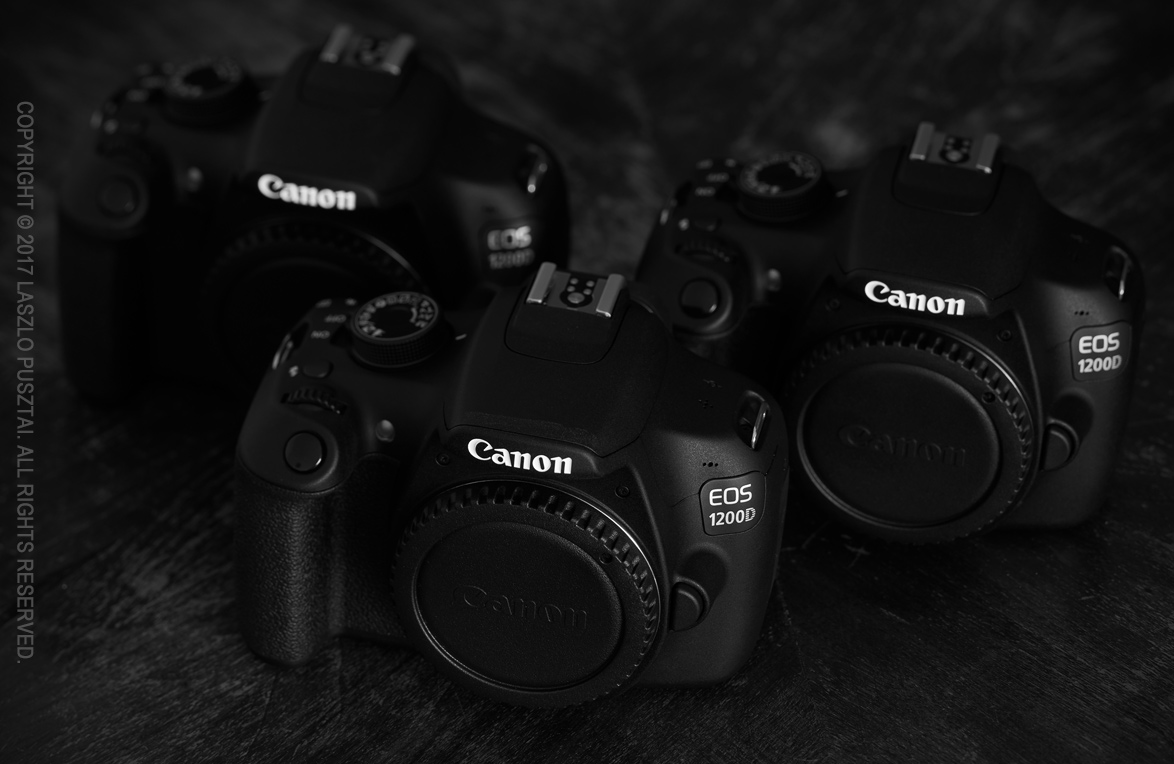
Cameras in the Suicide Squad (a.k.a. “The Kamikaze”) were ready to sacrifice their lives for the project. All three cameras survived with no damage at all.

It took two years, but I can proudly tell you that all those sleepless nights and hard work weren’t for nothing: not only we can read the shutter counter on all new Canon EOS DSLRs, but ShutterCount 3.0 does something never seen and done before.

Let me show you the camera summary screen in its full glory first. I mean including all the information the app is capable of displaying (total number of shutter actuations including live view related ones, plus the percentage where the camera’s shutter stands relative to its rated number of actuations).

My 5DS R’s info shown in ShutterCount 3.0. Both the Live View Pack (to show live view related actuations) and the Plus Pack (for the shutter rating percentage) are active.

That’s fine, but the app goes further than this. The new Distribution Chart shows a detailed breakdown of shutter actuation sources (you can also hover the cursor over the shutter count value on the summary screen for a textual breakdown).

The Distribution Chart showing the three different shutter actuation sources.

Cameras with electronic first curtain shutter (basically all Canons released after 2014, with the exception of the 1300D) are capable of providing separate numbers for photos taken through the viewfinder, for photos taken while in live view and for live view sessions. A live view session starts when you engage live view and stops when live view is turned off. Movies are part of the session number (no matter how many clips you record during a session it will count as one since the shutter only opens and closes once).

This detailed breakdown is a world’s first.

Older cameras behave a little differently. They only provide two counters: one for photos, and another one for all live view actuations.

The Distribution Chart for non-EFCS cameras (my 7D Mark II in particular).

Live view on non-EFCS cameras has a great impact on the shutter. When you take a shot in live view, the following happens:

  • The shutter opens when you start live view.
  • The shutter closes immediately before you take the picture, since the mechanical first curtain must be used.
  • The shutter opens and closes for the shot itself.
  • The shutter opens again after the shot has been taken to re-enter live view.
  • The shutter closes when you stop live view.

That is, a single shot in live view generates two shutter actuations for the shot, plus one for the session. One of these is counted in the “photos” number, the extra two in the “live view actuations” number. Took two shots in a session? The shutter was actuated 2 + 2 + 1 = 5 times. 2 of these is counted in “photos”, 3 in “live view actuations”. And so on. Movie recording is simpler – the shutter only opens at the beginning of the session and closes at the end, so “live view actuations” increases by one for each session.

Which means that it is really important to know the number of live view related actuations, since it can contribute a lot the shutter’s wear. It may make a huge difference to the camera’s selling price. But at least you can get a more precise picture.

Speaking of precision. I’ve seen things… And my opinion is that the cameras’ internal counters are precise at the scale of hundreds  (that is, 4200 or 4300 or 4400 shots is a difference, but 4210 and 4212 may not be). Unfortunately I can’t publicly discuss the exact details on why, so you need to take my word on it. And don’t stress about less than 100 differences. In one point I was even considering to show the counters only in increments of 100 – Canon does this in increments of 1000 in the 1D X II for this reason. In practice it doesn’t really matter if your camera has 51890 or 51906 shutter actuations, but it does matter whether it’s 51800 or 68900.

File Mode for Nikon and Pentax (and some old 1D models)

ShutterCount 3.0 for the Mac also introduces the File Mode. As the name implies, it uses image files taken with the camera to determine the shutter count – for cameras that actually record the number in the files. It was requested by lots of Nikon and older 1D(s) II/III users, so we added it.

File Mode is a largish topic in itself, so I’ll dedicate a separate post for it during the next days.

Availability

ShutterCount 3.0 is available on macOS and iOS, and supports all new Canon cameras (released after 2014) in the base app price. The Mac version also supports File Mode. Version 3.0 is a free update for existing users. New users can purchase it in the respective App Store. For the complete list of certified cameras please refer to the Tech Specs page.

We tested and certified the app with all the cameras on the Tech Specs page. In other words, we are completely sure that it works. But please, pretty please, check the supported camera list before purchasing.

Live view counters and the Distribution Chart are available when the optional Live View Pack add-on is purchased. For the list of supported cameras please refer to the app’s Tech Specs page. The Live View Pack is available as an in-app purchase. On a Mac, click the ShutterCount > Store menu item, on an iPhone or iPad tap More on the tab bar and tap Store in the menu.

Making the Canon 5D Mark IV Soup

The following is a satirical look on how Canon designed the Canon EOS 5D Mark IV – followed by a little more serious discussion.

Sitting on the old, weathered coffee table in my office, the camera is waiting for the validation tests for Kuuvik Capture 2.5

Sitting on the old, weathered coffee table in my office, the camera is waiting for the validation tests for Kuuvik Capture 2.5. It makes a killer combo with the EF 35mm f/2 IS lens, just like the 5D Mark III did.

Ok, so let’s begin with the ingredients:

The recipe is pretty straightforward, anybody having access to these quality ingredients can cook it after a few years of making soups like this.

Take the EOS 5DS R, and replace the sensor with a new one based on the current generation design with on-chip ADC (like the ones in the 80D and 1D X Mark II). Since the sensor is a bit smaller resolution than the one it replaces, frame rate can be increased a bit. Peel the 7D Mark II and add its weather sealing and a slightly modified version of the AF point selector switch to the bowl.

Crush the 1D X Mark II, but be careful that both the GPS unit and the AF sensor remain unharmed, we’ll need them. Unfortunately crushing the body will destroy the red AF point illumination and the CFast card slot, so there’s no chance to improve our soup with those extremely fine parts. Yes, use the GPS unit from the 1D X II, since the 7D II’s unit has a digital compass, and that might cause disorientation and dizziness even in small doses.

Cut the 80D in half, pull out the touchscreen and the Wi-Fi. But be extremely careful to clean the Wi-Fi thoroughly, otherwise the soup will taste like crap. Add these to the bowl. Season to taste with Dual Pixel RAW.

— ooo —

Tech companies (and Canon is no exception, just like us) love to reuse existing components in new products. This greatly improves return on investment (good for the company) and reliability (good for the customer).

The 5D Mark IV is a premier example of smart cooking from these components. It’s a serious upgrade for anyone using the 5D Mark III and doesn’t need high resolution or high frame rate. That is, a highly versatile generalist camera.

But since I own and love a 5DS R and a 1D X Mark II, this soup is not for me. I have been using a high res + high speed combination for years, and I prefer it to a single generalist camera, or even a pair of those cameras (I had a 5D Mark III for years, but life is much better now).

Stringent Look - Canon EOS 5D Mark III with EF 500mm f/4L IS USM + 1.4x III

Stringent Look – Canon EOS 5D Mark III with EF 500mm f/4L IS USM + 1.4x III

Photos in this post were made with the 5D Mark III years ago – despite having a rental body for adding it to Kuuvik Capture, I had no time to go out and shoot (not to mention that the weather was dull). But since the Mark IV is s direct replacement of the Mark III, they illustrate the kind of images I usually make with a body like this.

There are things that I really miss, however:

  • CFast 2.0. The 1D X Mark II showed that they are in a completely different league in speed and user experience compared to CF. With CFast the Mark IV’s smallish buffer (21 shots) would not be an issue at all.
  • UHS-II for the SD card slot. UHS-II would be a lower cost alternative to CFast 2.0 (but still faster than CompactFlash: speed ratings are 633x for UHS-I, 1066x for CF, 2000x for UHS-II, 3500x for CFast).
  • USB Type-C socket. The USB3 Micro-B socket the Mark IV (and all USB3 Canons) uses is the worst connector plug I ever saw (only Apple’s 30-pin dock connector comes close). Fragile, hard to insert properly with cold fingers, etc, etc. Canon (and everyone) should use the reversible USB3 Type-C plug these days. With A-to-C cables for legacy computers only having an A socket.
  • Red AF point illumination. See my former opinion about the crappy solution used in every contemporary Canon except the 1D X Mark II.
  • Usable Wi-Fi. The 5D Mark IV shares the snail-like Wi-Fi implementation of the 6D/70D/80D. Come on Canon, 9MB/s peak transfer speed over 802.11n for a 30mp camera? In 2016? To make things worse, you can’t use a much faster WFT-E7 external transmitter to speed up wireless tethering.
Window Remnants - Canon EOS 5D Mark III with EF 50mm f/1.4 USM

Window Remnants – Canon EOS 5D Mark III with EF 50mm f/1.4 USM

Would I recommend it to a friend?

It boils down to a pair of points: if you need ultra high resolution and are willing to spend a small fortune on lenses that actually can deliver the resolution, then no. In this case get a 5DS R, which is prominently usable even for birding. Or if you need a high-fps camera, then don’t fret about the Mark IV’s frame rate, go get a 1D X or 7D II for yourself.

But in all other cases I can recommend the Canon EOS 5D Mark IV – it’s a really nice camera and a joy to use. Well, it’s not a surprise as all professional Canons I happened to use since (and including) the 5D Mark III were exceptional tools. And I totally agree with Canon’s philosophy to please actual photographers and not tech journalists and bloggers (you know, the kind harshly complaining about “lack of innovation”).

Shameless plug

If you are upgrading from an older camera, such as the 5D Mark II, 5D Mark III or either 7D, you’ll probably need my ShutterCount app to let the buyer know how many shutter actuations your old camera has.

Kuuvik Capture 2.5 with 5D IV Support Available

The latest update to Kuuvik Capture is now available on the Mac App Store. It brings complete Canon EOS 5D Mark IV support, including the ability to shoot and display Dual Pixel RAW files. I’d recommend to check out my former notes on 5D Mark IV RAW files.

This release also boosts RAW decoding and camera communication performance – you can find more details on these improvements in my previous post.

A new preference

As a first step toward JPG support, you can now shoot RAW+JPG (Large/Fine) in the camera. Since Kuuvik Capture works from the RAW file only to display the histogram and highlight/shadow warnings, just the RAW files are downloaded even if you shoot RAW+JPG. JPG files are saved to the memory card.

The new "Image quality" preference

The new “Image quality” preference

You can switch between RAW (the default) and RAW+JPG Large/Fine in Preferences.

Notes on macOS 10.12 Sierra

Usually I’m not doing this, but this time I highly recommend NOT to upgrade to macOS 10.12. At the time of writing the new OS has way too many bugs, two of which affecting Kuuvik Capture users specifically.

1) Connecting the 5D Mark IV via USB to an app, and then quitting the app will leave the camera in an inconsistent state, and no app will be able to connect to the camera until the USB cable is disconnected and plugged in, or the camera is turned off and back on, or the memory card door opened and closed.

This only happens with the 5D Mark IV and on macOS 10.12 with the USB connection. The same camera on 10.11 works fine, all other cameras we’ve tried on 10.12 work fine. Even the Wi-Fi connection works fine – well, it’s not a surprise since it doesn’t use the flaky macOS PTP/IP stack.

It seems that macOS forgets to close the session with the camera. There is no workaround to the issue, other than the things mentioned above that actually break the session on the camera side.

2) On some computers (MacBook Pro 15″ Retina Mid-2012 for example) 5DS/R files are not displayed at all.

Update 10/30/2017: The new display engine in Kuuvik Capture 3.3 is immune to this issue.

Availablity

The update is free for existing Kuuvik Capture 2 customers. New users can download Kuuvik Capture 2 from the Mac App Store.

For more information about the app, please visit it’s microsite, or check out my posts.

Dual Pixel RAW and Kuuvik Capture

Dual Pixel RAW is Canon’s new invention that will see its first release with the EOS 5D Mark IV. There’s some vague marketing info floating around, but haven’t seen a concise description of these files yet. So while updating Kuuvik Capture’s (websitemy posts) RAW decoder to support the 5D Mark IV, I had a chance to dig deeper into Dual Pixel RAWs.

To understand the following discussion, you need to know how Canon’s Dual Pixel AF works, especially how these Dual Pixels are divided into two separate photodiodes. This article by Dave Etchells gives you a thorough explanation.

What is a Dual Pixel RAW file?

Normal CR2 files contain the following sections:

  • Metadata
  • Previews
  • RAW data

The DPRAW file is a CR2 file that contains one more additional section:

  • Metadata
  • Previews
  • RAW data
  • DPRAW data

This organization have a very important implication. Any RAW processing software that does support the normal 5D Mark IV files will be able to open DPRAWs. If the app is unable to interpret the DPRAW data part, it will simply ignore it and will work with the file as a normal RAW. There’s no risk or penalty in taking DPRAWs (besides the huge buffer drop from 21 to 7 frames).

The DPRAW file contains the normal RAW data section to make this compatibility possible, plus one side of each pixel in the DPRAW data section.

The RAW data section contains pixel values with the sum left and right sides of the photodiode, while the DPRAW section contains pixel values from just one side of each photodiode.

The RAW data section contains pixel values with the sum of left and right side photodiodes, while the DPRAW section contains pixel values from just one photodiode of the two.

But how do we get the other side of each pixel to let Dual Pixel aware processing apps do their tricks? It’s easy: since the RAW pixel value is the sum of left and right pixel sides, just subtract the DPRAW pixel value from the RAW pixel value.

This is an unusually clever implementation from Canon, where I’m used to see all kinds of inflexible hacks that look like as if they were designed in the 1980s.

Size-wise, DPRAW files are slightly less than double the size of normal RAWs (since metadata and preview images are stored only once).

How will Kuuvik Capture 2.5 handle DPRAWs?

Not being a RAW converter, Kuuvik Capture needs the RAW data for two purposes: the RAW histogram as well as shadow/highlight warnings (the image displayed on the screen comes from the preview embedded in each CR2 file). For these the RAW data section is totally sufficient, and the app will ignore the DPRAW data section if present in a CR2 file.

The app will display normal RAW and DPRAW files equally fast, but downloading DPRAW files from the camera will take almost twice as much time as normal RAW (because of their larger size).

I assume that there will be a possibility to switch the camera into DPRAW mode remotely (I can’t be sure until my rental unit arrives). If that is the case, then a new preference will let you specify whether you’d like to shoot RAWs or DPRAWs.