1D X II, 5DS R and 7D II AF Drive Speed Compared

I’m currently waiting for Capture One to support the Canon EOS-1D X Mark II. RAW converter options available at the moment (Canon DPP and Photoshop/Lightroom) do not cut it. Their output is seriously underwhelming compared to Capture One, so I’m trying to avoid to check the camera’s image quality now. That leaves other operational aspects to examine.

My current main camera is the EOS 5DS R – it will definitely remain in this position even with the 1D X Mark II at hand. I highly doubt that the 1D X will be able to challenge its superlative image quality. On the other hand, slow frame rate and especially the small buffer are a headache from time to time.
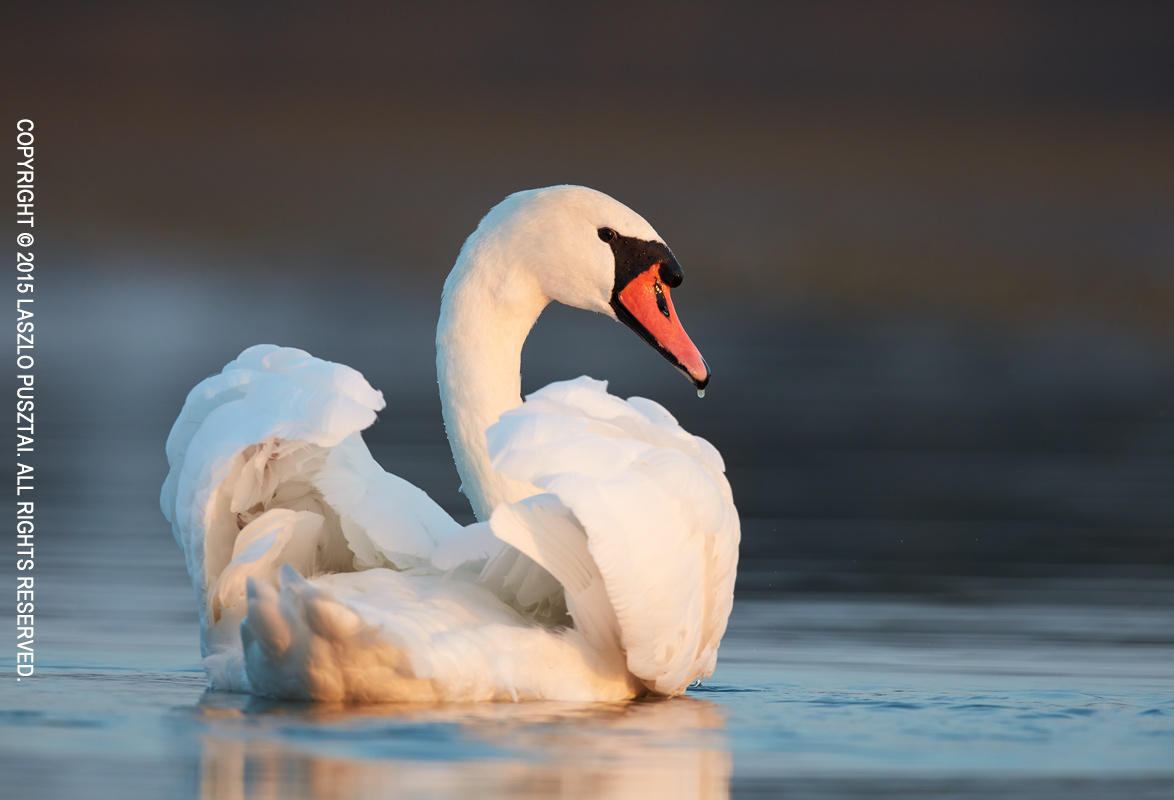
Swan

Swan – 5DS R with the 500/4 IS II and 1.4x III teleconverter

That’s why I had been carrying a 7D Mark II in my bag for the last year and a half. But now the 1D X Mark II casts a shadow on the 7D Mark II’s future…

Today I did a little test to compare the AF drive speed of these three cameras with my Canon EF 500mm f/4L IS II USM – naked lens, as well as with the 1.4x III and 2x III teleconverters.

The measurement was simple: recorded a video of the focus distance scale during a full stroke “infinity to minimum focusing distance to infinity” focus drive operation, and then counted how many frames the operation took.

It took a tad less than 0.8 seconds for the 1D X Mark II to execute this operation regardless of whether a converter was attached or not. What surprised me is that the 5DS R produced the exact same result. I must conclude that stories about the 1D’s more powerful battery in connection with the AF drive speed are marketing bullshit. The 5DS R with a weaker battery can do the same. Even with a teleconverter attached.

The 7D Mark II is a different story, though. The naked lens produced the same 0.8 seconds result, but extenders took their toll. The 1.4x slowed focusing time by some 17%, and with the 2x the full stroke took twice as much time as with the naked lens.

In today’s test the 1D X Mark II scored a win against the 7D Mark II, but the true winner for me is the 5DS R… I expected 7D Mark II level performance from the camera, and being on par with the 1D X just makes me to admire it even more.
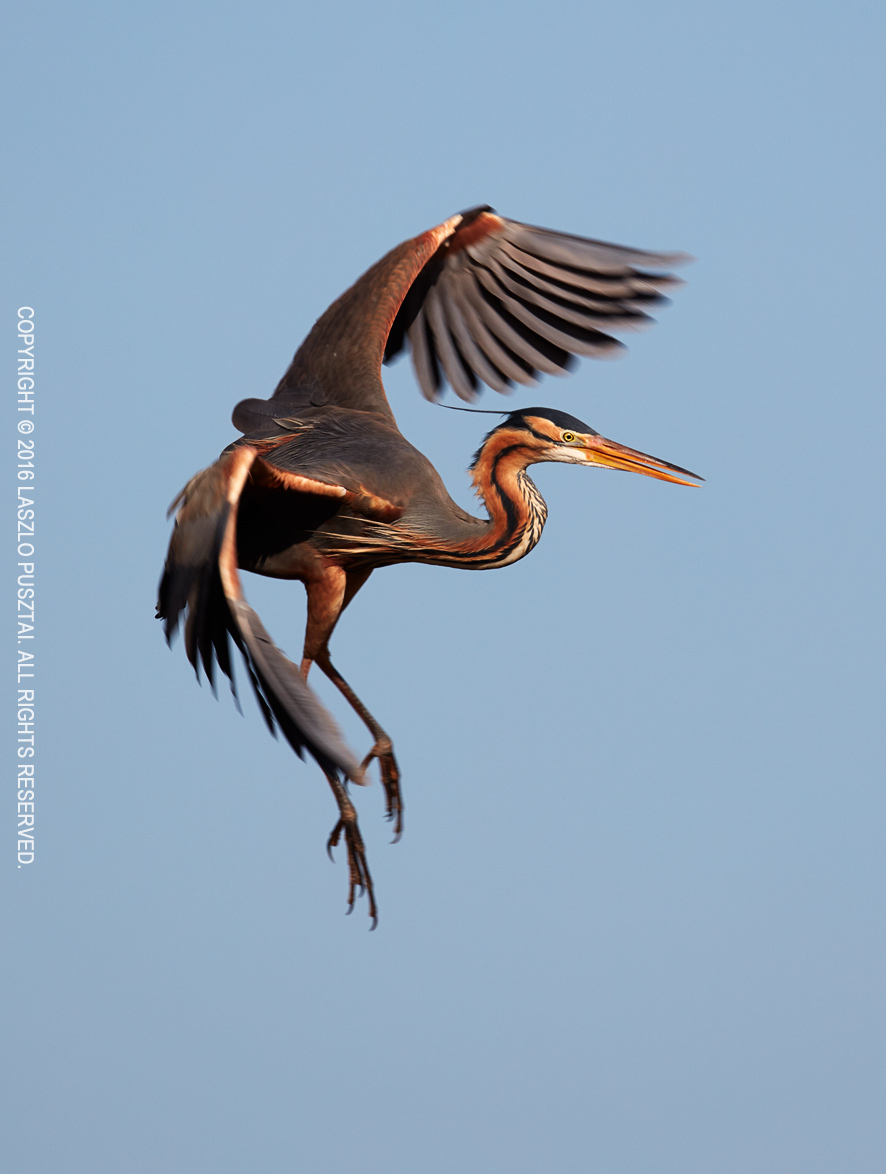
The Ballet Has Begun – With a Little Extra

Herons finally arrived and I spent the afternoon with warming up for the season. This year will be radically different from the previous ones because of the rig I use. The issue with photographing herons at this specific location is that they land at varying distances. This usually means frequent teleconverter and body changes, and lots of inadvertently cut wings and feet.

But not this time. The 5DS R has more than enough resolution for cropping if the bird lands further away while I can avoid truncating vital parts with closer landings thanks to the full frame sensor. I’m using the EF 500mm f/4L IS USM with the 1.4x III teleconverter.

Purple Heron Landing Ballet

Purple Heron Landing Ballet

Images are also much better from the 5DS R than they were from the 7D Mark II and 5D Mark III used for the last couple of years. Not to mention the ancient 1D Mark II… Frame rate is a bit slow sometimes, but still manageable. The real problem is that emptying the buffer to the card may take a lot of time even with a speedy 1066x Lexar CF. This is one point where I expect the 1D X Mark II to do wonders.

Besides the herons, a bunch of bearded tits were also hanging out in the reeds. They are funny little birds and I really enjoy working with them. So much that I missed quite a few heron landings.

Bearded Tit - Another Take

Bearded Tit – Another Take

The light was great, so why not take advantage of the situation and the cooperating birds? Heck, I already have a ton of great heron landing images…

Imminent Storm

On the evening of April 1st, a serious gale hit Lake Tisza. Of course I was out on the lake looking for images. After the first gusts I decided that it’s better to pack and go. But… I quickly made a few frames.

Imminent Storm

Imminent Storm

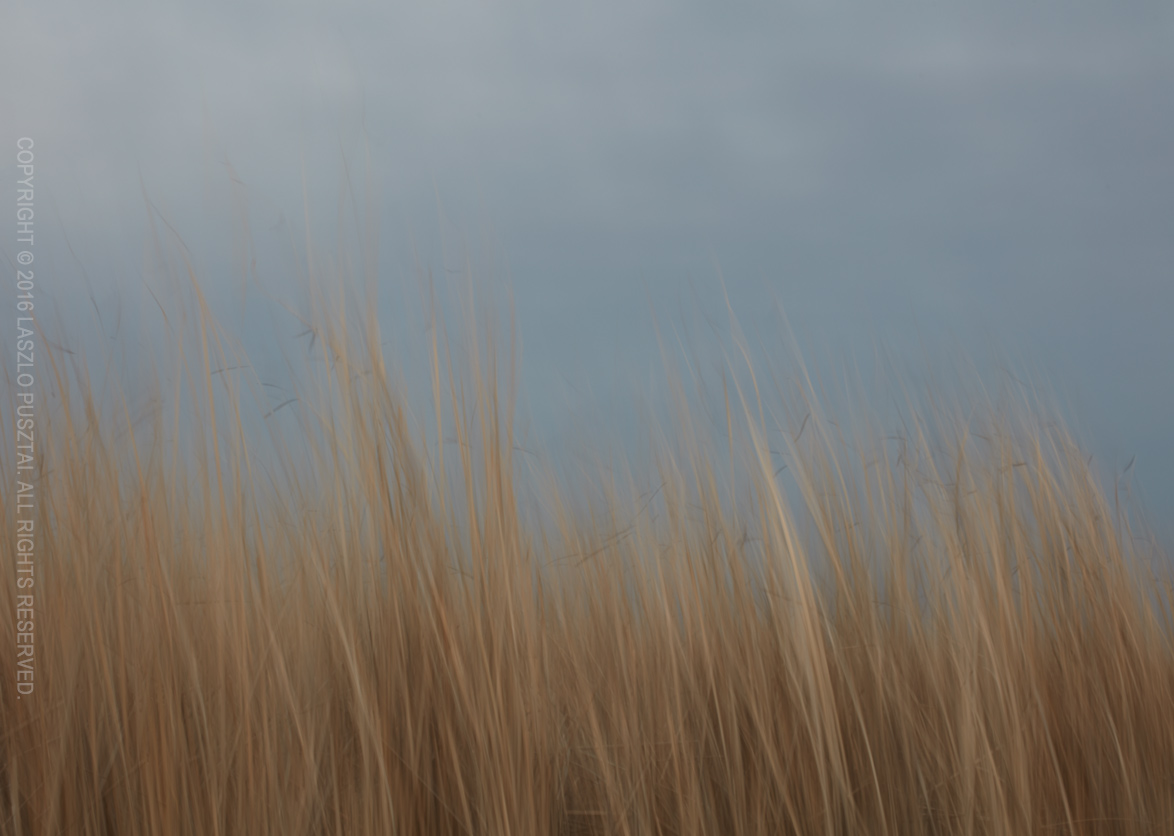
I wouldn’t have thought that one of my strongest images will lurk among those. It’s a huge departure from my usual style. It’s an image straight out of the camera – even the slightest post processing attempt weakened it.

Unfortunately the web sized reproduction does not let it go through entirely – and even the large version needs time to fully appreciate it. Look at the image. Let is sink. Smell the oncoming storm.

Oh yes, shot with the Zeiss Otus 1.4/55 on the Canon 5DS R. I can hardly wait to see it on large canvas.

Spring is Approaching

Spent the last weekend on Lake Tisza. It was clear that spring is approaching, but everything was still a bit dormant. Bulrush and reed haven’t turned to green yet, and birds were scarce. A few weeks and this place will be noisy from herons building their nests. But at the moment it’s tranquil, only the reeds rustling in the wind.

Spring is Coming

Spring is Approaching

Shot with the Canon 5DS R and Zeiss Otus 1.4/55. This image is a good example when one doesn’t need an extremely sharp lens – yet the Otus excels with its transparent and airy rendering. Also used a LEE Little Stopper to lenghten the exposure.

Zeiss Distagon 2.8/15 After the Surgery

I bought the 2.8/15 last December with the specific intention to use it with my LEE filter system. The stock lens doesn’t allow this, because of the integrated, non-removable hood. The plan was to get the lens, play a little with it, and send it back to Zeiss for a hood removal surgery if it turns out to be a keeper.

As I wrote in my first impressions piece, it was a love at first use. So the lens went back to Zeiss in January. They offer the hood removal modification for 250 Euros (+VAT).

Snowless Winter

Snowless Winter

A couple of weeks later I got the modified lens, but I noticed during the very first test that left side performance has dropped considerably. I know, the 5DS R is a merciless beast, but I also knew that the lens could perform better. So immediately contacted Zeiss about the issue.

What followed is a story of exemplary customer service. I’ve sent a few test images, and after a bit of discussion they recommended a focal flange distance adjustment to let the lens focus a little beyond the otherwise hard infinity stop.

A short technical explanation why this was a good idea: all my Zeisses have pronounced field curvature – ie. when I set the focus for the image center, sides may become soft, and when focusing for the best corner performance, the center goes out of focus. This is business as usual with the 5DS R and high performance lenses.

The 15mm Distagon’s image field is arching away from the camera on the sides, meaning that I would need to focus beyond infinity to bring the corners into focus. But the hard infinity stop did not allow this. This is something you won’t see on twenty-something megapixel cameras, but the 5DS R is more than demanding.

The lens went back to Zeiss again, and after some more discussion we agreed to stick with the original plan: adjust the focal flange distance. During which I received way more information than a usual service would ever send. Focus variation test results from their lab and such. The goal was to extract every last bit of performance possible while obeying the laws on physics and the realities of manufacturing tolerances.

With the fine-tuned lens in my hand, I was curious to find out the results.

Distagon 15mm with no hood

Distagon 15mm with no hood

Honestly, I’m impressed. Left side performance is better than ever. Although there’s still a bit of difference in optimal focus distances between the left and right, that’s nothing I can’t mitigate with proper depth of field selection and focus bracketing. What surprised me is that peak center performance is also higher now.

The moral of the story: when you approach a service with such a claim, they usually tell you that the lens performs “within specifications” (which is a polite way of saying that they don’t care). Been there, done that. But not Zeiss. They were keen to provide me the best possible instrument for my ultra wide angle photography – and they succeeded.

Oh, and regarding the surgery – the hoodless lens have some 6mm smaller diameter than the original. It’s a better fit in my bag now. A screw-in metal front lens cap was also included in the modification package, but I’m using a 95mm Otus lens cap instead. It’s much easier to handle, and the risk of scratching the front element is way less with a plastic lens cap.

  ☕ ☕ ☕

Did you enjoy this post? Consider buying me a coffee if so.

Accessories to Get the Most Out of Your 5DS R

The Canon EOS 5DS R is indeed a great camera, rivaling or even surpassing medium format digital offerings. But to extract its capabilities to the last ounce, you’ll need the appropriate lenses, accessories and technique.

Let’s get the lens question out of the way first, before I move onto the accessories and gadgets – the real topic of this post. This camera ignited a complete revamp of my lens set. I’ve already replaced the 500mm with the Mark II because of the 7D Mark II, but the 5DS R made changes also necessary in the shorter focal lengths range. The first lens that got replaced was the 135mm – with the Zeiss Apo Sonnar 2/135 ZE replacing the Canon EF 135mm f/2L USM. The Canon was no slouch, but the Zeiss is in a completely different league. Next came the Sigma 50mm f/1.4 Art replaced with the Zeiss Otus 1.4/55 ZE (actually this change is in progress, as the first copy went back to Zeiss – more on it after the issue settles). On the wide end I’m about to acquire a Zeiss Otus 1.4/28 ZE (when it comes out next year) and a Zeiss 2.8/15 ZE.

It may look pricey at first, but these lenses are not comparable even to the Sigma Arts. With the Sigma 50, 5DS R images just look like regular 35mm DSLR images, albeit with slightly higher resolution. But they are still limited to 40×60 cm print sizes according to my standards. There’s a lot of empty magnification in those images. With the Otus 55, 60×90 cm is easily reachable. The images remind me of those I saw from Hasselblads. The Otus 55 costs around $4000, which is in line with medium format normal lens offerings priced between $3000 (Schneider) – $6000 (Leica). And the 5DS R is more than affordable compared to medium format cameras/backs.

With this said, it’s not surprising that you’ll need tripod stability and shooting discipline used with medium format gear. The setup I describe in the following sections was built slowly during the last couple of years to satisfy my landscape photography requirements. Removing “field frustrations” one by one.

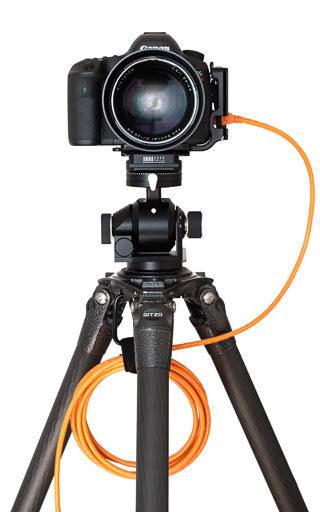
As a quick overview, you can see my rig on the following picture.

Ready to shoot

Ready to shoot

Tripod and Head

I’m using a Gitzo 3532LS tripod for more than three years now. These legs proved to be versatile, have great torsional rigidity and dampen vibrations rather quickly. I prefer three legs sections for increased stability, and myself being 172 cm, this tripod gives me just the right height to work comfortably even on slopes.

On the head front, the Arca-Swiss d4 is my choice. I had been struggling with ballheads for a decade, and they became unbearable when I started to shoot tethered most of the time. I had to wait three months for the d4 to be delivered, but it well worth the wait. Now I can adjust the camera position with just one hand, while holding the MacBook Air in the other. Not to mention that sagging omnipresent even with the best ballheads is a thing of the past. I prefer the d4 compared to the Cube, because of the quick adjustment feature.

The third piece of the the support puzzle is the camera plate. I’ve relocated my Kirk plate from the 5D Mark III – it is 100% compatible. As I wrote in my Kirk plate first impressions piece, I really like its two attachment point fixing method. Together with the 5DS R’s reinforced base plate, it provides very stiff support. Note that no battery grips are used here – they just introduce another attachment point with possible flex and sag.

Filters and Lens Shading

I moved to the LEE filter system when I started shooting with primes only. Four different filter sizes were unmanageable – even with the two types of filters (ND and polarizer) that I use. Still don’t like graduated filters and the dark mountain tops you see so many times on photographs made with them, and my LEE filter set consists of just a 100x100mm polarizer, a 3 stop ND, plus the Little and the Big Stopper.

They beautifully solve the filter thread problem, but forget about stock lens shades. So I had to find a solution. Sometimes I used my hat to shade the lens front element, and that gave me the idea: get a piece of black paper/plastic, and figure out how can I hold it in place (remember, one hand for adjusting the head/camera/lens, another for the MacBook – there’s no third one for holding the shade). I ended up using a Wimberley Plamp as a third hand. Originally I had a piece of black cardboard in my bag as a shade, but recently switched to a piece of matte plastic named Shadepirate. You can’t see on the above picture, but I put a piece of Velcro under the clip of the Plamp to protect the tripod leg.

Tethering

Tethering became integral part of my workflow years ago. At the beginning I had been dragging a 15″ MacBook Pro around, but that turned out to be a bit heavy and problematic. For more than a year now, a 11″ MacBook Air serves as a field computer. It fits into the pocket of my Domke vest, weights as little as five or six 4×5″ film holders… Yes it’s a bit more than 1kg, but my backpack and tripod weighs around 20kg together, so that’s not a huge increase.

Of course I use my own software – Kuuvik Capture – on the MacBook for controlling the camera. But usually also keep a copy of Capture One open so that I can make critical decisions on the filed.

With the arrival of USB 3, cable quality became increasingly important. You need to have good signal integrity for a reliable connection. For this reason, I settled down with TetherTools’ TetherPro cables – currently the 15 feet (4.57m) orange one. As an interesting side note, we had a handful of Kuuvik Capture support incidents where changing the cheap cabling to a good one solved the issue.

Conclusion

For me, the 5DS R marks the end of the casual 35mm shooting era, but in exchange delivers image quality previously available only with much more expensive medium format systems. Even with expensive Zeiss glass, the complete system price/performance ratio remains on a uniquely high level.

Not to mention that the same camera can be used for birding with stellar results – a domain no medium format camera dare to enter.

  ☕ ☕ ☕

Did you enjoy this post? Consider buying me a coffee if so.