I’ve noticed this scene while walking along a stream in the woods of Zemplen. I was using the Mark II Artist’s Viewfinder to hunt for images, and even looking on the screen of my iPhone 6 Plus showed that the shot will be a tricky one.
Why? Because of leaves floating around in the water. And most of those leaves were downright ugly. So I had no choice but to grab the LEE Big Stopper and go for a very long exposure.
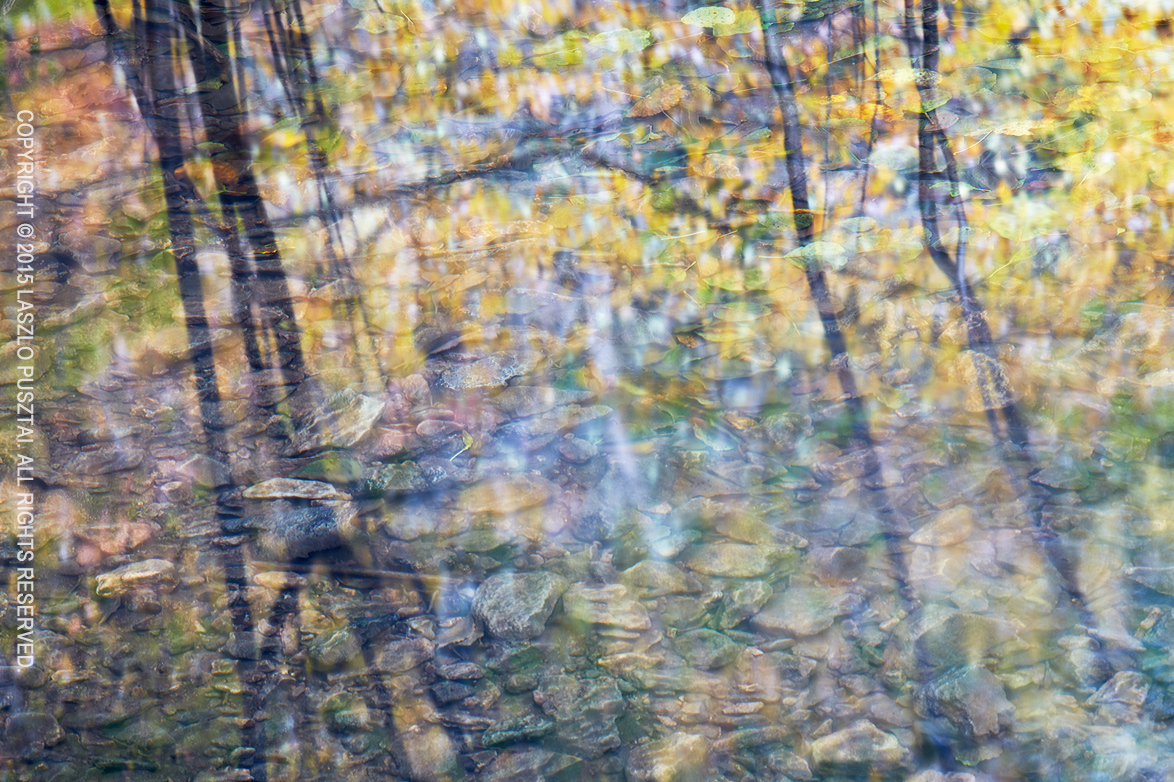
Fall Stream Reflection
At 135mm, I had to stop down to f/22 for appropriate depth of field. While I wouldn’t do that normally because of the sharpness killing effect of diffraction, here it was only part of the overall softness. Moving water also reduced sharpness and the reflecting fall foliage was deliberately left slightly out of focus. Nevertheless, a healthy dose of deconvolution sharpening was applied to restore detail.
But back to the long exposure. It was 6 minutes and 40 seconds. Floating ugly leaves left no trace at all. As usual I shot tethered to Kuuvik Capture 2, so fine tuning bulb exposure length was a piece of cake.

 First, a new preference is added to control whether the camera’s LCD is turned on when you start live view from within Kuuvik Capture.


