Ultralight Tethering with Kuuvik Capture

With the release of Kuuvik Capture for iPad, a decade-old dream started to unfold: enjoying all the benefits of tethered shooting out in the field without the burden of carrying around a notebook.

Once the very first beta of the app was ready, a quest for the optimal iPad size and a lightweight mounting solution had begun. It took several weeks of research to arrive at a solution that I’m using for the last year.

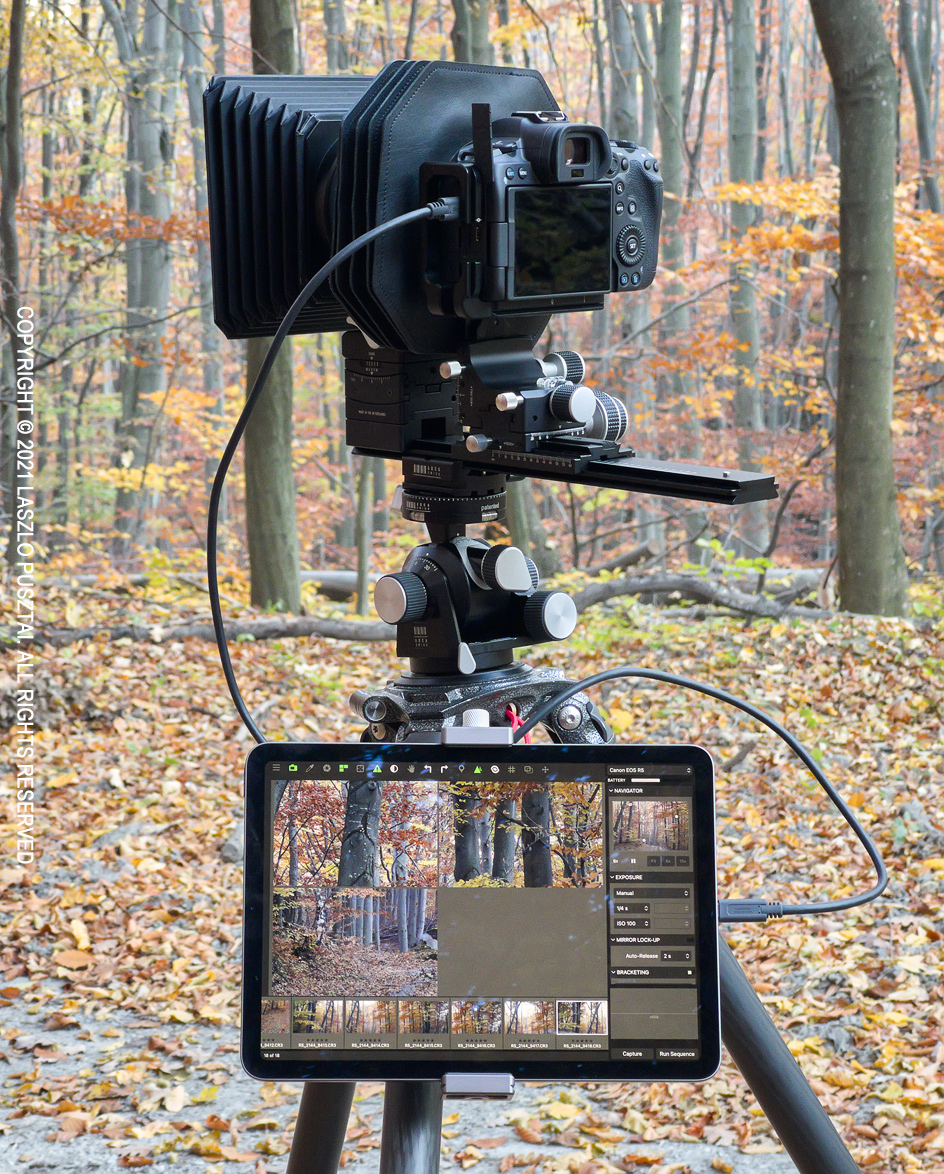
My Cambo Actus digital view camera with the Canon EOS R5 acting as the recording medium controlled by Kuuvik Capture running on an iPad Air 4. The image shows one of the app’s unique features: multi-point simultaneous live view.

The iPad had to have a USB-C port and large enough screen while keeping the weight down. Quite early during the development we’ve realized that the sweet spot is the ~11″ size. At the end I chose the Air 4 as it weighs a little less than the Pro, costs less, and for a dedicated tethering controller the Pro doesn’t provide anything worthwhile over it.

Storage-wise 64GB is plenty for me, especially since I don’t have to shoot a myriad of images to compensate for possible errors. With Kuuvik Capture I only keep the perfect ones. 64GB also turned out to be more than enough for a 5-hour Perseid shooting session, where I shot a ton of long exposure images.

Mounting the iPad was a headache, though. Generally I’m not happy with buying stuff made by Chinese copycats, but it turned out that nobody else makes any competent iPad holder… So I ended up getting a Sunwayfoto PC-01 tablet bracket.

Attaching the iPad bracket to the tripod was an easier job to accomplish with products from reputable European and US manufacturers: my choices being the Manfrotto 386B-1 nano clamp and RRS’ BC-18 micro ball head.

You can see the completed mounting solution below.

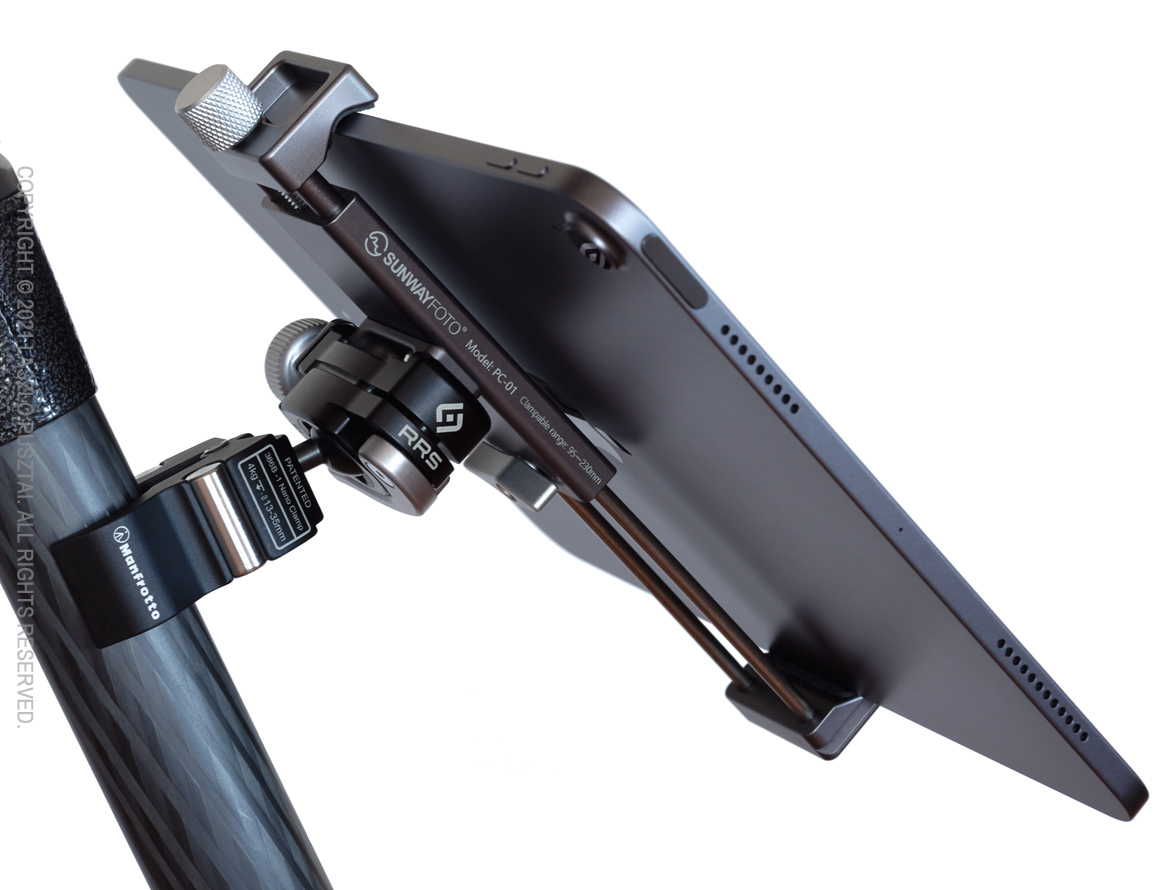
The lightweight mounting solution.

The torque the whole iPad assembly exerts on the ball head’s screw is significant, and could easily loosen it from the Manfrotto clamp. So a drop of Vibra-Tite Blue 121 or Loctite Blue 242 removable threadlocker is highly recommended to avoid issues down the road.

You don’t want your iPad to land on a sharp rock after all…

Another possible source of inconvenient moments is the nano clamp itself. If you don’t tighten it enough. Or if it breaks… iPad meets a sharp rock situation again.

To mitigate this risk, I’m using a simple security tether between the tripod and the iPad bracket.
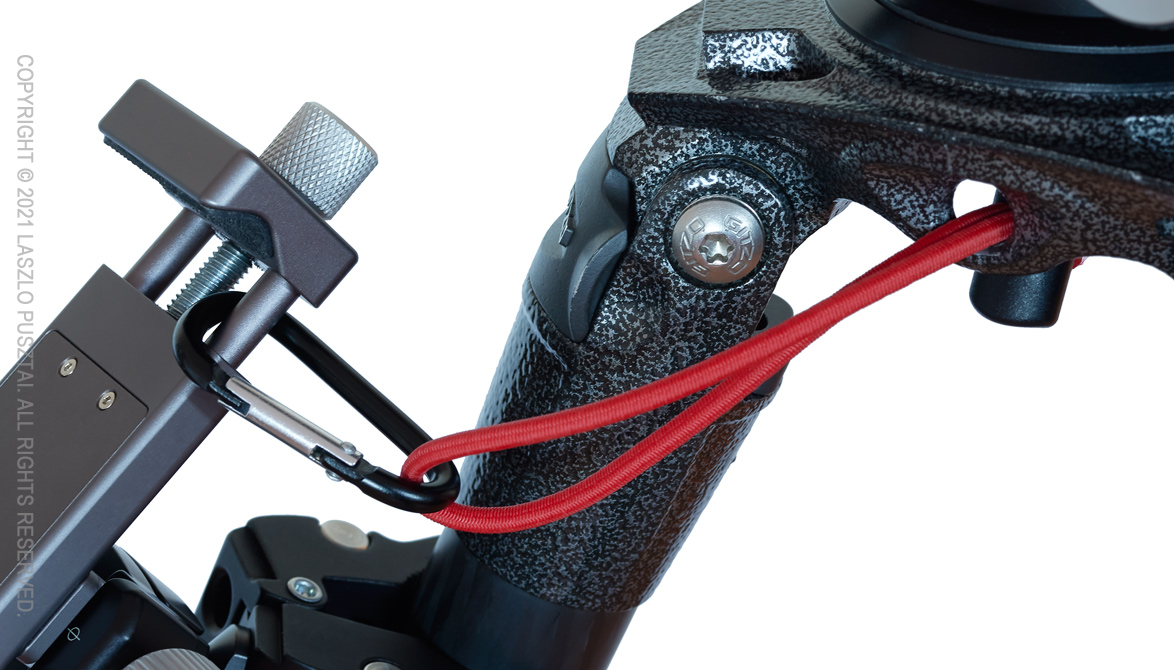
Security tether.

It is just a Think Tank Red Whip and a small carabiner.

Speaking of tethers, I have to talk about the cables that connect the iPad with my cameras. In plural, since I’m using a 5DS R and a R5 for tethered shooting, both having different USB connectors.

We learned through the years of supporting camera connectivity apps that you should avoid cheap Chinese junk cables and adapters. They are unreliable and most of the time do not work at all. We maintain a list of certified cables and adapters, and can’t stress enough the importance of high quality cabling.

With the R5 I’m using the cable that was included in the box, and with the 5DS R Cable Matter’s 1m long USB-C to Micro B 3.1 cable is my preferred choice.

Why not Wi-Fi? Well, Canon’s Wi-Fi connectivity implementation is a pain to use and is significantly slower than USB. Not to mention that I prefer not to be surrounded by Wi-Fi smog while enjoying nature.

The whole mount packs relatively flat, which I can slip into an outer pocket of my backpack or shooting vest. Even the iPad fits easily into a side pocket of my old Domke vest.

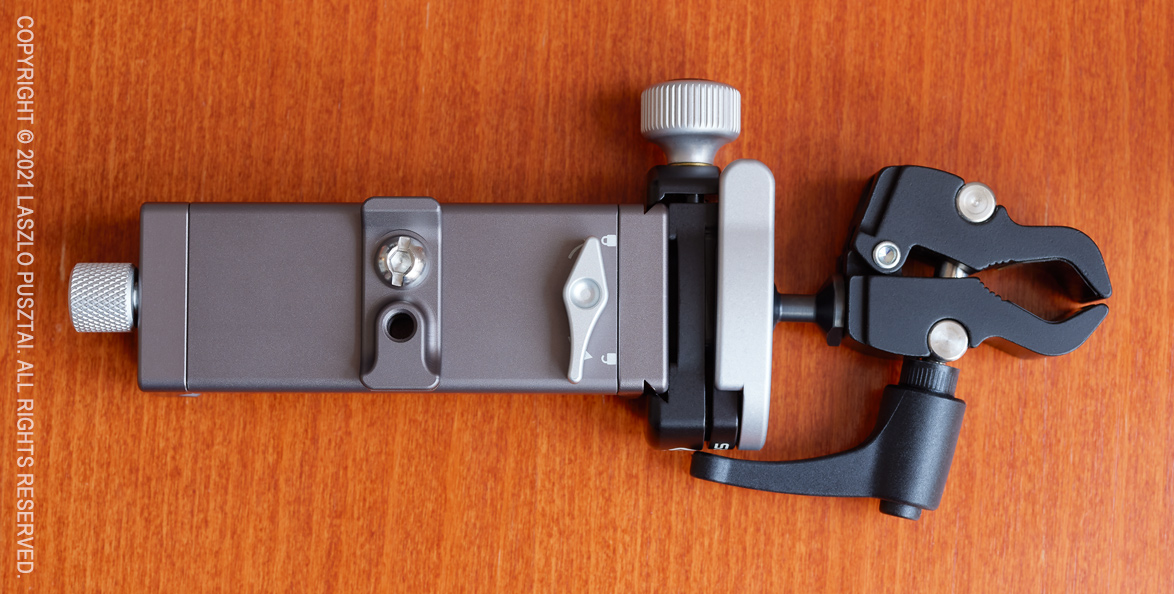
iPad holder and mount packed flat.

How light it is?

The holder and the mount (as shown above) plus the security tether weighs 357 grams. Add 458g for the iPad Air 4 and 83g for the two cables. 898g in total. Not bad for a pro-level tethering solution.

You may have noticed, but I’d like to mention it explicitly: with Kuuvik Capture you don’t need additional boxes, batteries, etc. Just the iPad and a USB cable. Or the camera’s built-in Wi-Fi in case wireless floats your boat.

I’m really happy with this solution, which perfectly augments the app’s ease of use.

Honestly, I feel like I’m cheating when shooting with this rig. It’s so easy to accomplish previously complex tasks, such as obtaining perfect focus with high-megapixel cameras or exposure evaluation. Not to mention the sheer joy of seeing just-captured images on a large screen.

  ☕ ☕ ☕

Did you enjoy this post? Consider buying me a coffee if so.

Kuuvik Capture 5.5 : Multi-Point Live View on EOS R5

The latest update to my Canon EOS tethering app, Kuuvik Capture, is now available for Mac and iPad. The headline feature is multi-point live view availability on the EOS R5.

When R5 support was introduced in Kuuvik Capture 5.2, the release notes indicated that multi-point live view is not available due to firmware bugs. Later Canon informed me that these “bugs” were actually “by design” behavior, and not going to change.

Fortunately, I’m a sucker for impossible problems, and was able to make it happen what Canon declared impossible. So multi-point live view is now working nicely on the R5. The only limitation – shared with the 1D X Mark III – is that depth of field preview is not available during multi-point live view. This is caused by another odd firmware behavior. Speaking of which…

This release also works around the aforementioned issue when moving to a marker: if DoF preview was active before the move, it will be re-activated after the new position is set.

On the iPad, a fine-tuned gesture detection improves long-tap handling when a tap is used to stop flick panning. The original implementation drove me nuts by bringing up the context menu way too early.

Plus the iPad version sports the missing “local network” permission handling message discussed in my former post.

We have published “privacy nutrition labels” for the app. It’s rather simple: we do not collect data from Kuuvik Capture. We are in the business of making and selling software to you, and not selling your private life to some sneaky data brokers. This is one reason why the prices of our apps are what they are.

The update is free for existing Kuuvik Capture 5 users. We also offer an upgrade from 2.x-4.x to version 5.

Kuuvik Capture 5.4 Released

The latest update to my Canon EOS tethering app, Kuuvik Capture, is now available for both Mac and iPad.

With this release, we’re starting to roll out a new focus bracketing engine. Building on new features of the DIGIC 8 and DIGIC X processors, Kuuvik Capture can now execute focus brackets with the mirror locked up during the entire bracket (on DSLR cameras), saving time and reducing mirror wear. The new engine is initially available for the EOS-1D X Mark III and 250D/Rebel SL3/Kiss X10/200D Mark II. Of course we’re planning to bring it to other cameras as well in the future.

The new engine also drives focus bracketing for the EOS R5, much faster than the old one did. Electronic shutter is supported for focus brackets with both the 1D X Mark III and the R5, resulting in minimal shutter and mirror wear, and rather quick operation.

Firmware for DIGIC X-based cameras unfortunately still full of bugs hindering proper tethering operation. A newly discovered one is that once depth of field preview is engaged, you won’t be able to move around the point of operation (that is, can’t move around in live view when zoomed in, or can’t jump to a marker). This is a rather serious oversight from Canon.

We’re mitigating this issue by automatically turning off DoF preview when it would break the operation you are going to perform. For example, one typically uses DoF preview with the jump to marker feature to be able to assess depth of field with the current focus placement. We faced a choice here, either a) jumping to a marker would silently fail when DoF preview is on; or b) turn off DoF preview and do what you asked for. B is a clearly better solution here, and we consistently do the same in case of all other operations where the bug would cause a problem.

On the 1D X III this bug also causes issues with multi-point live view, so we completely disable DoF preview during multi-point live view.

The update is free for existing Kuuvik Capture 5 users. We also offer an upgrade from 2.x-4.x to version 5.

ShutterCount 4.7 Released

The latest update to my ShutterCount app became available on the App Store earlier this week.

Newer Canon cameras, such as the EOS R and 1D X Mark III, feature a fully electronic shutter. Since it’s fully electronic, using it doesn’t count as “real, proper” shutter actuation. But as the cameras report the number of images taken with it, we thought letting you know that number would be a fun little addition to the app.

Mechanical and electronic shutter actuation counters on the Distribution Chart

The Distribuiotn Chart is the only place where the electronic counter is displayed, all other tabs use just the mechanical counter that actually contributes to shutter wear. As a consequence, you need either the Pro edition or the Live View pack for this feature to work. Cameras that provide this info are the 1D X Mark III, R, and “partially” the R5.

Partially, because there’s one more bug in the R5 firmware… Customers started reporting problems with the R5’s counter not being properly updated. We begun investigating these issues, and then suddenly the counter of my own R5 dropped from 3000 back to 1000.

Further analysis discovered that the camera fails to properly update or even corrupt the counter value. So now the app displays a warning if this is detected, and instead of the mechanical only counter, the value we display will include electronic actuations.

Handling the shutter counter bug found in the EOS R5 firmware

Yes, it may show a bigger number, but much better than having nothing at all. We sincerely hope that Canon will address this in a future firmware update.

Speaking of camera firmware bugs, we’ve added an interesting new feature that allows you to display the raw copyright information as appears in the camera’s memory. I was surprised to discover that Canon EOS firmware fails to properly handle this personal data, leading to potential leaks. Read my former post for full explanation.

Besides displaying raw copyright information, you now have a tool to properly, securely wipe owner name, author name, copyright and (if the camera supports it) IPTC information before selling a camera, for example. Both of these features are available from the Camera menu on a Mac and on the Camera Settings screen (available from the More tab) on iOS. Both require either the Pro edition or the Plus Pack, and can be used while a camera is connected.

I would like to note that in iOS 14.2 Apple finally fixed the non-operation USB connection bug introduced with iOS 14.0, so you can use this convenient connection method again.

Version 4.7 is also optimized for macOS Big Sur and runs natively on Apple Silicon Macs. The update is available on the respective App Store for your Mac, iPhone or iPad.