The latest update to my Kuuvik Capture camera remote control app went online earlier today. Although it looks like a small update on the surface, there’s a huge change under the hood. This version contains the 3rd generation of my digital camera library – with full Wi-Fi and Ethernet connection support.
You may remember that we had dropped the network camera option during the beta, because Apple’s PTP-IP (the protocol used to talk to the camera over Wi-Fi and Ethernet) implementation turned out to be unreliable under heavy load. Not to mention the side effect that Image Capture started every time we connected a camera.
So I took the challenge and developed a completely new PTP-IP transport component, debuting in Kuuvik Capture 2.2. If you think that it’ll appear in other apps in the future, then you’re on the right track… But let’s concentrate on Kuuvik Capture now.
Connecting your camera via Wi-Fi (or Ethernet)
First of all, you’ll need either a Wi-Fi equipped camera (6D, 70D), a built-in Ethernet socket (1D X, 1D C) or a separate Wireless File Transmitter (5D Mark III, 5DS, 5DS R, 7D Mark II, 1D X, 1D C) for this to work. Only Canon’s transmitters are supported, third party Wi-Fi remote control boxes will not work. Please check the tech specs for the full list of compatible equipment.
Canon cameras provide connectivity in several ways. The most complete is the EOS Utility connection mode. For this mode a camera needs to be paired to a given app on a given computer. Using two apps on the same computer? You need to pair the camera to them separately, and only one can be active at a time.
The computer side of this pairing process is dramatically simplified in Kuuvik Capture 2 compared to both version 1 and Canon’s EOS Utility.
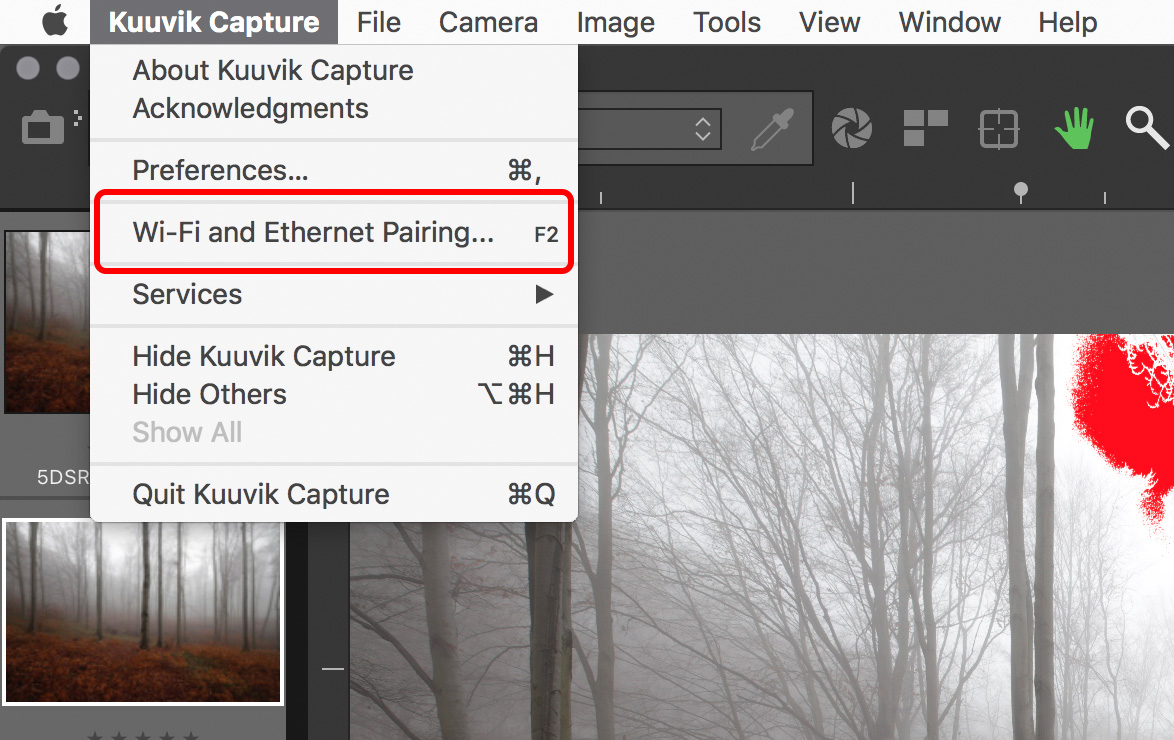
Kuuvik Capture now needs to be “pairing mode” to accept a pairing request coming from the camera. This mode is accessible through a new menu item (or by pressing F2).

Pairing can be initiated from the menu.
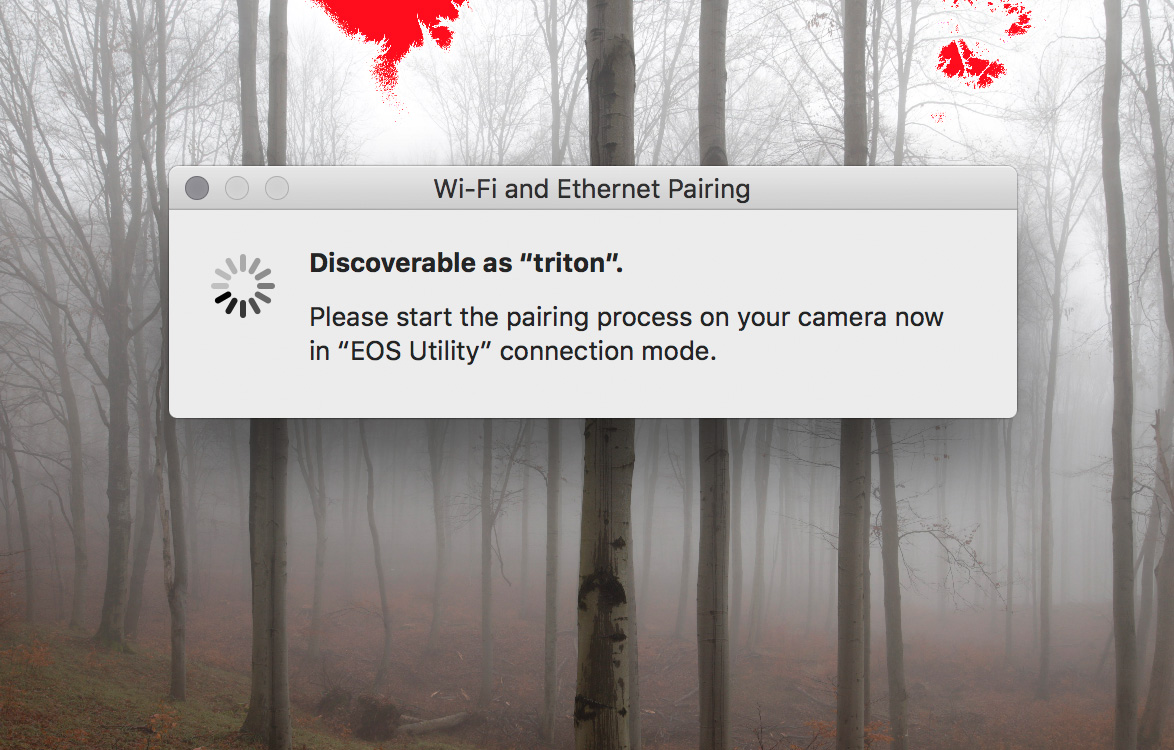
Kuuvik Capture displays the pairing window (shown below) while in pairing mode. This window also shows your computer’s name, which will appear on the camera’s LCD during the last pairing step, so you can double-check that you are pairing to the computer you were intended to.

The pairing window. Kuuvik Capture is ready to accept pairing request only when this window is displayed.
And that’s all you need to do on the Mac.
Once in discoverable state, you can start the configuration process on your camera. The process consists of three large steps:
- Choose a connection mode.
- Configure your network.
- Do the actual pairing.
They are documented in your camera’s or wireless transmitter’s user manual, but there are a few important points to consider.
First, please don’t start any Canon app that may be mentioned in the manual. You are now pairing to Kuuvik Capture, and not to Canon’s apps.
For step 1, you must use the Connection Wizard on cameras where it’s available (e.g. 5-series, 7-series with the external brick), otherwise you won’t be able to complete step 3. On the 6D and 70D choose the Remote Control (EOS Utility) mode. On other cameras choose EOS Utility mode in the Connection Wizard.
In step 2, the camera will ask for network specific parameters (whether it’s wired or wireless, plus various options and a password specific to your network). This is the most complicated part of the entire process, but Wi-Fi setup is such a thing… I’d recommend to study the camera/transmitter manual beforehand.
Out in the field with no network to connect to? My previous post shows you how to create a fast and secure Wi-Fi network on your Mac!
The last step is the actual pairing. As the LCD indicates, this is your last chance to put Kuuvik Capture into pairing mode. It may take up to 1.5 minutes for the camera and your Mac to find each other.

This is how the camera’s LCD will look like as soon as they found each other:

Pairing should be done once (unless in the meantime you paired your camera to another app, another computer, or used another network). To deal with these different scenarios, the very last screen in the process (after clicking that OK button) lets you save up to 5 (3 for 6D/70D) setups into your camera’s memory. But if nothing has changed, Kuuvik Capture will find your camera automatically the next time you turn it on and connect to the network, so the pairing is not necessary every time you want to use a Wi-Fi or Ethernet connection.
When pairing has successfully completed, the camera’s LCD will turn black, the pairing window will disappear, and the camera’s name will show up in Kuuvik Capture’s camera selector.
Notes on Wi-Fi speed
It seems that Canon implements one of the lowest speed classes for each of their Wi-Fi implementations. This is 150mbps for the external 802.11n bricks (using only one spatial stream), and a shockingly low 60mbps for the 6D and 70D (despite they advertise it as 150). So don’t expect miracles and be prepared for 12-15 second downloads on these slower cameras. On the other hand, the external bricks are fast enough to be perfectly usable when the network signal is good.
Well, speaking of bad, flaky networks. While I absolutely hate to add new configuration options (one more thing for you to deal with), this time it was a must.
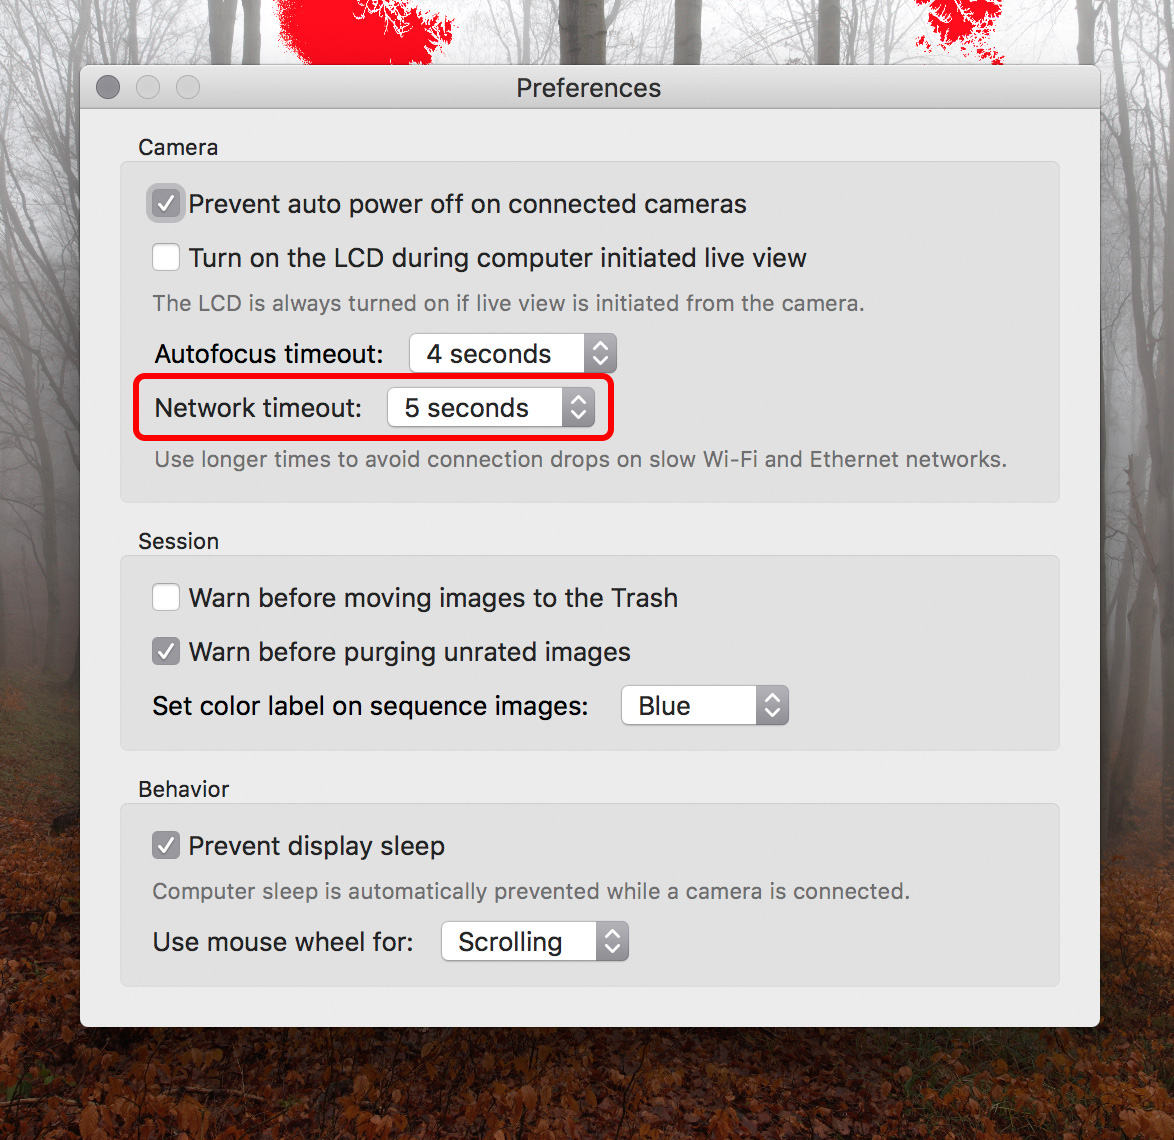
Wi-Fi networks can become unbeliveably slow (think longer distances and/or interference), causing the camera to disappear from Kuuvik Capture. A longer network timeout (a longer time allowance for intermittent network errors to clear) may solve this, but at the expense of delaying the detection of actual issues (such as when the battery dies). So the Preferences window now has an option to control this.

The default is 10 seconds, which we found to be suitable for most Wi-Fi networks. You can go as low as 5 seconds or as high as 30 seconds. My personal preference is to go with the lowest number, and raise it in the presence of connectivity issues.
Other new features
There are two of them. Customers have asked for more, longer time options for mirror lock-up auto-release. So we’ve added 8s, 10s and 15s to the palette. Also the new white priority white balance mode introduced with the 5DS/R is now available on the white balance control.
Availability
The update is free for existing Kuuvik Capture 2 customers. New users can download Kuuvik Capture 2 from the Mac App Store.
For more information about the app, please visit it’s microsite, or check out my posts.


