Technical Camera 1.6 : Keeping the Lowest ISO

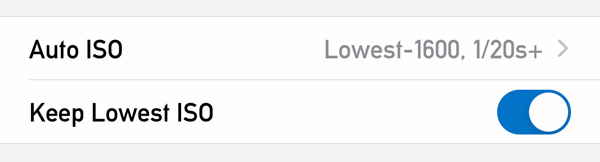
Technical Camera 1.6 introduced a new option, Keep Lowest ISO. But let’s start with a little background information.

Multiple cameras on an iPhone usually have different ISO ranges. For example on the iPhone 11 Pro Max, the ultra wide camera’s ISO range is 21-2010, while the wide camera’s range is 32-3070. The telephoto camera is capable of ISO values identical to the ultra wide.

The difference on the high end of these ranges doesn’t really matter as everything above ISO 400 tends to produce unacceptable results for serious photography, and ISOs above 1600 are pretty much useless.

But the low end is different. You have to use the lowest ISO possible to get the highest image quality. And switching between cameras having a different lowest ISO value in manual ISO mode was a bit of a pain, as you had to adjust the manually set value every time.

This is no longer the case in version 1.6. If you turn the Keep Lowest ISO option on in the menu, the app will automatically set the lowest possible ISO on the camera you switched to, given that you had the lowest ISO set on the camera you’re switching from. Please note that this works only in manual ISO mode. And that’s it. A pretty simple but highly effective feature for those pursuing the highest possible image quality even in mobile photography.

Technical Camera : Auto ISO

Technical Camera features auto ISO capabilities usually found on higher-end cameras, and are unique in a mobile photography app. Auto ISO is active during fully automatic exposure and even when you set the shutter speed manually.

The following screen shot shows its configuration screen.

Auto ISO Configuration

You specify the allowed range with Minimum ISO and Maximum ISO. The range for minimum is 25-400 plus Lowest, and for maximum it is 50-1600 plus Highest. Both in whole stop increments. But wait, what Lowest and Highest means?

Let’s take my iPhone 7 Plus for example. The native ISO range for the wide angle camera is 22-1760, for the telephoto 20-1210. These values do not fall onto whole stop boundaries. Lowest and Highest are a way to use the ends of the native ISO range. So if you set minimum to Lowest on the 7 Plus, then the auto ISO algorithm will use ISO 22 as minimum for the wide camera and ISO 20 for the telephoto. This gives a slight quality advantage over using the whole stop ISO 25 value.

Speaking of the auto ISO algorithm, it is different for fully automatic and manual shutter speed modes. In the latter, it simply keeps the ISO value within the specified range. But in fully automatic mode two additional settings come into play. With Minimum Shutter Speed you can specify the preferred slowest shutter speed. The app will begin increasing ISO from the minimum when light is low and this shutter speed is reached. If there’s enough light to work at minimum ISO, then we’ll begin to increase the shutter speed. That is, the algorithm maintains the lowest ISO possible (to avoid higher ISO noise). The range for the shutter speed minimum is 1/20 – 1/4000 seconds, in full stop increments. Given the very short focal length of the iPhone /iPad lenses, 1/20s is hand-holdable without an issue.

But why isn’t that minimum even lower? The answer is screen refresh rate. With an 1/5s exposure you can’t keep a 20-30fps refresh rate, it will drop to 1/5s. And not just that, but exposure calculation and response to lighting changes also becomes slower. That’s why we chose the 1/20s default – as a good practical balance.

There’s a trick, however. By turning on Allow Slower Speeds the app will lengthen exposures beyond 1/20s in case the maximum ISO is reached. This could be very handy in low light situations.

Don’t be afraid to experiment with these settings, since you can always reset them to factory defaults with Reset to Defaults.

Technical Camera is available for pre-oreder now on the App Store, at a 30% discounted price. It will be released on June 12.