The EOS R Diary : RF 50mm f/1.2L USM

As I did mention in the first installment of this diary, one of my reasons to get an EOS R was the RF 50mm f/1.2L USM lens. You might have read in other reviews that it’s worth to buy an EOS R just to be able to use this lens. Well, this isn’t an exaggeration. On my subjective lens quality scale it scores great.

My subjective lens quality scale have eight levels: awful, weak, mediocre, decent, good, great, excellent, and exceptional. To put you in perspective, I consider the Zeiss Otus 1.4/28 and Rodenstock HR Digaron-S 100mm f/4 to be exceptional. The Zeiss Otus 1.4/55, the Zeiss Apo Sonnar 2/135 and Rodenstock HR Digaron-S 180mm f/5.6 are excellent. The Canon EF 400mm f/4 DO IS II USM and EF 500mm f/4L IS II USM scores great. And the Canon EF 35mm f/2 IS USM gets a good rating. Keep in mind that these are subjective ratings, and sometimes a lens moves from one class to another in my view. But generally everything at great or above have very good image quality and is a joy to use.

Compared to the Otus 1.4/55

The 50/1.2 is roughly as big, as heavy and almost as expensive (2000 vs 2700 EUR net) as the Otus 1.4/55 – one of my all time favorite lenses. Let’s first see why I think that the Otus is a better choice if you don’t need autofocus.

Must be careful with strong backlighting

Two things. Well, actually three. The first is that the 50/1.2 is rather susceptible to flare, while you can basically shoot into the Sun with the Otus with zero flaring. It was quite shocking to realize this after all those years spent with flare resistant Zeiss glass. So you have to be careful when shooting backlit scenes with the 50/1.2. But this explains the oversized lens hood…

The second is very strong vignetting. It is easily correctable in post-processing, though. But keep in mind that vignetting is visible even at f/8.

Last, and maybe most importantly, the 50/1.2 breathes like hell. This practically renders the lens unusable for near-to-far focus bracketing. In comparison, the Otus breathes way less, but still exhibits some image size change.

Focus breathing refers to the image size change when focusing distance changes. All lenses breathe by default – unless they are corrected for it. The 50/1.2 doesn’t seem to be corrected much.

Why Does One Want the 50/1.2?

Simply put, this is the finest 50mm autofocus lens I have ever used. Focus acquisition is quick, despite the motor has to move 340g of glass and metal around. But this snappiness is not a surprise since the the focusing motor is borrowed from the new 400 and 600mm super telephoto lenses. The only issue is that Dual Pixel AF systems are totally blind to horizontal detail, and you’ll have problems focusing on the edge between the ocean and the sky, for example.

Of course one wants an f/1.2 lens for bokeh. And the 50/1.2 will not disappoint here. Although depth of field is razor thin, and you’ll end up stopping down a bit. But in any case, out of focus areas are rendered in a creamy smooth way, with nice transition between sharp and unsharp. This reminds me how German glass renders, and not typical for Canon. Out of focus areas are also free from contamination (colored haze, chromatic aberration, etc).

Nice creamy bokeh

The image above was shot for my favorite confectionery, and shows not just the beautiful bokeh, but the high degree of freedom from aberrations (look at how the metal bowls are rendered, despite being shot through the side glass of the fridge and under spiky, cold fluorescent light).

This freedom from aberrations is what I want in a lens these days. This ensures a transparent, airy rendering of the scene. Just the way I see it.

Colorwise the 50/1.2 has bit warmer atmosphere than I would prefer (like the 500/4). I do prefer the colder images Zeiss glass produces. I sincerely hope that Canon will finally introduce some consistency into how its lenses render. The Zeisses I use are consistent, but Canons are all over the place. The 50/1.2 would be a good reference rendering style for future Canon lenses.

With that said, I do like the images from this lens. They look natural and are full of detail. And yes, we arrived to one of the prominent features of the 50/1.2 – its high resolving power. While the EOS R isn’t a very high resolution camera, the 50/1.2 is in the same league as the Otus 55 and HR Digaron-W 70 on this body. Image field also seems to be rather flat (unlike the Otus, and most Zeiss lenses, where you should be very careful with focus placement).

The following image is just a handheld shot, with no tripod and focusing at the center. It had to be corrected for vignetting, though. It was shot at f/8, as the EOS R is a medium resolution camera and you don’t have to worry about diffraction. Which makes the EOS R and 50/1.2 combination a very easy to shoot one.

Natural color and plenty of detail

Construction and Handling

It is a large lens. Thicker than the Otus 55 because of the focus motor. Thicker than it would be convenient even for my large hands. But you’ll get used to it. I did. And the lens hood is humongous… At least it’s a constant diameter design, so no extra space is needed for the hood in your bag.

Fortunately inner focusing is employed here, as I have severe aversion to protruding lens designs. But the front of the lens is not weather sealed, meaning that a 77mm protector is advised to be used is inclement weather conditions.

Speaking of inclement weather. My very first shot with the Otus happened on a cold November morning. My hand literally froze to the lens (and I was wearing a light glove). So the use of plastic as the exterior is very welcome on the 50/1.2.

As I did mention in my EOS R customization post, focus ring rotation behavior on my EOS R (ill-named as sensitivity in the menu) is linked to rotation degree, resulting in 360 degree focus ring rotation, which is quite nice for manual focusing. I still think that rotation speed sensitive behavior is useless.

It’s Almost Always in My Bag

When I shoot from a car or boat, and have capacity to carry a secondary bag, then the 50/1.2 and the EOS R comes with me. It was rather surprising, since the 5DS R and Otus combo is a much better one. Well, except that the R system is way easier to shoot, and reach for it when I have no inclination to set up a “proper” camera.

All in all, if you can live with its shortcomings, the Canon RF 50mm f/1.2L USM could be a very nice and high performance addition to a serious photographer’s toolkit.

  ☕ ☕ ☕

Did you enjoy this post? Consider buying me a coffee if so.
Zeiss Otus 1.4/55 ZE First Impressions

It’s both hard and easy to write about the Otus. Hard, because there are qualities in this lens that one has to witness in person. And easy at the same time, since there are so many good things about it. So many, that one tends to forget about all the minor glitches and imperfections.

I didn’t want to join the “crap shot with an Otus” gang you may find on different forums, so went out to catch the last days of fall. I have the 55 for about a month now, but had only a few days to work with it since its arrival (partly because natural reasons, but mostly because it went back to Zeiss after the first days – more on this later).

Image Quality

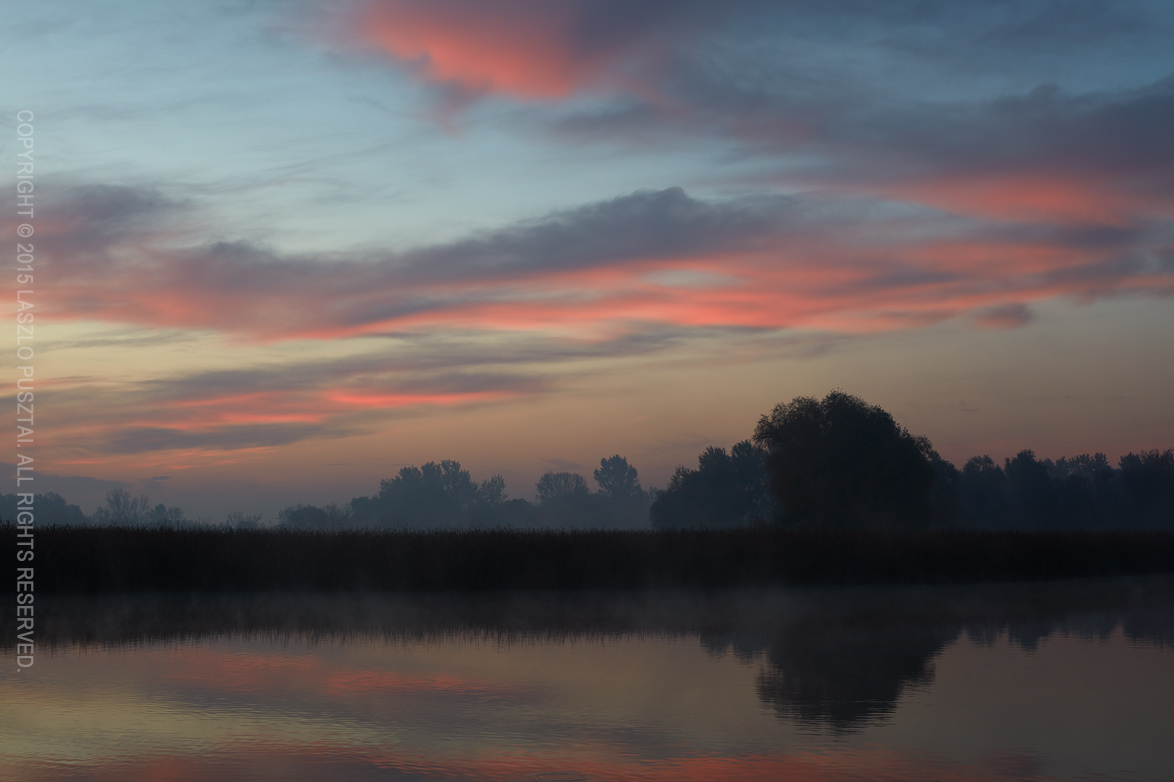
It’s among the best I’ve ever seen. And I don’t just mean its high resolution. Take the following image for example. I’ve shot this scene from my favorite port on Lake Tisza more than a couple of times.

Morning on the Lake

Morning on the Lake

None of the other images have this airy, three dimensional feeling that draws the viewer into the image. Some manufacturers refer to the residual aberrations in their products as the lens’ character. The character of the Otus is that it has no character. It was shocking when I noticed it with the Apo Sonnar 2/135, but the Otus 55 is the same. Even mundane subjects look good when photographed with these lenses. They render the scene almost as I see it.

I was in constant awe during the first morning with the Otus. I hadn’t had this feeling since the early days of digital photography. With the D60, 5D and 1D Mark II, L lenses were better than the cameras. But since the 5D Mark II and III arrived (not to mention the 5DS R), lens problems became more and more visible and partly ruined the game for me. It’s pretty devastating to shoot a great scene only to realize later that your lens is not up to the task. My recent move to an all-prime setup alleviated this problem to some degree, but only the Otus was able to evoke that feeling again. Even at 100%, all I see are gorgeous pixels.

No, it’s not completely, 100% free of all optical aberrations, but being an apochromat, the most annoying color errors are corrected to a very high degree. What remains is strong vignetting wide open, and barrel distortion. Neither of those is very hard to correct during post processing, it you want to correct them at all. Vignetting really helps the following image.

Late Fall Colors

Late Fall Colors

This was shot at f/1.4 and the quick transition from sharp to unsharp helps to attain three dimensionality. The lens is completely usable at f/1.4 without any restrictions. You don’t have to stop down for better image quality – this is huge creative freedom.

The only aberration that could be problematic is distortion. It’s clearly visible in some situations (think architecture), but I would strongly recommend leaving it uncorrected if possible, as distortion correction may kill the lovely micro-contrast of the Otus. Try to work around the distortion with your composition instead.

Speaking of contrast, the high contrast really insists black and white conversion, as you can see in my previous post.

Handling

I won’t talk about build quality, since it’s as good as one can wish for, so let’s move on to handling.

This is a large lens. I won’t say huge – huge is the word for the first generation Canon 600mm and 400mm IS lenses in my book. Its weight really helps to stabilize the camera if you must shoot handheld. In other words, it’s like a 24-70 zoom.

Small focusing ring rotation is a recipe to endless frustration when it comes to manual focus – and the Otus’ 245 degree rotation makes it easy and a joy to focus the lens. As you might already noticed, there’s no autofocus. But I would nevertheless recommend to calibrate your AF microadjustment value, because the AF sensor still works for focus confirmation – and precise focusing is crucial to extract the maximum attainable performance.

A sturdy tripod and a stable head is the real home of the Otus (especially on the 5DS R). I also prefer to shoot tethered to Kuuvik Capture for all the benefits the larger screen can bring.

The Glitch

otus-lintAt the end of the very first morning I touched the rear lens element. And when I started to clean it, I noticed a long lint (thread? hair?) inside the lens. It was visible on the very first shots I made of the lens for the insurance company.
So it went back to Zeiss immediately (actually to the dealer and they sent it to Zeiss). I received the lens earlier today, lint removed and focal flange distance readjusted. Because it was “out of spec”. I’m talking about a brand new, premium lens here.

I don’t know, but there’s something terribly wrong with quality control these days. I received the first 5DS R completely dead, had to send back several iPads because of screen uniformity and color cast issues… It’s not only Zeiss, it’s the industry in general.

The question is not whether you’ll get a lemon, the question is when will you get a lemon. And how the dealer and/or the manufacturer handles the situation. Fortunately for me, all these problems were quickly and successfully solved by the dealer and/or the manufacturer. Free of charge. But I cannot stress enough the importance of buying from a reputable dealer… And the importance of inspecting/testing new gear.

Also note that even a lint this large rarely shows up on real world images. The two pictures above (and the black and white if you followed the link) were taken with the lint present – and you don’t see it. It reduces contrast and actually became visible on homogenous backgrounds only at some focusing distances.

Oh, and you can see on this image how hard is to keep the rear element clear. It’s not Canon’s fluorine coating. The rubber focusing ring is also a dust magnet. But a little extra cleaning work is acceptable in exchange for the lens’ superlative imaging qualities. I just hope that the large opening for the distance scale will not suck dust and dirt into the barrel.

Compared to the Sigma 50mm Art

Ok, but how it compares to the Sigma? This is a question you surely will ask when thinking about a high-grade normal lens. I bought a Sigma last year (my first impressions review is here) for the 5D Mark III. The 5DS R stirred the pot quite a bit, to a degree where I decided to spend the $4000 on the Otus and part with the Sigma.

Please note that we’re splitting hairs here – both lenses are vastly superior to what Canon or Nikon has to offer. The Sigma is a great lens, just not on the level of the Otus. It’s quite close, and if you don’t want to spend $4000 on a normal lens, the Sigma is an excellent choice. But the Otus is better…

The Otus has higher resolution in the corners. In the image center the Sigma is pretty close (on the 5DS R), but the corners are a different story – even at f/5.6. Color correction is much better in the Otus. I prefer the overall “look” from the Otus. It’s more natural, while the Sigma tends to be a little clinical. Distortion is visibly less on the Sigma – this may be a serious point if you are doing lots of architecture work. Haven’t compared vignetting, as neither bothered me too much.

Focusing is by far superior on the Otus. Although the Sigma is an AF lens, it’s implementation is quite inconsistent and I was unable to arrive at a working AF tuning setup that works both at infinity and close distances. So I consider the Sigma a manual focus lens. With live view focusing it’s bearable, but it’s way faster to focus the Otus.

Conclusion

As my better half says: “we love the Zeisses”. And as she continues: “there must be a significant difference if even I can notice it immediately”.

This is a kind of equipment that will actually make your images better. Partly because of the wonderful rendering, partly because it slows you down, and finally because you’ll find much more joy in making images with this lens.

Yes, a good photographer can make good images with crappy cameras, but a good photographer can make images that sing with the Otus.

If manual focusing and the normal lens fits your working style, working from a tripod or even tethered doesn’t scare you away, and actually print your images large – do yourself a favor. Rent an Otus. And if you have the funds – buy one. This may be the best investment in photo gear you ever made.

Sigma 50mm F1.4 DG HSM Art First Impressions

I’m constantly looking for better lenses at my favorite focal lengths, and when Zeiss had announced that they are making an über 55mm lens, it immediately appeared on my shopping list. Its $4000 price while not prohibitive, I have very high expectations at that price point. And the Otus fails at two of them. I don’t think that the open distance scale is a good thing to have when I’m out in the field (except for generating trips to the service), and for $4000 I would expect 11-12 rounded aperture blades and perfectly circular aperture all the way down – like on cine lenses in this price class.

So I became very excited when Sigma’s new Otus competitor was recently announced. I read every possible review on the net (just to realize how shallow these became during the last years), and actually ordered the lens without having a solid idea how will it perform.

My copy finally arrived yesterday. I spent an afternoon on comparing it with my former 50mm lens of choice, Canon’s EF 50mm f/1.4 USM. Well, I can attest that most of the hype about the Sigma 50 Art is true.

Sigma50-5D3

Simga 50mm F1.4 DG HSM Art on the Canon 5D Mark III

I’m going to use this lens for landscapes as well as for astrophotography. While f/1.4 isn’t necessary for traditional landscapes, it definitely opens up new creative possibilities. And for astro, wider usable apertures are a must. The Canon 50/1.4 isn’t really usable until f/2.8. It’s a pretty solid performer at f/4 and up, but forget about making high quality images wide open.

The Sigma is in a different league wide open. At f/1.4 it’s a bit better than the Canon at f/2.8 – and while the difference becomes smaller, there’s an edge to the Sigma at every aperture. The Sigma is a pretty damn sharp lens. And this was one of the things I was looking for.

Its high contrast also increases apparent sharpness. But high contrast is not necessarily a good thing. It’s easy to increase contrast during post-processing, but plugged shadows and burnt highlights are not that easy to deal with. I read somewhere that the engineers sacrificed a little sharpness for increased contrast – personally I would be happier with a sharper and less contrasty optic. Given the shadow-challenged nature of Canon’s current sensors, I will need to keep an eye on the shadows constantly.

Color rendering is brutally different. Reds and especially greens come alive with the Sigma, where I needed substantial amount of work with the Canon during post. Shadows are also clean, no yellowish-brown tone to them. Overall colors are on the colder side – not something that can’t be corrected in post easily.

Except for the colder color, the 50mm Art reminds me to the magical Canon EF 135mm f/2L USM. That is, they are of similar size, similar weight, similar materials and build quality and produce similar superbly clean and detailed files. Yes, this isn’t your small and light 50mm – but are perfectly in line with other high quality primes in my bag (the 135 and the TS-E 24mm f/3.5L II). It’s not something I would bring to a vacation, however. The Canon 50/1.4 is a much better option for that.

I haven’t checked autofocus yet, as I plan to use Sigma in manual focus for 95% of the time. For manual focus, I would prefer a longer than 92 degree focus throw. I suspect that AF would be slowed down too much with longer throw.

What else could be improved on the 50 Art? Well, I would be happy to spend a few hundred more and get weather sealing. Rubber materials are a dust magnet on this lens, so a less dust attracting material would be great…

I’m very impressed with this lens. Something I didn’t feel since I got the Canon 135mm f/2L. At $950 it’s a steal (again, like the 135mm). If 50mm is something that makes your world go around, I highly recommend to give the Sigma 50mm Art a try.

Which Lenses Do You Recommend?

I get asked the above question quite often – only “which camera do you recommend?” being more popular.

Well, this piece isn’t the all too familiar “this is the best lens you must own, and here’s a link to buy it – which earns me a small commission” type. I’m not going to recommend any single lens here. But I will give you some tips on how to get an answer for this question from the only authentic source – yourself.

With freedom comes responsibility

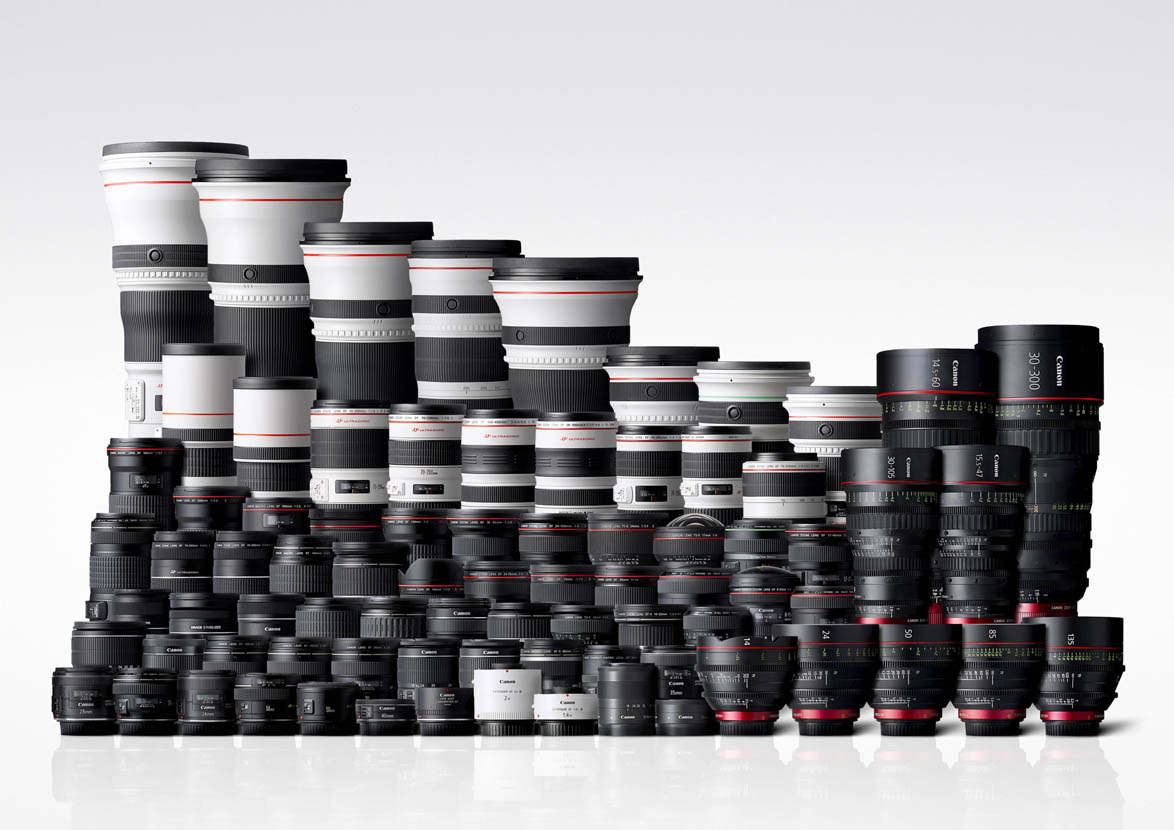
The sheer amount of lenses available for a single mount could be overwhelming. For example Canon offers no less than 76 EF/EF-S lenses at the time of writing. And this does not include 3rd party offers from other manufacturers like Sigma and Zeiss.

The Canon lens lineup at the time of manufacturing the 100 millionth lens. Image courtesy of Canon.

The Canon lens lineup at the time of manufacturing the 100 millionth lens. Image courtesy of Canon.

There is a popular – but false – wisdom that you should cover every possible focal length. Just in case you need it. I must admit that as a newbie I fell into this trap too…

But why this trap exists in the first place? Because going this way is easy. It’s pretty damn easy to pick up two or three quality zooms and be “covered”. I’m not saying that zooms are inherently bad. There are situations (when your movement is restricted and/or you can’t change lenses) when they are indispensable. I’m just saying that picking up zooms on the idea of being “covered” is a bad method of choice.

Also zooms are great for my mom, but if you are serious about photography then you should be serious about angle of view – and thus lens – choice. That is, you should make informed decisions about the lenses you use. No, you shouldn’t trust and rely on information coming from the outside (blogs, friends, etc). You must check and evaluate your own work and yourself continuously and correct the mistakes along the way. Believe me, you will make lots of mistakes – but those will teach unforgettable lessons about your vision and your personality.

The goal is to find the glass that matches you vision. Both in angle of view and character. Yes, you’ll need to work and experiment a lot. But it will be fun!

Matchmaking tips

The following is a list of tips and techniques I found incredibly useful in evaluating my own work and vision. Chances are that they will also help you.

Borrow or rent. You have to see it yourself. You can’t trust reviews on the net. So instead of buying a given lens (which may or may not fit your vision) it is more economical to borrow one from a friend or rent it. But more important is to do some real work with it! Brick walls and pets doesn’t count (unless what moves your world is either brick walls or pets, of course). Use the lens for a handful of shoots. But do it at least in two sets, a few weeks apart. Evaluating the resulting images on the camera’s LCD also doesn’t count. Process them. Print them. Use them as you normally would use any of your images. If you can’t make a single good image with the lens, then it doesn’t match your vision, so it’s better to let the given focal length go. If you think that usability, max aperture, or any other aspect sucks, then look for an alternative with the desired parameters.

Simulate. Especially useful when you can’t borrow or rent a lens, or for first quick checks. If you have an iPhone/iPad/iPod, my Artist’s Viewfinder app lets you simulate viewing angles for tons of different camera and lens combinations. Or you can tape down the zoom ring on your existing zoom to simulate what it feels like to shoot with a prime. Or crop a wider image in Photoshop. With simulation you can get a feel, but don’t forget that it’s not the real thing. You should have the lens in hand to do a final check whether you match or not.

Check your existing work. This is a pretty powerful thing. As metadata in digital images record the focal length they were shot with, you can check your previous images whether you like or dislike a given focal length. Only finished work counts, however. You will have countless images with any given lens classified as crap. Don’t let them deteriorate the results. Also don’t forget to account for format differences! In my case, digging in Lightroom’s database revealed a (then) surprising fact: even if I used zooms, all my finished landscape images were clustered around three major focal lengths: 24, 50 and 135 mm (in full frame 35mm terms). It’s not a surprise now (four years later) that these are the focal lengths I always carry.

Buy the best you can afford. Great lenses will be with you for 10-20 years, or even more. They also tend to keep their value. But most importantly, they match your vision and style, and thus are vital to your work. Do yourself a favor and don’t be cheap! You’ll be grateful 20 years later…