Kuuvik Capture 3.2 : The Dual Histogram

The very first Kuuvik Capture release introduced RAW histograms in an attempt to provide a tool for judging exposure more precisely than what regular histograms are capable of. I even wrote an article on the merits of having a RAW histogram. The conclusion of that article was that despite you have a RAW histogram, white balancing could clip channels in the converted image even if everything was fine with the RAW; so you need to see both the RAW and the processed histograms (preferably in your RAW converter) for the final decision on your exposure.

While my former article revolved around the white balance issue, other image processing parameters, like picture style and color space, also have heavy influence on histogram precision and usability. Making to see both histogram types a fundamental need. Not to mention that launching a RAW converter is not always convenient to do.

So version 3.2 sports a new Dual Histogram tool to show Kuuvik Capture’s RAW histogram along the usual one generated from processed data.

For images, the processed part is based on the JPG preview that every RAW image contains (this is what Kuuvik Capture displays, and this is the source of the histogram shown on the camera’s LCD). This represents how the image was processed by the camera. Your RAW converter will almost certainly convert it in a different way, so the final word on exposure still belongs to the converter. But the camera’s interpretation gives a solid starting point.

The processed histogram also indicates the image’s color space. Different color spaces have different clipping points – more on this later.

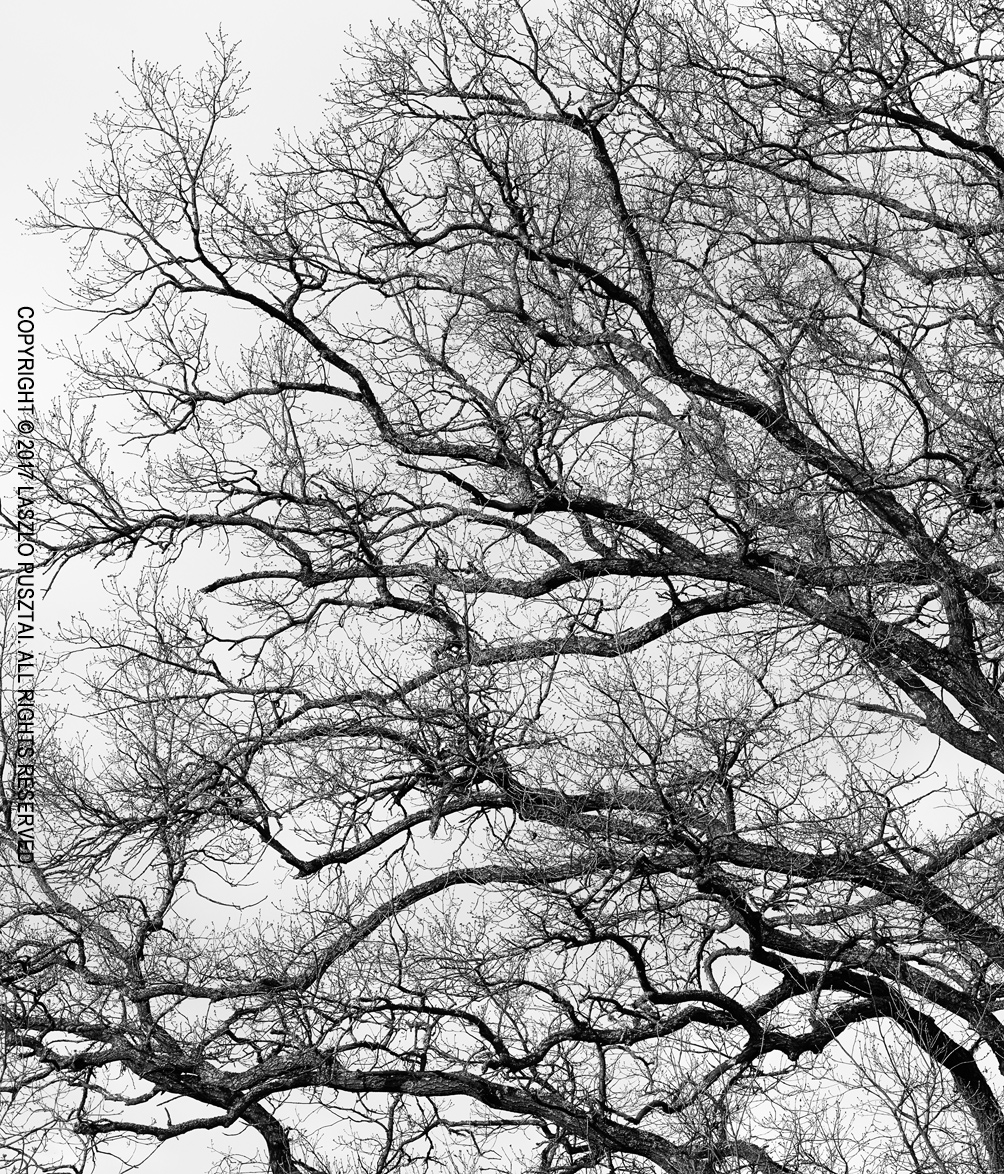
You can clearly see on the example how white balancing influenced things. You’d be in trouble having made a decision solely based on the RAW histogram in this case – the blue channel would be almost completely clipped. The example belongs to the original of the following photo (that is, before contrast stretching and other adjustments).

Ice Abstract

For live view and movie recording the camera always serves video frames in sRGB – even if you set your camera to Adobe RGB. But why is that important? Well, it’s time to talk about the effect of color space choice on histograms.

Color spaces vs. histograms

I made two photos of a regular ColorChecker chart. One with setting the camera to sRGB and another with setting it to Adobe RGB. Lighting and exposure were the same.

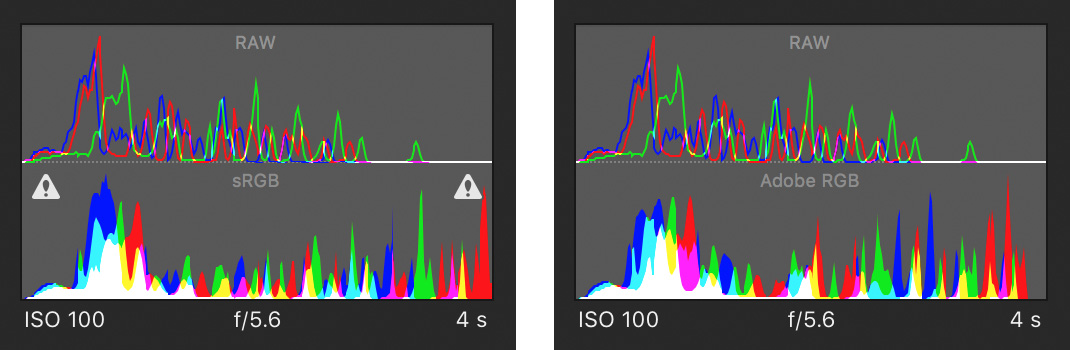
As you can see, there’s absolutely no clipping in the RAW data. And there’s no clipping when converted to Adobe RGB. But in sRGB both highlights and shadows are clipped! So live view (which is always in sRGB) may show some clipping while Adobe RGB not. And even a histogram from an Adobe RGB conversion might show clipping while there’s absolutely no clipping in the image when converted to ProPhoto RGB in Capture One.

I’d recommend to treat these processed histogram clipping warnings as different levels. The sRGB warning in live view goes off first, this should ring a bell in your head to watch more closely after taking the image, as there may be a problem. After taking a picture, if Adobe RGB shows clipping, then it’s time to either check it in your RAW converter or back off a little bit.

But RAW histogram clipping warnings are always hard facts: indicating unrecoverable data loss.

The above example explains why I recommend to set your camera to Adobe RGB: to prevent premature clipping in histograms displayed on the camera’s LCD.

A few words on JPG support

JPG files slowly become a first-class citizen in Kuuvik Capture. The JPG processing engine in version 3.2 is up to 5x faster than previous releases. This speedup is what allows efficient histogram generation and made Dual Histograms possible. JPG histogram display was also a requirement for a JPG-only workflow, which was high on our feature request list. And now it’s fully supported as you’ll see in my upcoming post.

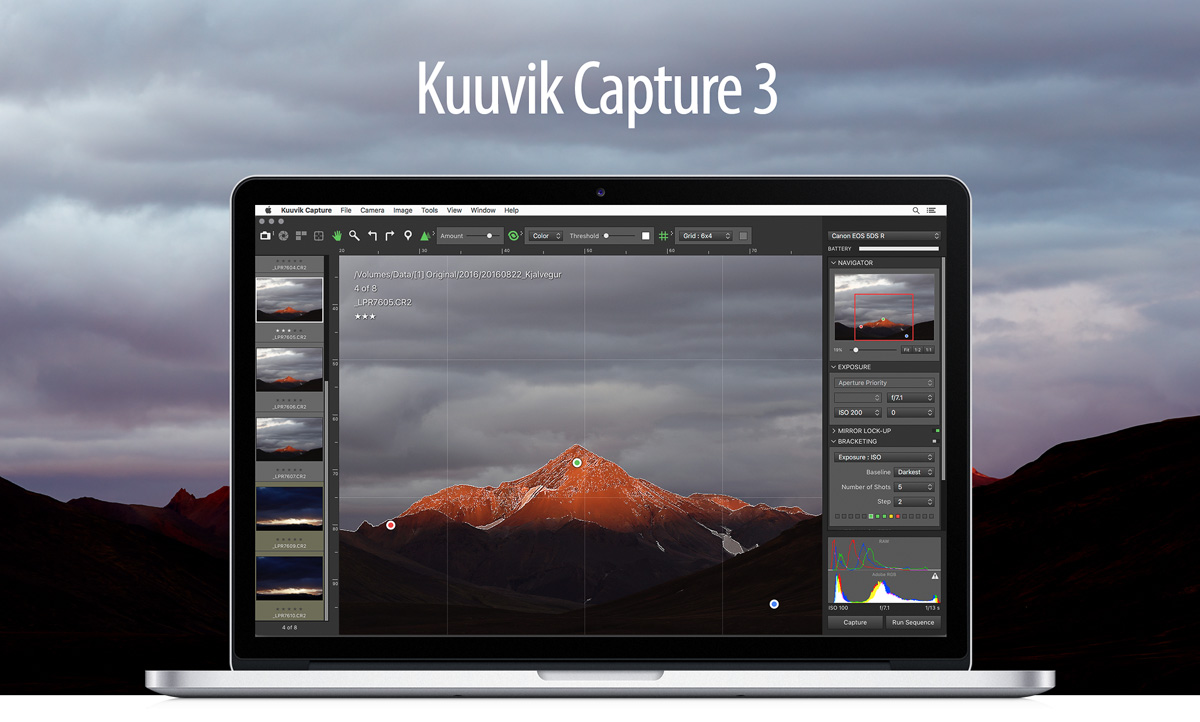
Kuuvik Capture 3.2 is available on the Mac App Store. It is a free update for existing Kuuvik Capture 2.x and 3.x users.

Kuuvik Capture 3.2 Sneak Peek

The latest update to the ultimate Canon EOS tethering app, Kuuvik Capture, is around the corner, so I thought I’ll share the new home page image.

The eagle-eyed will surely spot one of the cool new features. Hint: look at the histogram area in the lower right corner.

Introducing the ShutterCount Plus Pack

Last night we released a substantial update to my ShutterCount app in the form of the Plus Pack add-on. Let me go through all its features.

Graphing and forecasting

This is the most eye-catching addition, and I think the following screen shot speaks for itself.

A few words on how it works, though. The source of the graphs (as well as for the forecast) is your existing history logs. The horizontal axis is time, in month/year format. Vertical axis is the number of shutter actuations in thousands (k) or millions (M). Grid lines are placed automatically. There’s also a thick horizontal red line, representing the camera’s shutter durability rating, which is visible only if you are nearing it.

You have the option to display the trendline calculated from the data. This trendline is also the base for the forecast, which looks for the intersection of the trendline and the durability rating’s line. The app needs at least four measurements in a 30-day or longer interval to make a forecast. But be aware: this is just a forecast, and not future cast in stone. Your shutter may work much longer, but might even die at half of the rating. It helps you plan preventive maintenance before a long and/or important trip, though.

Date/time synchronization

This is the exact same feature we’ve introduced with the latest Kuuvik Capture update, so I’d recommend to read my post on that.

Outdated firmware warning

There are people who go to great lengths to keep their cameras’ firmware up-to-date, but there’s also quite a huge crowd who do not even know that it should be updated from time to time. This feature helps both camps.

Since Canon’s firmware updates aren’t frequent, the app contains a database of current firmware versions at release time. This database is updated with each new ShutterCount version.

History duplicate removal

If you happen to use a camera less frequently, your history logs may fill up with identical readings. At least mine did. It bothered me quite a lot, so the duplicate removal feature was born.

You have two options: manually initiate a cleanup from the history window, or flip the auto-removal preference and let the app do it for you. In case a manually initiated removal, a backup is created from the log (in the same folder as the original).

Availability

The Plus Pack is an optional add-on, and can be purchased from within the Mac and iOS versions of ShutterCount. On a Mac, click the ShutterCount > Store menu item, on an iPhone or iPad tap More on the tab bar and tap Store in the menu.

In both cases the in-app Store will be displayed, where you can make the purchase. If you have the app on more than one device, then make the purchase on one and use the Restore Previous Purchases button to get it on others. Just like with the app itself, the Mac and iOS versions has to be purchased separately.

Sea of Branches

This is the first real image made with my digital view camera setup. Just went out to get familiar with the camera, do image quality evaluations and some stitching tests. But during one of those stitching tests the left side of a tree captured my imagination.

Sea of Branches

Shot with the Cambo Actus-G, Rodenstock HR Digaron-S 100mm f/4 and Canon EOS 5DS R. A little front tilt, 15mm back fall and a few millimeters of shift to the left was used. The elegance of movements still blow my mind. Focusing was done in Kuuvik Capture.

A few words about the aforementioned stitching test. If you ever dreamed about extremely high resolution images that are pin sharp from corner to corner, this rig can easily deliver wonderful 100+ megapixel files.

Kuuvik Capture 3.1 Released

Version 3.1 of my Kuuvik Capture tethering app is available on the Mac App Store. Along the usual addition of new cameras (the 77D / 9000D and 800D / Rebel T7i / Kiss X9i this time), this version brings support for movie recording on the 6D and 80D, and extends multi-point live view support to the 80D.

But there’s one more thing. Well, actually two.

The Preferences window is now tabbed to make it smaller vertically. This is needed to fit it on smaller screens (such as the 12″ MacBook).

And the app has a new function, with an accompanying preference. Synchronize date/time with the Mac will set the date, the time, and the time zone (on cameras that can handle it) of the camera to match your Mac’s each time a connection to Kuuvik Capture is made. If you were fed up with Canon’s awkward time zone naming (the same city name could refer to different time zones on different cameras), this is a remedy. The synchronization process also sets the daylight saving time flag, so there’s no need to fiddle with your cameras at the beginning and the end of daylight savings periods – just connect them to Kuuvik Capture.

The complete list of new features, changes and fixes is available in the release notes.

Version 3.1 is a free update for existing Kuuvik Capture 2.x and 3.0 users. New users can purchase the app from the Mac App Store.

My book, Kuuvik Capture Inside Out, was also updated to reflect the new features.

So, while you are downloading and trying out time synchronization, it’s time for me to open that bottle of Laphroaig Select waiting on my coffee table. Slàinte!

Rodenstock HR Digaron-S 100/4 + 5DS R Crops

If you were wondering what kind of performance the Rodenstock HR Digaron-S 100mm f/4 lens is capable of with the Canon EOS 5DS R, here are two 100% (actual pixels) crops from my test shoots for your pixel peeping pleasure.

Click the image for 100% view on non-retina displays.

While the sRGB and JPG conversion kills some of the magic the files have, you can still see the stunning resolution and lovely rendering. Both files are straight out of Capture One 10. The lens is in the same league with my high-resolution Zeisses (28 and 55 Otuses, and 135 Apo Sonnar).

Click the image for 100% view on non-retina displays.

Aperture for both shots was somewhere between f/5.6 and f/7.1. The lens and the 5DS R were mounted to my Cambo Actus-G view camera. Focusing and capture was done in Kuuvik Capture.

These crops are from the 5-10mm vicinity of the image center, but you get the same quality to the edge of the 70mm advertised image circle.

The 70mm image circle allows for 15mm shift along the longer image side and 18mm along the shorter. There’s a 12mm-ish practical shifting limitation along the shorter image side with Canon DSLRs, however (more on this in a later post).

You can shift all the way to 22mm the Actus is capable of along the longer side – going well out of the advertised image circle. But you’ll start to lose edge/corner sharpness past 17-18mm. To put it in perspective: with 22mm horizontal shift the corners are comparable to what you get at 12mm shift with the Canon TS-E 24mm f/3.5L II. Impressive. Think about 150-180 megapixel stitches with this shifting potential.

  ☕ ☕ ☕

Did you enjoy this post? Consider buying me a coffee if so.