This is the most popular Kuuvik Capture video to date, showing most of the app’s features.
How to Make Focusing a Tilt/Shift Lens Easier
April 12, 2013 by
The tilt movement is used in technical cameras as well as DSLR tilt/shift lenses to precisely adjust where the plane of focus is on the image. Focusing with tilt is a tedious process (described here and here), but the results always worth the time!
There was a big pain point in using DSLR T/S lenses: checking what you have done. The viewfinder isn’t enough for that with today’s high resolution bodies, so you have to zoom in and check different points on the image using magnified live view. The adjust either tilt or focus. Then check the points. Then refocus… I had some images where I spent more than half an hour on fine tuning focus!
I said “was” – as it was the case before Kuuvik Capture’s Split View feature came along. I’m using this since I was halfway into developing the first prototype, and man, it can save lots of time! No, it won’t think instead of you, but the ability to quickly and visually asses what you have accomplished is priceless. It is also a great tool for learning how to focus a tilt/shift lens.
So watch the video below, and if you are using a Canon EOS-1D X, 5D Mark III or 6D with any of Canon’s great tilt/shift lenses, then grab Kuuvik Capture’s beta now! It’s that good (OK, don’t believe me, try it for yourself ;)).
The First Kuuvik Capture Intro Video
April 10, 2013 by
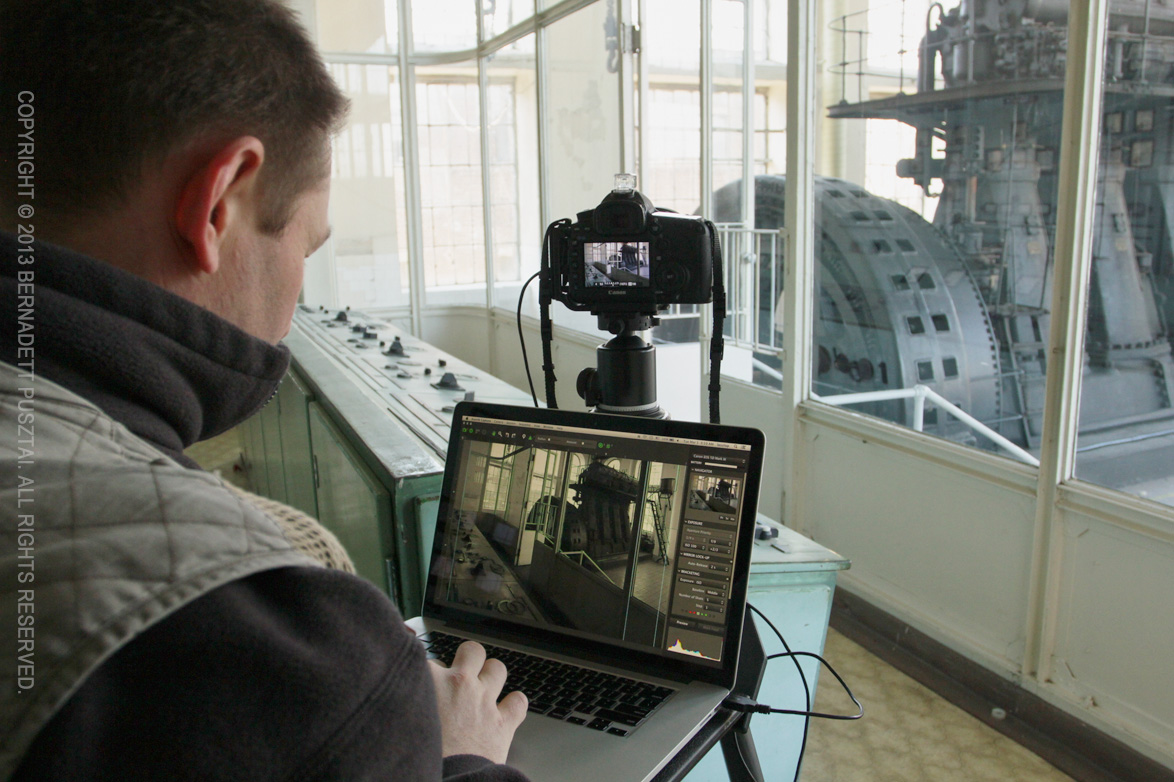
During March we were filming a few intro videos to show off some of the coolest features of Kuuvik Capture. The first one, showing how I created my generator room photo is now online on Vimeo.
I recommend you to maximize it and turn HD on – and watch for the synchronization between the camera and the app.
Making “The First Flower” with Kuuvik Capture
April 4, 2013 by
As I told you in the introduction of Kuuvik Capture, I used the software yesterday for shooting quasi-macros with the Canon 135 f/2. In this post I’ll give a detailed description how it helped me creating The First Flower.
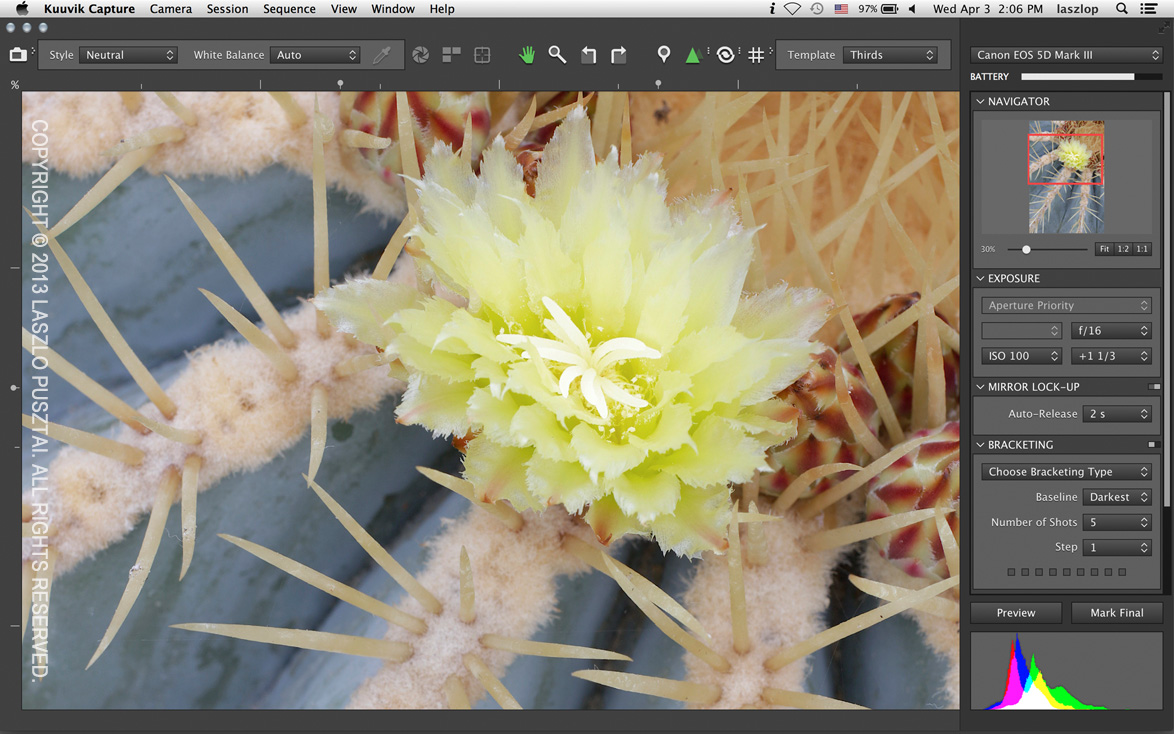
The final optimized image. Click the image for a larger version.
The biggest challenge was keeping the appropriate depth of field, without the softening effect of diffraction. I would like to expose the image at f/11 or wider, so I focused on the flower and checked the image in 5x magnification to see whether all the thorns are in focus. Unfortunately they weren’t. So I placed a marker on the flower, and another one on the lower left part of the image and entered split view. Split view can show you two or three 5x magnified parts of the image simultaneously with the 5D Mark III.
Why just 5x and not 10x? Simply because 10x is an “empty magnification” in Canons, that is you do not get more detail in 10x. This is because the 10x magnification is simply the 5x image blown up in software!
Seeing both parts at once I was able to see how much more should I stop down. I used depth of field preview and focus pulling to optimize sharpness for the thorns. I ended up shooting the first preview at f/14. Critical focus check at 100% revealed just a tiny bit of softness at the base of the thorns on the lower left, so I stopped down to f/16 and took another preview. It was good at this time.
Then came exposure optimization. I started out at +1 during the live view part, and seeing the raw histogram I knew that I have some more headroom to lighten the image, thus keep more data. At +1 2/3 stops the image became overexposed, so I lowered the exposure to +1 1/3.
Deleted the markers and turned off focus peaking to see the image in its entirety, it was what I was after (this is what you can see on the above screenshot). I marked it final. This step removed all four preview images I made during the optimization – both from the computer and from the camera’s memory card. In the studio I didn’t have to go through the selection process as I just had a single, final, optimized image.
Introducing Kuuvik Capture
April 2, 2013 by
![]() Ladies and gentlemen! It’s my pleasure to introduce something I have been developing for the past 15 months: Kuuvik Capture.
Ladies and gentlemen! It’s my pleasure to introduce something I have been developing for the past 15 months: Kuuvik Capture.
It’s simply the best tethering software for Canon that I’m aware of, sporting never before seen features like simultaneous magnified live view, a really usable raw histogram (that is, gamma corrected but with no white balancing applied), a highly useful bracketing monitor, and lots of other pretty neat stuff. The product entered public beta today, and I highly recommend you to visit the product’s homepage, sign up for the beta program and grab a copy – it’s completely free at the moment.
In the coming weeks I’ll publish a couple of technical posts about how the app works and will shed some light on a few controversial digital photography topics. So stay tuned!
Me re-shooting Generator Seen from the Control Room with Kuuvik Capture
But for the remainder of this week, I’m going to relax a bit, celebrate my 40th, and play a little with my new Canon 135/2 – of course tethered to Kuuvik Capture.


