Canon EOS cameras do not tolerate when more than one app tries to talk to them over USB. They don’t even give a beep, just silently start operating erratically. This isn’t new, this behavior is present from the dawn of the EOS system.
And yet large manufacturers are routinely caught red handed, keeping a connection to your camera when no one asked. With serious consequences. This arrogant behavior frustrates the hell out of me – imagine solving a user’s problem when he has a pile of these apps on his machine…
To make things worse, Apple had removed the ability to detect such an interference in macOS 10.12, and thus we are unable to pinpoint culprits the way we did in the past.
I already wrote about how to prevent Apple’s Photos from automatically launching when you connect a camera (you can find a longer version in my Kuuvik Capture Inside Out eBook).
This is EOS Utility’s turn. It was a great citizen that coexisted nicely with other camera control apps for years, but recent versions started to do naughty things.
I recommend against installing any Canon software in the first place, unless you have a very strong reason to do so. Don’t get me wrong, I love Canon’s cameras and several lenses – it’s extremely good at making these things. But its apps always were, and still are, sub-par. You can get markedly better results (in terms of image quality, user interface, functionality, power consumption, etc.) with proper third party apps.
For a long time EOS Utility was a single app. But recently it’s been split into three: EOS Utility 3 for new cameras, EOS Utility 2 for older ones, and a shell around those, which is now called EOS Utility (formerly this was a separate utility for Wi-Fi pairing). The problem child is the latter, EOS Utility, which thinks it has a right to always run and talk to your cameras – without your consent. Start it once, and you need to run extra miles to get it out of the way. These extra steps are the topic of this post.
![]() Once started, the EOS Utility shell’s icon appears on the menu bar. Right-click the icon, choose Quit, and you may think it’s gone. Well, until you start your computer next time.
Once started, the EOS Utility shell’s icon appears on the menu bar. Right-click the icon, choose Quit, and you may think it’s gone. Well, until you start your computer next time.
This is because it created a startup item. But fortunately this item can be removed easily in System Preferences. Go into Users & Groups, and then click Login Items. You’ll see something like the screen below.
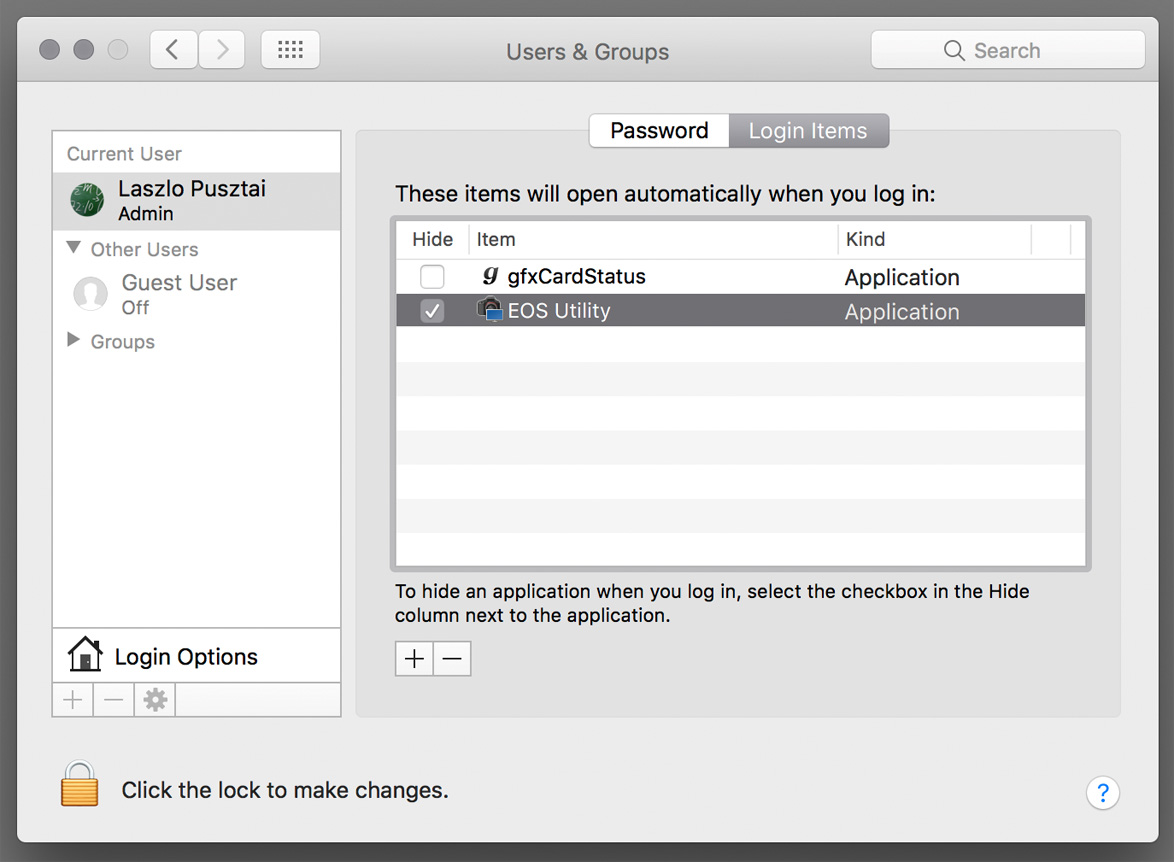
Click the line with the EOS Utility item, and click the minus sign below the list. And while you are here, it’s a good practice to remove other suspicious/unwanted items.
If you need to use EOS Utility over USB, I recommend to start the separate EOS Utility 2 or 3 apps instead of this shell. This way you can avoid both unwanted interference as well as doing this cleanup procedure over and over again.
☕ ☕ ☕
Did this post help you? Consider buying me a coffee if so.
 Step 1/a : Cameras having either a Wireless communication settings or Built-in wireless settings menu, the Clear settings item is on that menu.
 Step 1/b : Older models hide the clear function in a different place: go into the Wi-Fi function menu and press the INFO key. The resulting General sett. screen will have it. Note that the camera’s network (MAC) address is also displayed here. If you use MAC address filtering on your Wi-Fi, you should enable access for this address.
 Step 2 : First choose Wi-Fi settings (or Wi-Fi/NFC settings) from the menu.
 Step 3 : Choose Enable to enable Wi-Fi support. Be aware that enabling Wi-Fi may disable the USB port on the camera, so if USB stops working after this, you need to come back here and disable Wi-Fi. NFC is not supported on Apple devices, so I recommend to turn it off when your camera has that option.
 Step 4 : The camera may ask for a nickname. There’s no other option here, but to confirm that you will provide one. It doesn’t matter what the actual nickname is. Our apps does not use it for anything at the moment. I usually recommend to accept what the camera offers.
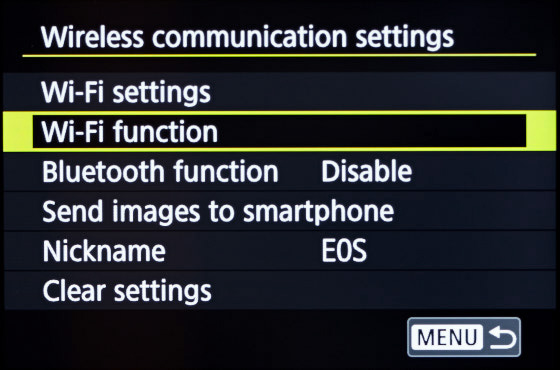 Step 5 : Choose Wi-Fi function to begin. Note that the location of the Wi-Fi function menu differs from camera generation to generation.
 Step 6 : You must choose Remote control (EOS Utility), even if the app is running on an iPhone or iPad. The camera will think it’s talking to EOS Utility, when in reality it will talk to our apps. Pressing the INFO button on this screen will show the network (MAC) address of your camera. If you use MAC address filtering on your Wi-Fi, you should enable access for this address.
 Step 7 : Newer devices will show you this screen. Since you are connecting for the first time, choose Register a device for connection. Later on, you can recall specific settings here to quickly re-connect with different apps on different devices (but that’s a topic for another post). If the screen is skipped by the camera, don’t worry.
 Step 8/a : On newer Canons, choose Switch network at this point.
 Step 8/b : Older models will present the Connection method screen, where you should choose the Select a network option. Even more older ones will call the Select a network option as Infrastructure mode. On these more older cameras you will also need to choose Find network on the subsequent screen.
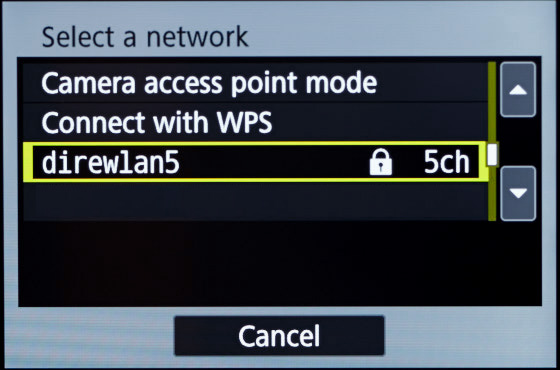 Step 9 : Choose your existing Wi-Fi in the next step. Forget about Camera access point mode (described just above) and WPS/PBC. Choose the network your iPhone, iPad or Mac is connected to. A word of caution though. Canon’s Wi-Fi implementation is unable to handle Wi-Fi roaming (that is when you have multiple Wi-Fi access points in the house). Each access point will appear as a different network here, and chances are that the camera will pick a wrong one even if you are selected the correct one. Try the pairing procedure close to each access point to see which one the camera sticks to if you experience connection issues.
 Step 10 : Older models will bother you with a question about the key format. I’ve never seen a Wi-Fi network in my entire career that hasn’t used a textual password, and Canon also realized the uselessness of this option and eliminated it from newer cameras. But you should choose Enter 8-63 ASCII characters if the camera insists.
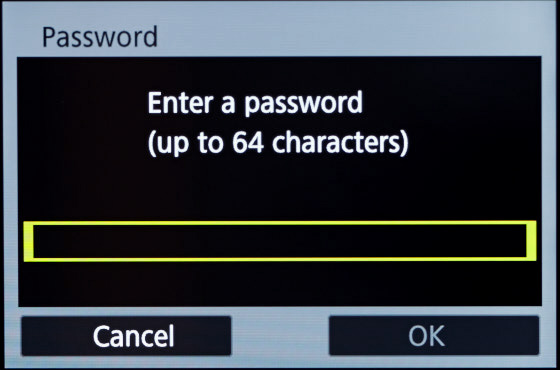 Step 11 : Enter the password for your Wi-Fi network. Again, if you use MAC address filtering, you will need to allow access for the camera’s MAC address, otherwise this screen will not appear or the password will not be accepted.
 Step 12 : Choose Auto setting to get the IP address (and other basic networking parameters) from your router automatically. Just line your phone does.
 Step 13 : This is a “this page is left blank intentionally” kind of screen… Choose OK.
 Step 14 : The camera now entered pairing mode. If you haven’t done so, put ShutterCount or Kuuvik Capture into pairing mode. Don’t let the message fool you, do not start EOS Utility – it’s not needed, and would just cause trouble. The camera will think that it talks to EOS Utility when it talks to our apps.
 Step 15 : This last screen confirms that the camera found the app. Choose OK and enjoy the app! Again, don’t let the message fool you. The camera seems to think that everything is a PC. If your camera prompts for saving the newly created Wi-Fi settings at this point, choose SET1.
 The app provides the three shortcuts you see on the screen shot.
 These enhancements are also allow us to detect when someone attempts pairing in the wrong pairing mode.