The Ultimate Photographer’s Flashlight

As I find myself under dark skies quite often, I carry not one but two flashlights in my bag. One of them is a Petzl Zipka headlamp, used for close range work, such as setting up the camera or finding something in the bag. But there are several other usage scenarios that a headlamp won’t fit into: navigation while you are getting to a location or walking home, searching, warding off uninvited visitors (be they curious humans or hungry animals), and even light painting.

I used several different sized flashlights with different feature sets during the last decade (I’m using the Zipka for more than a decade and it’s still running off of the original batteries), but more than a year ago I found a light that is quite possibly the ultimate in features and durability.

Enter the Nitecore SRT7

The high-end of the flashlight business in dominated by Chinese companies. But these are not the usual low-quality knock-off products you might associate with China. They are top of the class both in design and in manufacturing (the SRT7 is so simple and elegant that it could even carry an Apple logo).

Nitecore is one of these manufacturers, with some unique features in their lights. First of all, the SRT7 is part of their tactical offerings. Nowadays I tend to gravitate towards tactical and military products because of their durability and well thought out features. Not that I would need pistol magazine stabilizers in my pants’s pockets or uninterrupted light during shotgun recoil for a flashlight… Well, actually those magazine holders are pretty darn useful for holding various items…

The Nitecore SRT7 flashlight

The Nitecore SRT7 flashlight

You can see the light above. It is waterproof, shock proof (I exercise both features regularly) and in all aspects built like a tank. It feels well balanced in my hand, and have enough grip on the surface even when wearing heavy gloves.

Along with a very powerful white LED (960 lumens – easily outshines my car’s headlights), you have three colored LEDs: a red, a green, and a blue one. I was interested in the red one when I bought the lamp, and use it heavily during astrophotography. Never used the blue or the green one. The white LED in on the cool side.

But it’s user interface is why I bought it in the first place. It consists of a switch, a rotating ring and a LED. The switch is on the tail of the lamp, and is used to cut power off completely, so that it won’t drain the battery while sitting in the bag. The red LED starts to flash when the battery is starting to run out of juice. The ring is the centerpiece of the user interface.

It is used to switch between the different modes, as well as to continuously adjust the light’s brightness. The continuous adjustment is smooth, with good perceptual uniformity. Turn the ring to the right to increase brightness. At the end of the scale is a “turbo” mode as well as a stroboscope mode (the latter can be useful in self-defense situations). Turn the ring to the left to access the red, green, blue, police-like red/blue flashing and beacon modes. It’s that simple.

Powering the flashlight

The SRT7 can be powered with two CR123 lithium batteries or with a rechargeable 18650 battery. The latter is a standard industrial battery type with added protection circuitry – and is a quite common flashlight power source among Chinese manufacturers. I bought two Nitecore NL189 3400mAh batteries along with the lamp.
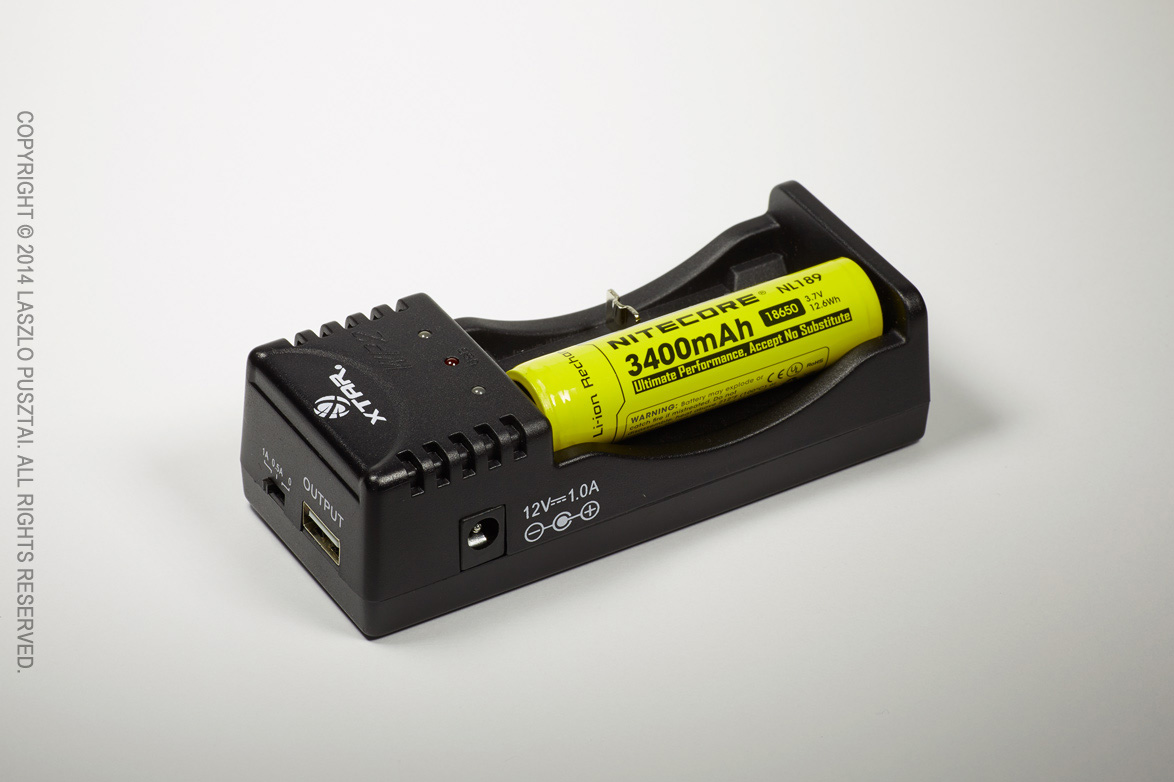
18650 battery in an Xtar WP2 II charger

18650 battery in an Xtar WP2 II charger

I’m using an Xtar WP2 II charger for those, as it can provide 1A charging current (compared to the 0.5A of most other chargers). The 1A current is well within the battery’s specifications, and I don’t like to wait for batteries to charge…

This charger has another neat feature: you can turn it into a power source to charge any USB-connected device (such as emergency recharging your phone). The output is a standard 500mA USB port.

Conclusion

It’s hard to add anything else for a flashlight – it’s just a flashlight. Albeit a good one. Highly recommended.

Leica Monovid 8×20 Review

I have been using a small rubberized 10×25 Canon binocular since I began photographing birds. As part of my ongoing camera bag weight reduction project I wanted something to replace the Canon – something that’s smaller, lighter and optically better.

Why a monocular?

Well, for two reasons, which are the following three: weight, size and because there’s no need for constant diopter adjustment that drives me crazy with most binoculars. I can work much faster with a monocular than with a bino – and speed is important to me because I use these kind of instruments for quick glances. It is a bit trickier to hold monoculars steady, and you need to look through them perfectly on-axis (like a riflescope) to avoid “blacking out”.

Why Leica?

I spent an entire weekend on researching the subject of monoculars. Man, there are tons of cheap monos out there! But they were ruled out pretty fast as I wanted something that’s small, light and has great optics.

5D3_1417_8082

Leica Monovid with the optional neck strap

This left only two choices: Zeiss and Leica. I’m not a huge fan on push-pull focusing used on Zeiss monos, so I bought a Lecia Monovid three months ago. For about $500 it’s definitely not a cheap one, but lives up to my high expectations.

In use

Build quality is first class. The focusing ring is smooth but have enough resistance to allow precise and quick focusing. Unfortunately focusing ring rotation is just the opposite of my Canon lenses (have to turn counter-clockwise to focus closer). You can easily grip both the tube and the focusing ring.

While we are at focusing. My preferred holding method that provides both steady image and easy focusing is the following: hold the Monovid in my left hand, between the tips of my index/middle/ring fingers (above the tube) and thumb (below the tube), and rest my hand on my forehead and nose. And focus with my right hand.

It is waterproof, nitrogen filled to prevent fogging and lenses have dirt and water repellent coating. But you get only an eyepiece cup. I would like to have a front lens cover too (actually it’s not a big deal as it usually hangs from my neck). Well, another missing thing is a neck strap. You receive a hand strap in the package, but I found the neck strap to be invaluable.

Most importantly, it is very good optically. The image is bright and with high contrast. My Canon produces a bit hazy view, and the Leica is much better. Colors are rich and deep. On the negative side, it has pronounced pincushion distortion and slight chromatic aberration towards the edges. All in all, it is a pleasure to look through the Monovid.

Minimum focusing distance is 1.8m – which is more than enough for me. But there’s a close-up lens in the box which reduces the MFD to 25cm. This lens (along with the supplied leather case) usually sits in the drawer. For those interested, the case has a belt loop and you can screw in the close-up lens into the case’s lid.

Conclusion

The Monovid weighs about 1/3 of my former Canon bino, for 3x the price… But it definitely worth the steeper price. It’s compact, lightweight, has superb image quality, and built in a way that lasts generations. Highly recommended.

  ☕ ☕ ☕

Did you enjoy this post? Consider buying me a coffee if so.

Bataflae 32L – Is It The Ultimate Photo Backpack?

Like most photographers, I had many photo bags over the years. But only a few of those were truly great. In this post I’ll tell you about my reasons to get, and my initial experiences with what I consider the ultimate photo backpack for my needs: the Gura Gear Bataflae 32L.

My Bag Story

My first camera carrying solution was a Canon gadget bag. With a huge red “steal me” kind of logo on the side. It was awful, but was able to carry the D60 and a single lens.

Later on as my lens collection grew I needed a larger bag, and made my first mistake: bought a Lowepro DryZone 200 backpack. It was heavy and it was painful to get access to the main compartment – not to mention that I rarely shoot in an environment where I need a totally waterproof bag. It was an overkill for me. So I sold it just to fund my second mistake: a Lowepro Stealth Reporter 650W. Although it was good when shooting from the car, I realized that this was a mistake while hiking to the Delicate Arch. My conclusion was that I would definitely prefer a backpack to shoulder bags.

The next bag, which is one of those I consider to be a great one, was the Lowepro Mini Trekker (which had been discontinued since then). It was able to hold all my gear those days, as you can see on the picture below.

My Lowepro Mini Trekker in 2004

Lowepro Mini Trekker in 2004

It was a lightweight backpack, with only one downside: wasn’t able to carry a notebook computer. So an upgrade to its bigger brother, the (also discontinued) CompuTrekker AW was a logical step. The brother was also a bit more spacious, so 1-seriers bodies put less stress on the zipper.

Over the years I hauled the CompuTrekker around the globe from Antarctica to Iceland and it served rather well. In it I was routinely carrying: 1D Mark II and 5D (Mark II) cameras; 17-40 f/4L, 24-70 f/2.8L, 70-200 f/2.8L IS and 400 f/5.6L lenses; 1.4x and 2x teleconverters plus both extension tubes in the main compartment. A flash with its external power pack and cables, batteries, and a GPS in the outer pocket. An up to 14″ notebook in its dedicated compartment. I was truly happy with this backpack. Really. So much that I thought I found the ultimate carrying solution.

More Lenses Need More Space

The bag problem resurfaced with the arrival of the 500 f/4L IS. It was huge, just used it for birding, and a separate pack seemed a good solution – mostly because I didn’t want to part with the CompuTrekker. I ended up using a Kinesis L311 long lens case to store and carry it for seven years. Yes, this way I had to carry two bags, but was happy with them – and still have fond memories of this combo.

Until – guess what – my next lens purchase, which was the TS-E 24/3.5L II. I thought that I would carry the TS-E along with the zooms, so I would need a bigger pack again. At that time (late 2011) the best solution seemed to be the Lowepro Pro Trekker 400AW. I got one, and my DryZone memories came back… It is an expedition quality pack, that would definitely withstand lots of abuse – an overkill for my needs. And that toughness comes with a price – it weighs 3.3kg empty. Despite the weight used this pack for two years.

To be honest, I regret buying it: I don’t hike that much with photo gear, so its hiking-oriented features seen no use during those two years. What made my situation even worse is that I replaced my zooms with primes, and the Pro Trekker was half-empty. Even the old Mini Trekker would be too big for those. Putting the 500 f/4L IS into the bag wasn’t an option, as its divider structure didn’t allow that. All this resulted in thinking about replacing the Pro Trekker with a backpack more suitable for my current needs.

Enter the Bataflae

Recently I came across Gura Gear’s new Bataflae product line. One of my friends has a Gura Gear Kiboko, so I knew their quality and design. I didn’t like the butterfly-only opening design of the Kiboko, but the Bataflae promised full opening (which is a must if you want to carry a notebook). My last concern was the configurability of the strap system. The Pro Trekker being excellent in this regard, I had fears that I will not able to configure the Bataflae for my body size, resulting in some rather painful experiences.

After two weekends of measurements, thinking and hesitation I decided to get the biggest Bataflae, the 32L, in black. Although I think the gray one looks better, “black makes your bag look thinner”, which is a huge plus during air travel.

Man, this bag is a pleasant surprise. The experience is kind of getting your first Mac(Book) Pro or Gitzo Systematic tripod: it is so well though out and solves your problems so genuinely, that there’s no going back.  Now I can believe those raving reviews.

It’s Bigger Inside

The empty bag is a tad smaller on the outside than the Pro Trekker, but swallows way more gear. This is because of the divider structure (two huge compartments in the Bataflae vs. three smaller in the Pro Trekker), the slightly taller side walls and the thinner dividers.

And the Bataflae today

Gura Gear Bataflae 32L today

On the right is a picture of my fully packed Bataflae. The left side compartment holds the 5D Mark III and the 650D; 24 f/2.8 IS, TS-E 24 f/3.5L II, 40 f/2.8, 50 f/1.4, 100 f/2, 135 f/2L  lenses with their hoods; 1.4x II and 2x III teleconverters and extension tubes; 600EX flash under the hoods; and a few filters tucked under the 24/2.8.

In the right side compartment is the 500 f/4L IS (after the weight reduction treatment it went through last winter); extension cord and battery pack (under the 500) for the flash; and to my biggest surprise I was able to find a place for the Mongoose M3.6 head – which clearly show how deep is the bag.

As you can see I still have plenty of free space.

Pockets on the flap are large and easily accessible (as they were on the CompuTrekker – much better than the Pro Trekker). These and the outer pockets hold all those small gadgets such as batteries, remote switches, shoulder straps, cleaning supplies, and so on.

My fully loaded bag weighs just shy of 16kg. Honestly, I’m not really calibrated to carry more on my back.

Carrying Comfort

All my worries vanished the instant I put the bag on my back. Despite the less padded strap, it feels more comfortable than the Pro Trekker – even fully loaded. There’s only one difference between the strap systems of the two bags: you can’t adjust the Bataflae to your torso’s length (here the PackJack tool of the Pro Trekker is a plus). Fortunately the 32L Bataflae fits me just perfectly, so there’s no height adjustment necessary (this was one of the reasons I went with the largest one).

A rather nice addition to the strap system are the strap keepers: small velcro strips with which you can get rid of those dangling straps.

Quite a few reviews of the Bataflae tout how easy it is to strap a tripod to the bag (you can do it two ways – to the side and to the back). Well… This is bullshit in my opinion. Yes, you can strap a toothpick-legged tripod to it, but I’m completely sure that if you buy this kind of bag then your gear demands heavyweight support. I have a Gitzo 3532LS with an Arca Swiss Z1sp head, and would never-ever strap it to this bag. Even if the elastic pouches on the sides could withstand the tripod’s weight (which I doubt), it would protrude too much above the bag (and my head). So I still carry my tripod separately.

Working from the Bag

99 percent of time I work from my bag in the following situations:

  • The bag is on the back seat of a car. Usually I’m sharing the car with another photographer, who also puts his/her bag on the back seat. I found opening larger backpacks (like the Pro Trekker) to be problematic in these cases, while the smaller CompuTrekker was just fine – there’s a top flap collision when both of us try to open the bags. The butterfly opening here is a big help.
  • On a smallish boat, sometimes shared with others. The butterfly opening here helps to keep a small equipment footprint, leaving room for other supplies (food/water) and also for my legs. It is also great to have the bag half-closed but accessible all the time, as accidents can happen (from birds dumping their load on the boat and the bag, to larger fishes jumping into the boat – both happened to me).
  • Out in the field, where I must put down the bag on whatever ground happens to be there. I don’t know about you, but I really hate to put a wet or muddy pack on my back, so previously I carried a piece or nylon or closed cell foam sheet to lay under the bag. The Bataflae has a detached rain cover, which can be used as a ground cloth for this exact purpose – and can also be lost because it’s detached. Anyway, I will still bring a cheap piece of nylon sheet as a ground cloth, not risking to lose or damage the expensive cover/sheet of the Bataflae. In this case the butterfly opening is a plus too, as reduces the equipment footprint and hides the bag’s content from passersby.

To summarize: I find the butterfly opening a truly usable feature that makes my life much easier. Actually I use full opening in just one situation: when I carry a notebook.

Where to Put a Notebook?

There’s no dedicated notebook compartment, so what to do? Of course you can carry a dedicated notebook bag (as a personal item while traveling by air, for example). But there’s a more compact method, one that I started to use back in the Pro Trekker days.

Observation: there’s no ideal place for a notebook compartment on a photo backpack. If one places the compartment to the back, then the whole weight of the bag’s content will push on the laptop’s lid when the pack is laid on its back. I had some display panel damage from this in the past. Or one can place the compartment on the outside of the front flap, just like the Pro Trekker does. This also has drawbacks: the notebook can hit the ground if you quickly open the flap, and the laptop’s weight will act on a longer level arm, so you will feel it heavier.

To counteract these I started to put the notebook inside the main compartment (within its sleeve, of course). It is even easier to do this with the Bataflae, because the higher walls leave enough clearance for my sleeved MacBook Pro.

Conclusion

As you might have noticed: I really like the Bataflae. On the level I liked the CompuTrekker. But what will I do when I get more gear? Well, as I can’t carry more than 20kg (backpack, tripod, notebook combined), something will have to leave the bag.

All in all: I highly recommend the Bataflae 32L.

Retina MacBook Pro – After 2 and a Half Months

The 15″ MacBook Pro with Retina Display is by far the best computer I had ever used, no question about it. And I had used great many – although only a handful made a deep impression (I mean a positive impression, because I came across several that made unforgettable bad impressions). These are heavy words from me. As you might have been noticed I’m really picky on everything I use (just browse the Hall of Shame section for rants about bad design and/or execution).

You can read my initial impressions about the machine here.

During the last months I had used the machine as a desktop for software development (both iOS and OS X) as well as studio work, and lugged it around the country as a field laptop to assist during my photo trips. Most of my first impressions are still valid, and I love the machine even more than I though at first. I would just like to add further observations.

Battery Life

In my initial post I wrote around 5 hours. Since then OS X 10.8.2 came out, which increased battery life substantially. Now I get something between 6 and 8+ hours, depending on the usage pattern (disabling Adobe Flash holds a great contribution to increased battery life, though).

Tethered Shooting

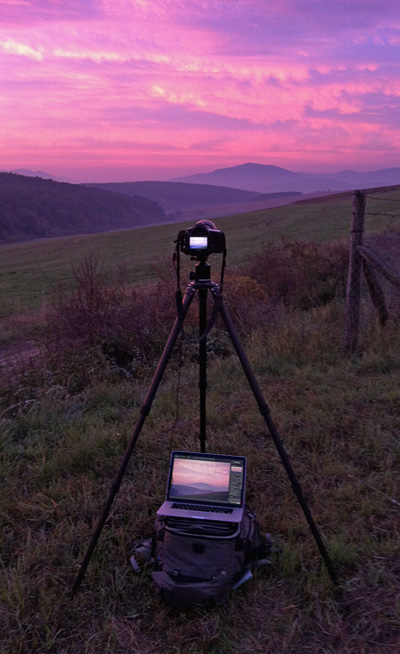
Working Tethered

I started working tethered for landscape shots immediately after receiving the MacBook, and the benefits far outweigh the inconvenience of lugging around a computer. Before the MacBook I had tried to use the Lenovo X200s for tethered work, but was not really satisfied with it and abandoned the idea until the MacBook arrived.

I like several things about this setup.

No time required for image sorting and selection later. I just bring home the keepers. This proved to be a huge time-saver!

I can make the first cut of the final processing in the field, using the same tools I use in the studio. This fits extremely well into my creative process. The high resolution and color-accurate display helps a lot in this. It’s like holding an A4 sized print in front of me. I even stitch panoramas made with the 24mm TS-E lens to check whether everything is good about the shot.

Images are immediately backed up, as the the tethering software saves images to both the memory card in the camera and onto the computer. (Which app? – you might ask. Don’t worry I’ll devote a few posts for that subject later.)

As I wrote in my first impressions piece, the machine fits perfectly into my Lowepro Pro Trekker 400AW. Fully loaded it’s now a back-breaking experience, but if I leave home stuff I don’t need for the shoot, then the full weight is around 15kg, which is bearable. I did several 2-3 hour hikes with the setup without any effects on my back and shoulders (did I mention that the Pro Trekker is a great backpack?).

Other Good Things

The notebook-as-the-desktop was really helpful during the August storms. I routinely power down and disconnect sensitive equipment during thunderstorms, as I saw quite a few over-voltage spikes in the past. But with the MacBook I can continue working during these hours. I really like thunderstorms and they put me in a creative mood, so it’s a big plus!

Last, but not least, no more copying or syncing or Dropboxing files between my desktop and field notebook! No more forgetting to copy something in the hurry before I leave! This saves me lot of time and the peace of mind that comes from the fact that I always have everything I need with me is priceless.

What I miss?

Thunderbolt docks. Matrox’s and Belkin’s solutions are both delayed. Plugging in all those cables (all the connectors of the machine are populated) in the morning really pisses me off. I’ll be first in the line for one of those docks!