Kuuvik Capture 4 supports two methods to achieve the self-timer functionality: one built right into the app, and another via the camera.
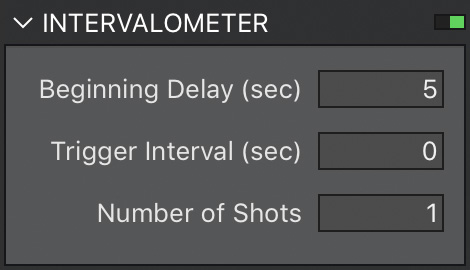 The app’s implementation is accessible through the intervalometer. In version 4 we’ve lowered the minimum for the Number of Shots field to 1 (it was 2 in previous versions). In this case Trigger Interval is ignored, and the app waits the time specified in Beginning Delay before capturing an image. It also works for brackets, and mirror-lock up (even in auto-release mode) just like the normal intervalometer functionality. Since this is an exposure sequence, you have to use the Run Sequence button (Cmd+R) instead of Capture. This is the method we recommend to use.
There’s one situation, however, in which the camera’s 2s and 10s self-timer drive modes come into play. In a rather awkward fashion, the RC-1/5/6 infrared remote control works only with self-timer drive modes. Kuuvik Capture manages the camera’s drive mode to avoid potential issues caused by some of those (for example continuous drive), and switches back to single frame capture when the camera is in an incompatible drive mode. Now the app accepts both the 2s and 10s self-timer as compatible, so you can use the IR remote to trigger the camera.
You need to set the self-timer/remote control drive mode directly on the camera. While mirror lock-up set in the app will work, auto-release will not.
Kuuvik Capture 4.0 is available on the Mac App Store. It is a free update for users who purchased the app earlier from there. You can see the complete list of new features and changes in the release notes.


