During software development we create several tools that never see the day of light. These are for internal use only, and aid in a multitude of ways. For example for testing the image and metadata encoding components in Technical Camera we needed something that can display both the image and its metadata quickly. So we built a special version of Kuuvik Capture that could do that. And it turned out to be so useful in everyday culling and image browsing that we merged the code from this special internal version to the released app.
 The tool I’m referring to is called extended metadata tooltips.
When activated, it adds GPS location (including altitude), color space, artist, copyright, camera owner, serial number and producing software information to Image Browser tooltips besides the usual basic camera and exposure data.
It is off by default, and you can choose between the regular (basic) and the extended metadata display via a new preference.

GPS coordinates are nice, but it’s much better if you can see the location on a map. So the Show on Map command (also accessible by pressing Cmd+G) was born. As the name implies, it will open Apple Maps with a pin dropped at the image’s location.
Besides these, the Imager Browser also gained the ability to read star ratings from JPG files (as it does from Canon RAWs). Of course you can always override the embedded ratings from within the app.
Kuuvik Capture 4.0 is available on the Mac App Store. It is a free update for users who purchased the app earlier from there. You can see the complete list of new features and changes in the release notes.
My updated eBook, Kuuvik Capture Inside Out is also available for download, free of charge for both existing and prospective users.
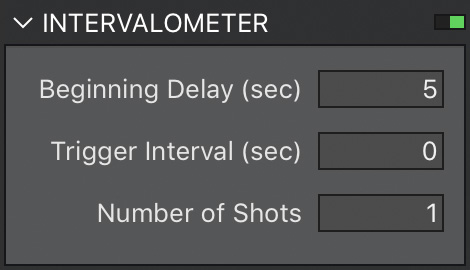 The app’s implementation is accessible through the intervalometer. In version 4 we’ve lowered the minimum for the Number of Shots field to 1 (it was 2 in previous versions). In this case Trigger Interval is ignored, and the app waits the time specified in Beginning Delay before capturing an image. It also works for brackets, and mirror-lock up (even in auto-release mode) just like the normal intervalometer functionality. Since this is an exposure sequence, you have to use the Run Sequence button (Cmd+R) instead of Capture. This is the method we recommend to use.
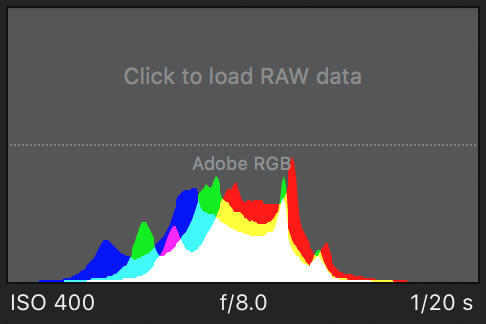
 A circular progress indicator on the RAW histogram’s panel lets you know how the loading goes forward. With the exception of a few operations (such as image deletion and purging) you are allowed to do anything during RAW loading. If you move to another image or capture a new one, loading is automatically cancelled, so you don’t have to waste your time on waiting for something that will be instantly thrown away.
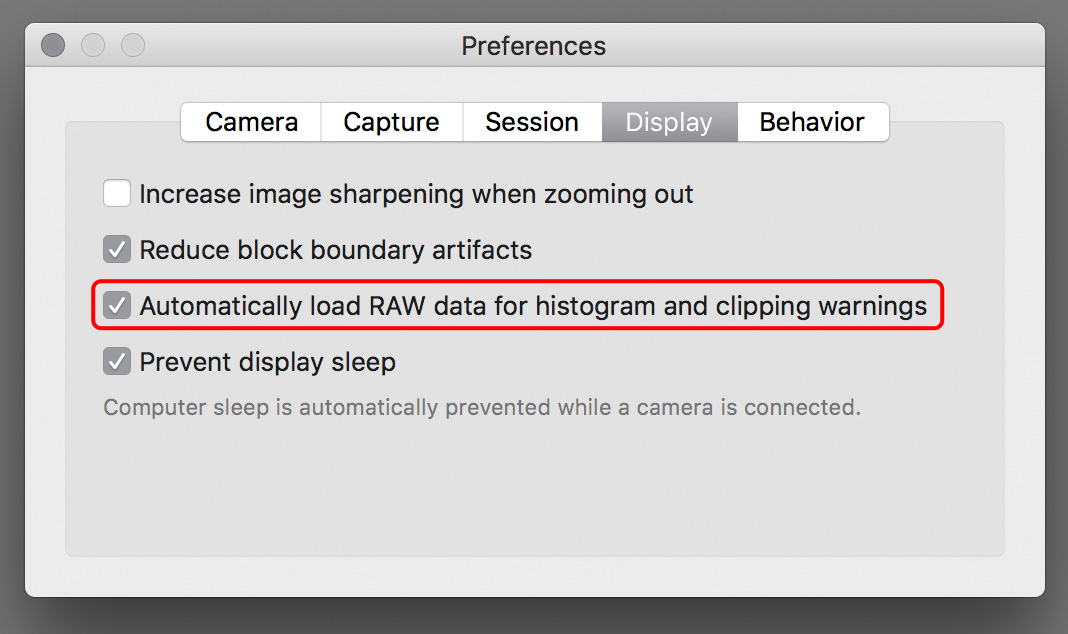
 Should you need the histogram or the warning layers later on, you always have the option to load the RAW data manually. Just click the placeholder on the RAW histogram, or choose the Load RAW data command from the menu, or press Cmd+L.
 It took a while to update all the screen shots and stuff, but I’m happy to announce that the long awaited update to my eBook


