Kuuvik Capture on iPad : Gestures

Being an iPad app, gesture support in Kuuvik Capture takes center stage. Let’s dive right in!

Long Press

Where you normally would right-click in the Mac version, use a long press on iPad. It brings up context menus on browser thumbnails (shown on the screen shot), on the displayed image, on live view and on the bracketing monitor. It opens the corresponding option panel for the Live View, Clipping Warning, Marker, Sharpening, Focus Peaking, Guide and Image Overlay icons on the toolbar. Long pressing the camera selector in the top right corner will show the Wi-Fi and Ethernet Pairing dialog.

In Pan (Hand Tool) Mode

While an image is displayed, double tapping will toggle between 100% and Fit zoom levels. Otherwise use pinch and spread to zoom in and out. Drag the zoomed image around with a single finger, or flick it for faster movement. Swipe left or right with two fingers held together to show the next or previous image in the session, respectively. Note that the app will change the image when you lift your fingers.

In live view things work a bit differently. You can use flick-zoom (a fast, flick-like pinch and spread) to change zoom levels. And then drag the zoomed image around with a single finger. What a double tap does can be configured in the menu: initiate AF or toggle medium or high magnification levels. Swiping up and down with two fingers will pull focus. Step size for focus pulling depends on the magnification: Kuuvik Capture uses small steps for zoomed-in levels and medium steps at Fit zoom level.

Use the rotate gesture to rotate both displayed images and live view (the latter when live view auto-rotation is disabled). Rotation happens at 90 degrees. Once the app recognizes the rotation gesture, it will highlight the corresponding rotation icon on the toolbar. Let the screen go at this moment, and the image will be rotated.

In Marker Tool Mode

Tap the image/live view to place a marker, and tap an existing marker to remove it. A single-finger left or right swipe can be used to move between the markers. Two finger swipe is also recognized in this mode, just like in pan mode.

In Reposition Overlay Mode

You can resize and rotate the overlaid image with two fingers, and drag it with a single finger. Simple as that. Double-tapping the displayed image will toggle between 100% and Fit zoom levels, to facilitate precise overlay placement.

Guide Dragging Takes Precedence

When you tap a guideline (and it becomes a dashed line), then all other gestures are ignored while you hold or move that line around, regardless of the current tool or mode.

Kuuvik Capture 5.1 Available on iPad

Continuing the decade long tradition of bringing you industry-first solutions, I’m pleased to announce that Kuuvik Capture 5.1, both on Mac and iPad, is now available on the App Store. It is the world’s first Canon EOS remote control app that can be used with a USB cable between your camera and iPad – thus skipping slow and error-prone Wi-Fi completely.

Camera connections on iPad work exacly the same way they do in ShutterCount Mobile, as described in my post announcing USB support, as well in the Getting Started Guide for Wi-Fi.

More information about Kuuvik Capture on iPad can be found my previous posts (here and here).

Now I’m taking a deep breath, a few days off, and start posting short articles as the handbook is updated.

Enjoy!

IMPORTANT: If you purchased the app for Mac and want to download it to your iPad (or vice versa), the App Store may not recognize your previous purchase and display the full price. Make sure that you are using the same Apple ID you did for the original purchase, and go ahead with “buying” the app. Instead of charging your card, the App Store should display the message “This update is free”. This is an App Store bug, so please address your comments to the party responsible for it (that is, Apple).

Sneak Peek : Kuuvik Capture 5 on iPad

After a month, we’re roughly halfway through the project that brings Kuuvik Capture 5 to iPad, and I wanted to show you how does it look now. Click the image for a full size version.

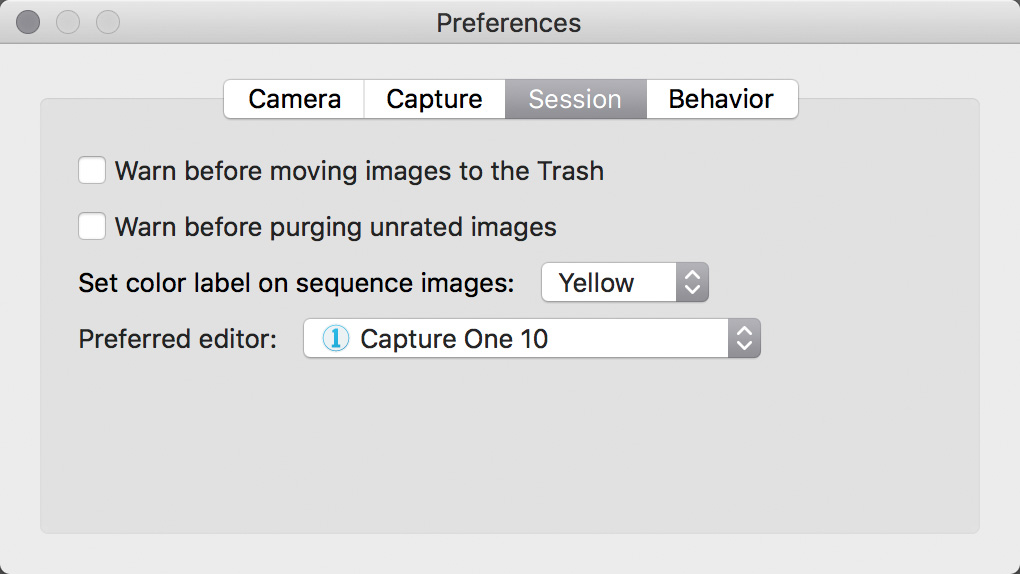
The iPad version sports the familiar Kuuvik Capture interface, but there are several subtle differences because of the touch input. Buttons are generally bigger, for example. I’ll show you quite a few interesting new user interface elements during the coming weeks.

As I mentioned previously, it’s going to be a full-featured professional tethering app, supporting both direct USB connections as well as your Canon’s built-in Wi-Fi. 3rd party Wi-Fi boxes are NOT required. I strongly think that Kuuvik Capture on iPad will open up a new era of in-the-field tethered shooting.

I’m currently working 7 days a week on this project, and you could encourage me to push even harder by purchasing the Mac version right now. Since the app is a universal purchase, the iPad version will be yours for free soon.

Kuuvik Capture 5.1 : The Move to Metal

Kuuvik Capture, as well as my other apps, used OpenGL and its mobile counterpart, OpenGL ES, as the base technology behind their display engines.

While it was working, ES was different enough so that I had to keep Mac and iOS code effectively separate, with serious consequences.

Then a year ago Apple announced that OpenGL is deprecated in its operating systems (and I guess it will be removed completely in a few years). So it was time to move on.

My new unified display engine, rewritten on top of Apple’s proprietary graphics technology called Metal, will debut in Kuuvik Capture 5.1. Both in the Mac and iPad versions.

The benefits are nothing short of breathtaking. Kuuvik Capture was always known to be amazingly quick. But now images appear on screen up to 2x faster… Live view CPU utilization is further lowered by up to 25%… Even previous versions used 10x less CPU for live view compared to Canon’s EOS Utility, so the difference is simply brutal.

You’ll be able to enjoy these enhancemets when version 5.1 is released later this summer.

Stay tuned!