AstroTrac Polar Scope – Another Take

PolarScope2In a post last year, I talked about the replacement of my AstroTrac’s crappy polar scope with one designed for the Vixen Polarie.

Well, that solution worked kind of well for a while, but the adapter was made of plastic, the scope was friction locked into the adapter, and the lack of firm bonding between the scope itself and the adapter resulted in lots of headaches.

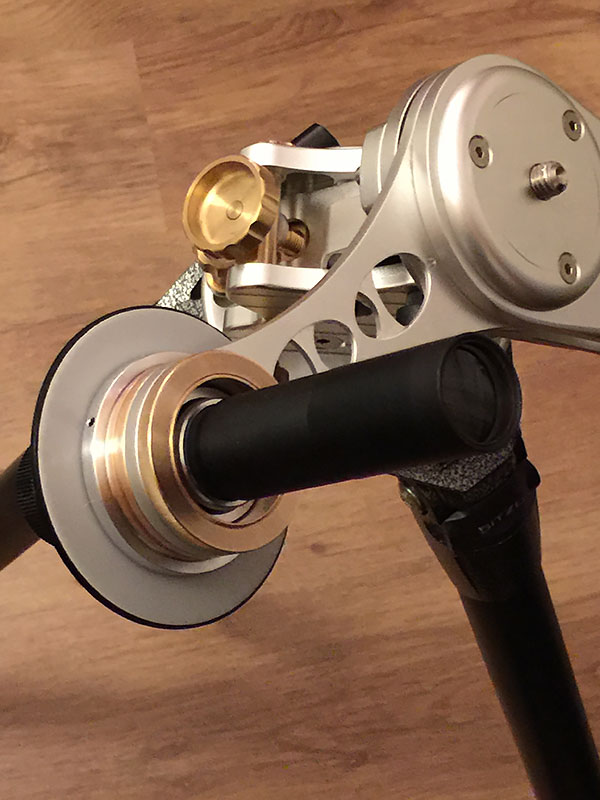
I liked the Polarie’s scope, but its large screw-less housing was a nightmare to design an adapter for. So I went out searching for another scope, and found another Vixen product, this time the polar scope of their Sphinx mount. It is basically a naked version of the Polarie scope, with a thread on it, and without the former’s bulky case. Otherwise it’s exactly the same.

What you see on the picture is the scope with the adapter we made for it. Everything is held firmly in place by screwing things together.

And the new scope with our adapter prototype is lighter than the Polarie scope was alone (232g vs 268g).

Building an Astrophotography Rig

Building an astrophoto rig is like building a custom motorcycle: it’s expensive, time consuming and involves a lot of DIY. There are some outstanding parts available, but assembling them into a great tool isn’t trivial. You have to do lots of research. I decided to share my experiences along the way as I build my setup – and this is the first installment.

When I started this project, my goal was to be able to utilize the great primes in my existing lens collection and share the equipment to the greatest extent possible with my regular photography toolset. So there’s no telescope involved – I use my 500/4 instead for deep sky objects.

650D_1409_5103
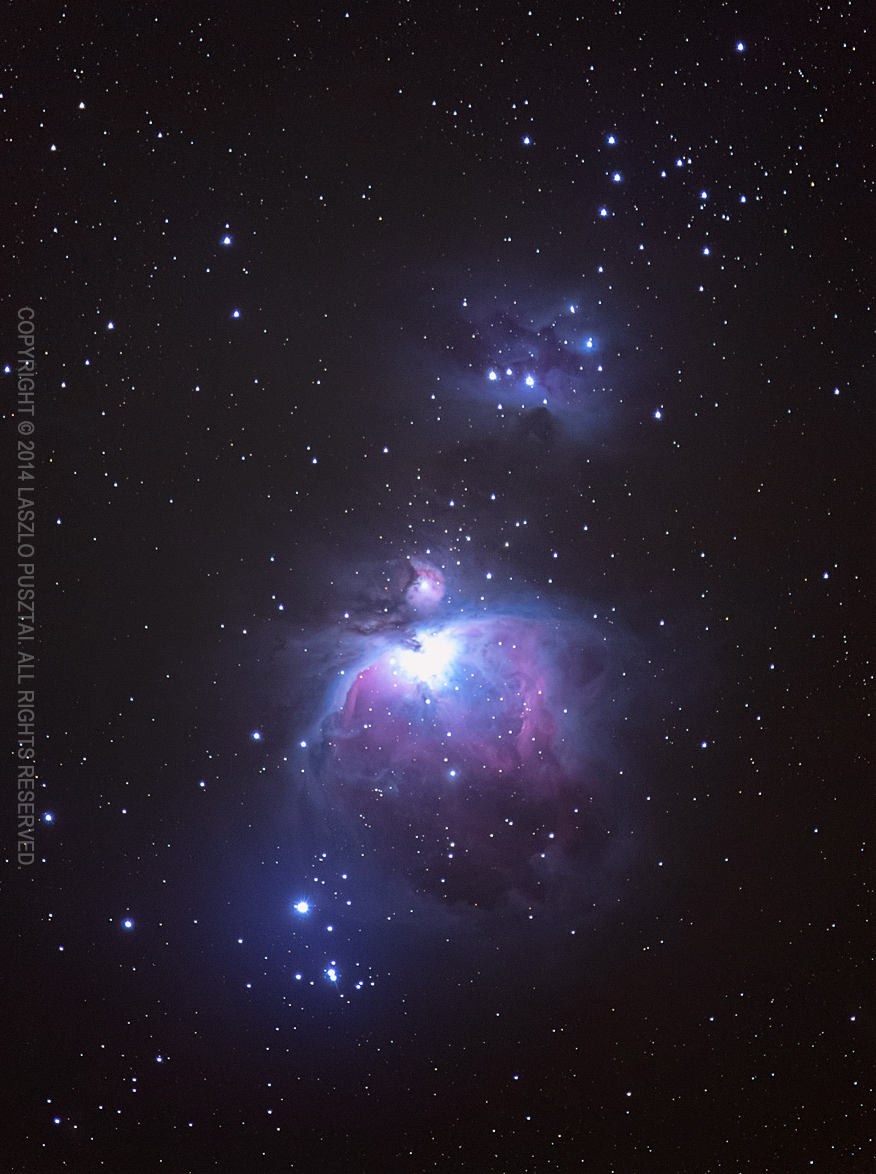
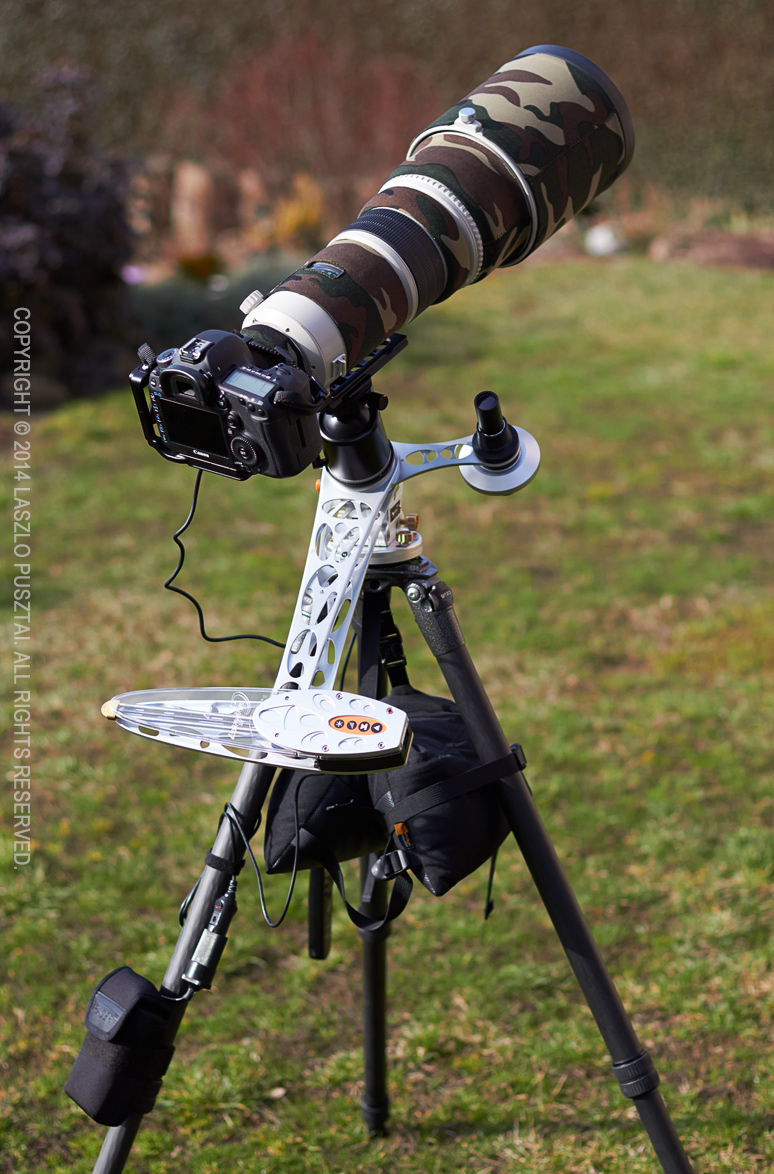
My current rig (with the 500 installed) is on the left. Let’s forget about the camera and lens for this post’s sake, and concentrate on what’s below them.

Basic Support

The central part of this setup is the tracking mount, which compensates for Earth’s rotation. This is a mandatory piece of equipment if you want to use anything other than wide angle lenses and short exposures.

I decided to go with the AstroTrac TT-320X-AG. This is a “barn door” type mount, where two arms open up like a scissors. This device is small and light, and provides the tracking accuracy of regular equatorial mounts weighing 20x as much or more.

Of course the AstroTrac is in equatorial arrangement: you have to align its rotation axis with Earth’s. To allow precise alignment you’ll need a geared head between the tripod and the tracker. A ball head won’t do it. AstroTrac also makes a head, called a wedge is astro parlance, the TW3100. This provides great controls for very precise adjustment and is lightweight.

A heavy-duty, stable tripod is essential. Fortunately it is not a new requirement for me – and I use a Gitzo 3532LS. This is a great tripod, and the ability to rotate the top plate is godsend for rough tracker alignment. To improve stability I extend only the upper (thicker) leg section and hang a beanbag on the top plate’s hook.

The top plate of the tracker is the home of my regular ball head, an Arca-Swiss Z1sp. With a breaking point somewhere around 50-60kg, this head can easily support even the 500mm lens. Just have to be careful with loosening the knob when the 500 is mounted.

Powering the AstroTrac

Well, this was the point where things started to look ugly. The AstroTrac mount needs 12V DC. They sell a very basic (read crap) AA battery holder, but using alkaline AAs is a no-go in my book. So I needed a rechargeable 12V power source. First though about using ten AA NiHM batteries (again, in a crappy holder), but charging lots of AAs is a pain in the butt. Another solution would be to use a 12V car battery. There are lots of car battery based astronomy targeted power sources around, but they weigh several kilograms – definitely not on the portable side.

Surfing the web for hours I ran into Tracer’s lithium polymer battery packs, and ordered the 4Ah model immediately. This is the block you see on the lower left corner of the above picture, Velcroed to the tripod. It sports a 12V cigar lighter plug, which connects with the AstroTrac’s fused cigar lighter cable.

This battery provides enough juice to run the tracker for up to 16 hours, and weighs just 330 grams. Problem solved.

Polar Alignment

To help in precise polar alignment, a polar scope is needed. And this is the weakest offering in AstroTrac’s product line. The tracker and the wedge are great, well built products, but their polar scope is a bad joke. It has an illuminated reticle on which you have to place three stars in marked positions. But this reticle is not collimated (centered) in the factory! To make things even worse, collimation can be done with three tiny grub screws – a totally unusable solution. Even after I replaced them with thumbscrews, I had to re-collimate it quite often. Another issue is that this scope is held in position with three tiny magnets. Just a small breeze, and the scope will fall. A small amount of pipe insulation around the scope solves this, but nevertheless this scope is sub-par. I had to look for a replacement.

650D_1409_5122And that was a competing tracker’s polar scope, from the Vixen Polarie.

Of course it won’t fit into the AstroTrac’s polar scope arm – the base of the Polarie scope is just 0.5mm wider that the hole on the polar scope arm.

My father machined a custom adapter that not only holds the scope in place, but I can screw it in securely.

Alignment with the Polarie scope is also easier. Much easier. Just set the current date, time and meridian offset on three dials, and place Polaris into the marked position on the reticle. Quick and easy.

The only downside is that the Vixen’s reticle is not illuminated, and you don’t see the markings by default. So I cannibalized the AstroTrac scope’s red LED illuminator, and shine on the front lens of the Vixen scope while doing the alignment. The background turns red, markings become visible, while I can still see Polaris well.

With the Polarie scope I can polar align the rig in just a few minutes – every time. It’s a difference like switching to a Mac from Windows.

Update 2/9/2015: now I’m using a much better solution with another Vixen polar scope.

Conclusion

I’m very happy with this rig. Polar alignment with the scope only is good enough for 2 minute exposures with the 500mm and the 5D Mark III – it might be good for even more, I just haven’t tried yet. For wide field work it’s more than enough. My only issue now is the number of clear, moonless nights…

  ☕ ☕ ☕

Did you enjoy this post? Consider buying me a coffee if so.

First Take on Orion Nebula

Last night the conditions were favorable to try my Canon 500mm f/4L IS lens for astrophotography. I was interested in the maximum exposure length with only a simple polar alignment (with no time-consuming drift alignment). Also wanted to check out any other issues that might arise from using such a heavy lens.

Well, it turned out that 2 minute exposures were good, so I made a series of 2 minute, 1 minute, 30 second and 15 second exposures. 35 in total – the shorter ones to be able tame the bright core of the nebula. When I loaded the images onto my computer half an hour ago, I realized that focus drifted horribly after the first three frames… I suspect the rapidly falling temperature being the cause. Temperature change induces a focus shift. That’s why you can focus lenses “beyond infinity” – to compensate for this shift.

So it turned out to be an exercise in recovering what’s possible in such a badly screwed up situation. Below is what I could recover from these three frames. I was surprised that the overall result is pretty good, just disappointed about the overly bright core.

OrionNebula-3frame

M42

Because refocusing between frames is not a viable option (think image position changes and lack of bright enough stars), I’ll look into telescope heaters… I’ll let you know when I will have a working solution.