What’s New in the Mark II AVF 3.2 Update

The latest update to the Mark II Artist’s Viewfinder went online earlier today. Besides the usual slew of newly supported cameras and backs (listed in the press release), there are two feature groups I’d like to talk about. Let’s begin with new customization features.

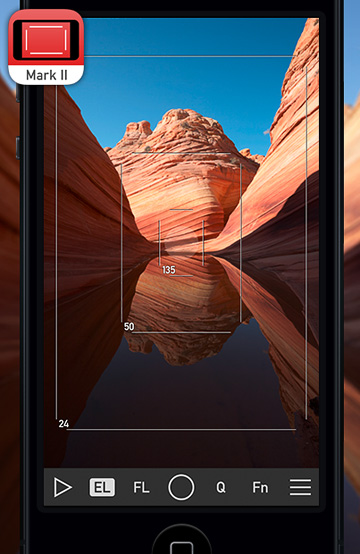
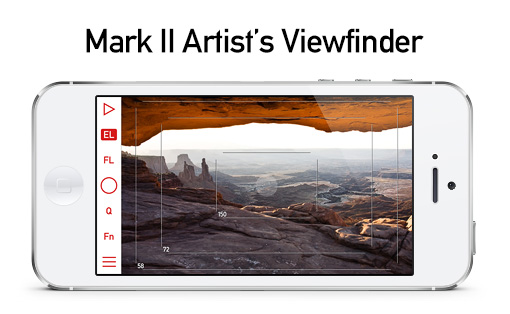
Original Viewfinder editions had a completely neutral main screen. While the Mark II’s red/white toolbar looks pretty neat, a few users complained about the vivid colors interfering with their composition. So in the 3.2 update you can switch the toolbar into a dark and neutral themed one. It’s interesting to note that it brings a completely new character to the main screen – but still looks neat.

dark-toolbar

The new Dark & Neutral toolbar theme

Speaking of distractions, a few of you found the translucent white AF/AE point indicator distracting. You can now turn it off if you wish. But please note that the red circle will still be displayed when AF is in progress.

We also received requests to make “more Fn Keys” – that is to let the user customize the function of other toolbar buttons. And beginning with version 3.2 you can override the EL and FL buttons with the exact same functions that you can assign to the Fn Key. You’ll lose their initial functions while the override is active, of course.

Finally I was able to put my hands on the iPro lens system case for the iPhone 5s, so this update rounds out the supported wide converter/device combinations with both Schneider converters on the iPhone 5s. And also adds the Cambo WRS-1060, which utilizes the Schneider wide lens.

A fix for the “gray screen with no live view after switching to another app and back” bug is also included. While fixing this, I ran into a more serious issue: with toggling exposure lock on and off on the iPhone 5s I was able to bring the phone’s entire video capture system down to its knees. We are working on a fix with Apple, but the interim solutions is to restart live view when you disengage the exposure lock. I know, it’s a bit of pain, but there’s no better workaround yet. The good news is that only the iPhone 5s is affected.

The Viewfinder Handbook has also been updated to cover these new functions.
Building an Astrophotography Rig

Building an astrophoto rig is like building a custom motorcycle: it’s expensive, time consuming and involves a lot of DIY. There are some outstanding parts available, but assembling them into a great tool isn’t trivial. You have to do lots of research. I decided to share my experiences along the way as I build my setup – and this is the first installment.

When I started this project, my goal was to be able to utilize the great primes in my existing lens collection and share the equipment to the greatest extent possible with my regular photography toolset. So there’s no telescope involved – I use my 500/4 instead for deep sky objects.

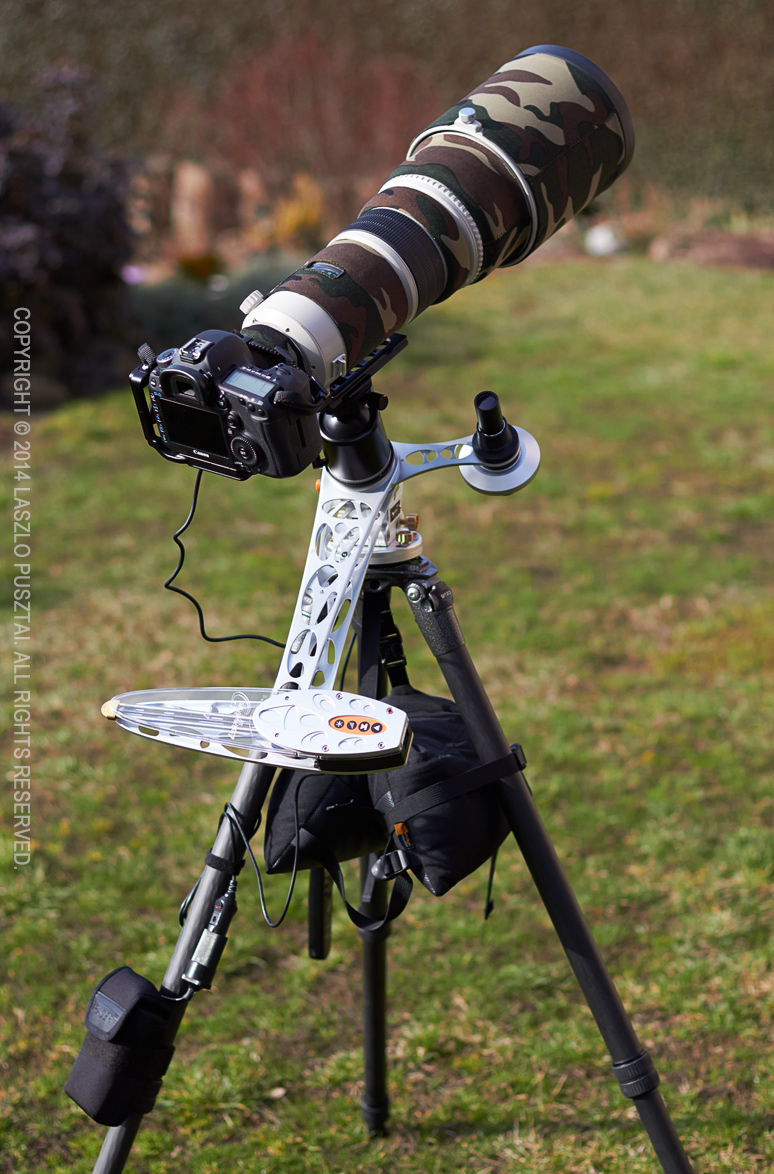
650D_1409_5103My current rig (with the 500 installed) is on the left. Let’s forget about the camera and lens for this post’s sake, and concentrate on what’s below them.

Basic Support

The central part of this setup is the tracking mount, which compensates for Earth’s rotation. This is a mandatory piece of equipment if you want to use anything other than wide angle lenses and short exposures.

I decided to go with the AstroTrac TT-320X-AG. This is a “barn door” type mount, where two arms open up like a scissors. This device is small and light, and provides the tracking accuracy of regular equatorial mounts weighing 20x as much or more.

Of course the AstroTrac is in equatorial arrangement: you have to align its rotation axis with Earth’s. To allow precise alignment you’ll need a geared head between the tripod and the tracker. A ball head won’t do it. AstroTrac also makes a head, called a wedge is astro parlance, the TW3100. This provides great controls for very precise adjustment and is lightweight.

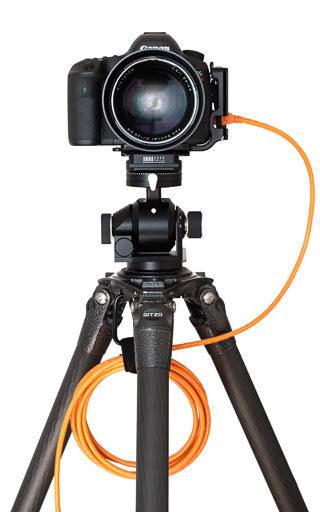
A heavy-duty, stable tripod is essential. Fortunately it is not a new requirement for me – and I use a Gitzo 3532LS. This is a great tripod, and the ability to rotate the top plate is godsend for rough tracker alignment. To improve stability I extend only the upper (thicker) leg section and hang a beanbag on the top plate’s hook.

The top plate of the tracker is the home of my regular ball head, an Arca-Swiss Z1sp. With a breaking point somewhere around 50-60kg, this head can easily support even the 500mm lens. Just have to be careful with loosening the knob when the 500 is mounted.

Powering the AstroTrac

Well, this was the point where things started to look ugly. The AstroTrac mount needs 12V DC. They sell a very basic (read crap) AA battery holder, but using alkaline AAs is a no-go in my book. So I needed a rechargeable 12V power source. First though about using ten AA NiHM batteries (again, in a crappy holder), but charging lots of AAs is a pain in the butt. Another solution would be to use a 12V car battery. There are lots of car battery based astronomy targeted power sources around, but they weigh several kilograms – definitely not on the portable side.

Surfing the web for hours I ran into Tracer’s lithium polymer battery packs, and ordered the 4Ah model immediately. This is the block you see on the lower left corner of the above picture, Velcroed to the tripod. It sports a 12V cigar lighter plug, which connects with the AstroTrac’s fused cigar lighter cable.

This battery provides enough juice to run the tracker for up to 16 hours, and weighs just 330 grams. Problem solved.

Polar Alignment

To help in precise polar alignment, a polar scope is needed. And this is the weakest offering in AstroTrac’s product line. The tracker and the wedge are great, well built products, but their polar scope is a bad joke. It has an illuminated reticle on which you have to place three stars in marked positions. But this reticle is not collimated (centered) in the factory! To make things even worse, collimation can be done with three tiny grub screws – a totally unusable solution. Even after I replaced them with thumbscrews, I had to re-collimate it quite often. Another issue is that this scope is held in position with three tiny magnets. Just a small breeze, and the scope will fall. A small amount of pipe insulation around the scope solves this, but nevertheless this scope is sub-par. I had to look for a replacement.

650D_1409_5122And that was a competing tracker’s polar scope, from the Vixen Polarie.
Of course it won’t fit into the AstroTrac’s polar scope arm – the base of the Polarie scope is just 0.5mm wider that the hole on the polar scope arm.

My father machined a custom adapter that not only holds the scope in place, but I can screw it in securely.

Alignment with the Polarie scope is also easier. Much easier. Just set the current date, time and meridian offset on three dials, and place Polaris into the marked position on the reticle. Quick and easy.

The only downside is that the Vixen’s reticle is not illuminated, and you don’t see the markings by default. So I cannibalized the AstroTrac scope’s red LED illuminator, and shine on the front lens of the Vixen scope while doing the alignment. The background turns red, markings become visible, while I can still see Polaris well.

With the Polarie scope I can polar align the rig in just a few minutes – every time. It’s a difference like switching to a Mac from Windows.

Update 2/9/2015: now I’m using a much better solution with another Vixen polar scope.

Conclusion

I’m very happy with this rig. Polar alignment with the scope only is good enough for 2 minute exposures with the 500mm and the 5D Mark III – it might be good for even more, I just haven’t tried yet. For wide field work it’s more than enough. My only issue now is the number of clear, moonless nights…

  ☕ ☕ ☕

Did you enjoy this post? Consider buying me a coffee if so.

First Take on Orion Nebula

Last night the conditions were favorable to try my Canon 500mm f/4L IS lens for astrophotography. I was interested in the maximum exposure length with only a simple polar alignment (with no time-consuming drift alignment). Also wanted to check out any other issues that might arise from using such a heavy lens.

Well, it turned out that 2 minute exposures were good, so I made a series of 2 minute, 1 minute, 30 second and 15 second exposures. 35 in total – the shorter ones to be able tame the bright core of the nebula. When I loaded the images onto my computer half an hour ago, I realized that focus drifted horribly after the first three frames… I suspect the rapidly falling temperature being the cause. Temperature change induces a focus shift. That’s why you can focus lenses “beyond infinity” – to compensate for this shift.

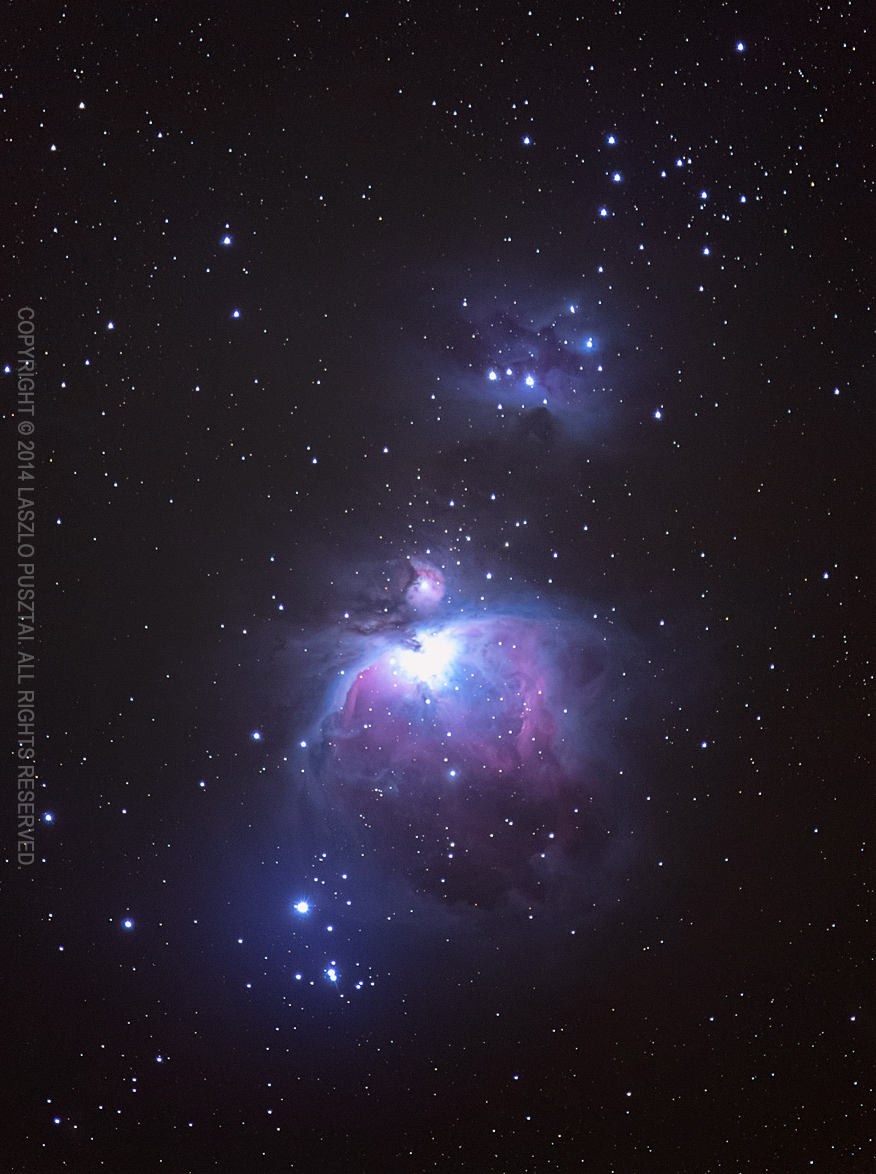
So it turned out to be an exercise in recovering what’s possible in such a badly screwed up situation. Below is what I could recover from these three frames. I was surprised that the overall result is pretty good, just disappointed about the overly bright core.

OrionNebula-3frame

M42

Because refocusing between frames is not a viable option (think image position changes and lack of bright enough stars), I’ll look into telescope heaters… I’ll let you know when I will have a working solution.

Mark II Artist’s Viewfinder 3.1 Update

IMG_6679The 3.1 update of the Mark II went online during the weekend. There are three groups of new features: wide converter support, device support, and new cameras/backs.

The following is an excerpt from the press release.

New features:

  • Supports the iPad mini with Retina display.

Added wide converter support:

  • olloclip 4-in-1 Wide on iPhone 4, 4s, 5, 5s and on the 5th generation iPod touch.
  • Schneider iPro Series 2 Super Wide on iPhone 4, 4s, 5.
  • Schneider iPro Series 2 Wide on iPhone 4, 4s, 5.

Added cameras:

  • Arca-Swiss F-classic 4×5, F-classic 5×7, F-classic 6×9, F-classic 8×10, F-metric 4×5, F-metric 5×7, F-metric 6×9, F-metric 8×10, M-Line two mf, M-monolith 4×5, M-monolith 5×7, M-monolith 6×9, M-monolith 8×10, misura 4×5, misura 8×10, Rl3d, Rm2d, Rm3d factum, Rm3di.
  • ARRI ALEXA XT, ALEXA XT M, ALEXA XT Plus, ALEXA XT Studio.
  • Blackmagic Cinema Camera MFT, Pocket Cinema Camera, Production Camera 4K.
  • Canon EOS 70D, 100D/Rebel SL1, 700D/Rebel T5i.
  • Fujifilm X100S, X-A1, X-E2, X-M1, X-T1.
  • Linhof Kardan re, M 679cs, Master Technika 3000, Master Technika classic, Technikardan S 23, Technikardan S 45, Techno, Technorama 612 pc II, Technorama 617s III.
  • Mamiya 6, 6 MF, 645DF+.
  • Nikon AW1, D610, D3300, D5300, D7100, Df, J3, S1.
  • Olympus OM-D E-M1, OM-D E-M10, PEN EP-5.
  • Panasonic DMC-G6, DMC-GF6, DMC-GM1, DMC-GX7.
  • Pentax K-3, K-50, K-500.
  • Samsung GNX, NX-30, NX-300, NX-1100, NX-2000.
  • Sigma DP3 Merrill.
  • Sony A3000, A5000, A7, A7R, NEX-3N, NEX-5T, PMW-F5, PMW-F55, SLT-A58.

Added backs:

  • Phase One IQ250, IQ260, IQ260 Achromatic, IQ280.

One thing to note is that the Schneider wides are not supported on the iPhone 5s yet. The reason is simple: Schneider have a new case for the iPhone 5s that we were unable to buy anywhere.

The Mark II supports only certified converters, so if you find your favorite converter missing, please let us know.

IMG_2030Do you like this app?

There’s also a small new feature that we do not advertise in the press release: you can easily share your love towards the app.

Open the menu, scroll all the way down and tap I Like This App!

It doesn’t cost you a dime, but spreading the word helps us to bring exciting new features to the app faster.

Thank you for letting your friends – and even complete strangers – know about the Mark II!

But please do not use reviews as a feedback or bug reporting channel! It’s not bi-directional and we can’t get in touch with reviewers.

Use Report a Problem in the menu instead. It’s the fastest way to get in touch with us – and you are not required to have an actual problem to use this feature.

Thoughts on iDevice Wide Converters

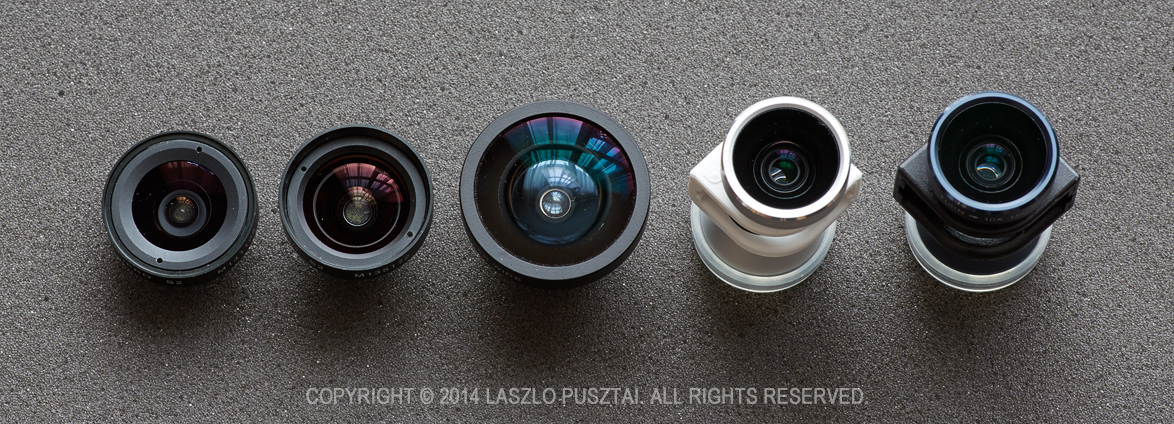
Last week I added support for a bunch of iPhone/iPod wide converter lenses to the upcoming release of our Mark II Artist’s Viewfinder app. They were Schneider’s Series 2 super wide and wide iPro lenses as well as the wide lens in olloclip’s 4-in-1 offering. The picture below shows them: Schneiders on the left, olloclips on the right, and the ALPA ACAM in the middle. They are shown without their mounting cases (except for the olloclips).

A bunch of wide converters

A bunch of wide converters

While they are all suitable for viewfinder use, you can’t expect good optical performance from such lenses, period. Their manufacturers like to advertise them as “high quality”, “precision”, etc. Well, they might be high quality for someone who lo-fi filters the crap out of their smartphone images, but in my book they are not usable for real photography – even on smartphones.

They are all priced in the same range ($65-$100) with mounting hardware included. Schneiders usually occupying the higher end of this range.

Conversion factor and distortion

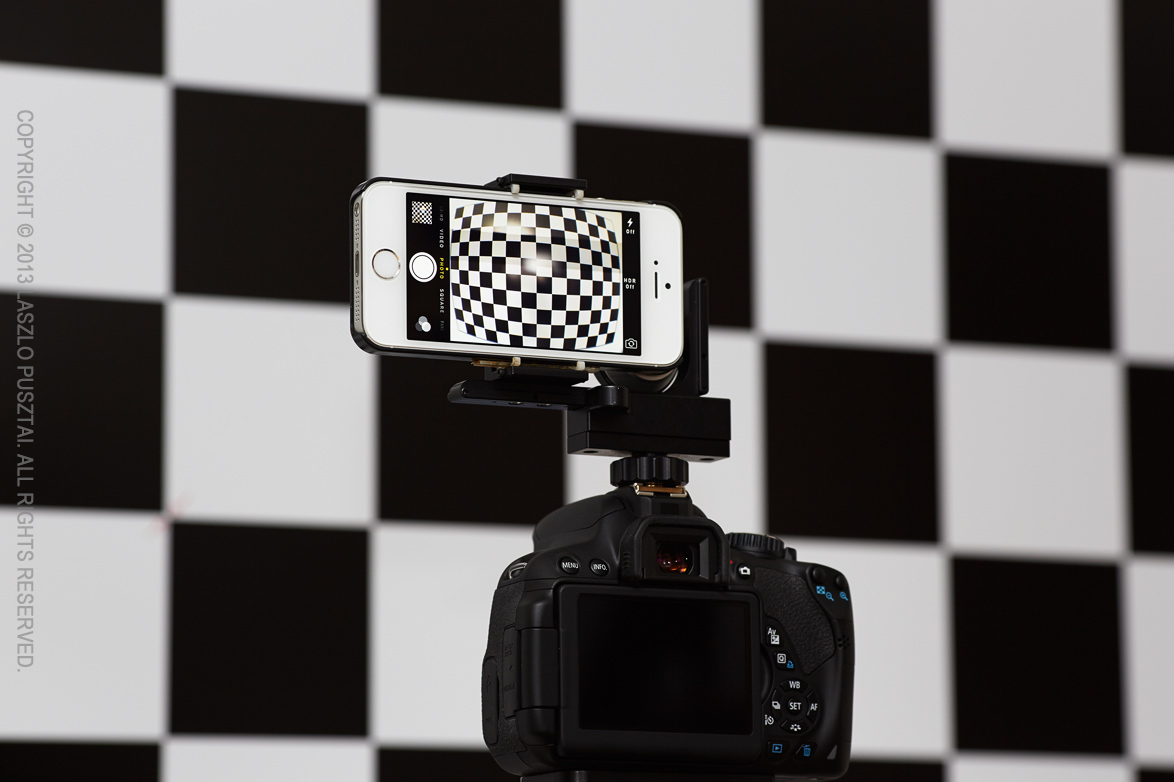
The bad news: advertised conversion factors can’t be used to compare these lenses. All super wide converters we measured exhibit huge (10% or more) barrel distortion. What gets in the marketing material is the magnification ratio with no distortion correction applied. That is, they count in the extreme edges, which will result in smaller factors.

But when distortion is removed, those extreme edges go away (as you can see in the first illustration in my previous post). The result: Schneider’s super wide lens that’s advertised as having a 0.45x conversion factor is a 0.5x lens is reality. ALPA’s lens, which is advertised as 0.5x (because I told them to) is a bit wider in reality than Schneider’s 0.45x.

The conversion factor also changes from device to device – and all the adapters I measured go wider when they are used on a device having a wider native field of view. For example, the ALPA is a 0.5x on an iPhone 4, but a 0.48x on an iPhone 5S.

ALPA ACAM mounted for measurement

ALPA ACAM mounted for measurement

If you look at conversion factors you’ll find out that there are two distinct classes: 0.5x and 0.65x. The Schneider super wide and the ALPA wide belongs to the first, and the Schneider wide and the olloclip belongs to the second. Is it important to note that the wide Schneider exhibits only a small amount of barrel distortion – and this lens would be usable even without correction. The olloclip is not, it has the same huge distortion as super-wides.

Sharpness

The sharpest is the Schneider super wide. The least sharp is the iPhone 4/4S variant of the olloclip – so much that I struggled for hours to find the checkerboard corners in the sea of blur and chromatic aberration.

Other aberrations

Schneiders are almost free of chromatic aberration. All others exhibit a huge amount of it in the corners. Centering is bad on all converters. The Schneider super wide also exhibits hard to correct mustache-like distortion. On the iPhone 5 for example this – together with bad centering – causes residual pincushion distortion on one side of the image after the barrel has been removed.

Mounting

Olloclips tend to slip off easily – except when you use it on an iPod, where a rubber inserts keeps the lens in place. Converters with cases are all solid, although I found Schneider’s iPhone 4/4S case too tight and hard to remove.

Mounting on the top of the camera (in the hot shoe for example) is another story. If you want to use the converter lens to compose stitched panoramas with the Mark II, you’ll need a holder that keeps the phone’s lens centered with the camera’s. This is to avoid parallax as much as possible. This is where things start to cost more. ALPA makes a holder that ships with the super wide converter lens and two cases. Other manufacturers, such as Cambo, also make holders (the Cambo includes a converter lens that the Mark II does not support yet). But be prepared to spend $800-$900 on these.

My favorites

I’m not a big fan of the Schneiders. I was confused about which case is compatible with which series lenses, and their site offers little help. Now I know that the series 1 cases can hold series 2 lenses, but not vice versa.

Actually I have two favorites. The ALPA rig (holder and such) is what I use. It offers the widest view, it’s easy to mount on my camera, has the sturdiest lens mount, and so on. All in all, highly recommended.

The other, the olloclip 4-in-1 on an iPod touch 5, was a surprise for me. I never thought how usable this combo could be. It’s lightweight, fast, and the rubber insert keeps the lens from falling. It can simulate lenses down to about 24mm (on full frame 35mm cameras). Not to mention that it’s the cheapest way to get into the wide converter world of the Mark II.

Christmas Catch

I photographed a kingfisher family just a few days before Christmas. Despite the bitter cold and the flat light, it was a great day, resulting in lots of images.

Christmas Catch

Christmas Catch

Happy holidays to you and your loved ones!