The EOS R Diary : Remote Release Options

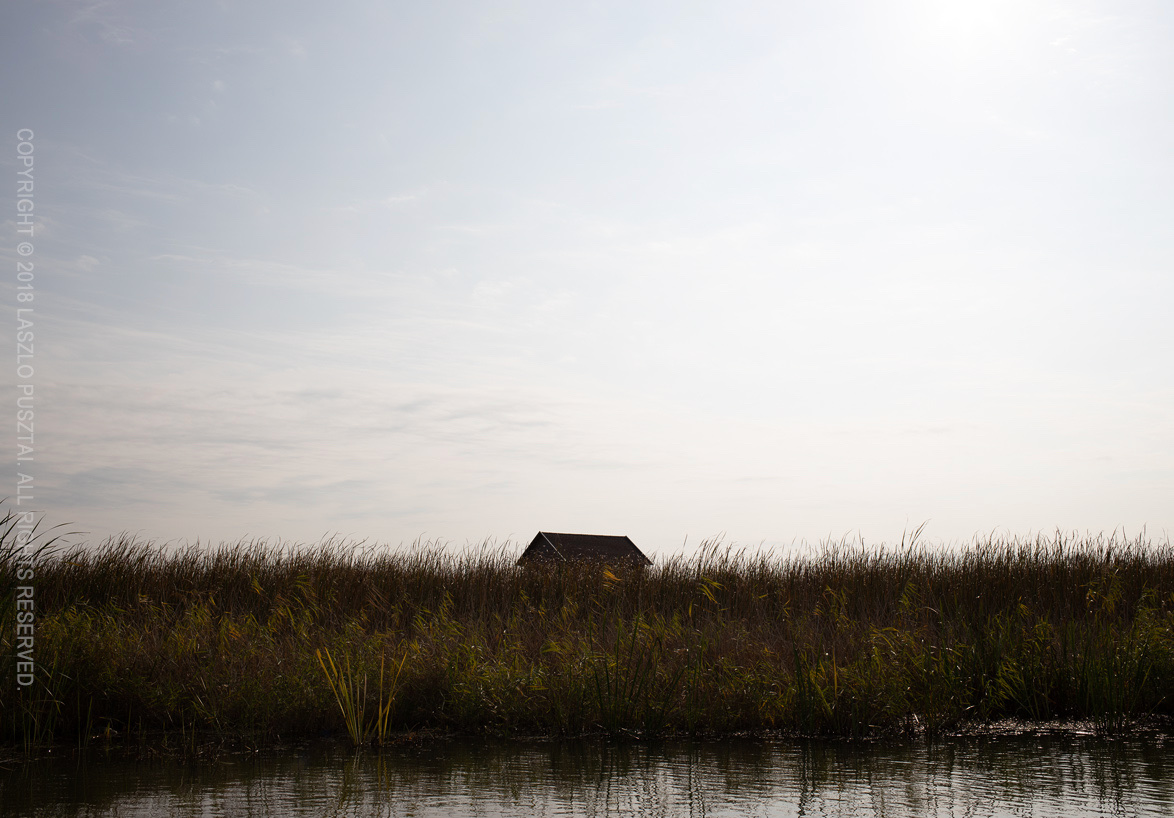
Seascapes tend to cry for long exposures. When I spend a week-long vacation on a small island, it’s definitely something I do a lot. And for this I need three things: a good tripod, a neutral density filter and some kind of remote release. The tripod (especially one suitable for travel) was a subject of my previous post. For ND filters I use LEE products for a very long time (I may write about them). But let’s concentrate on the remote release for now.

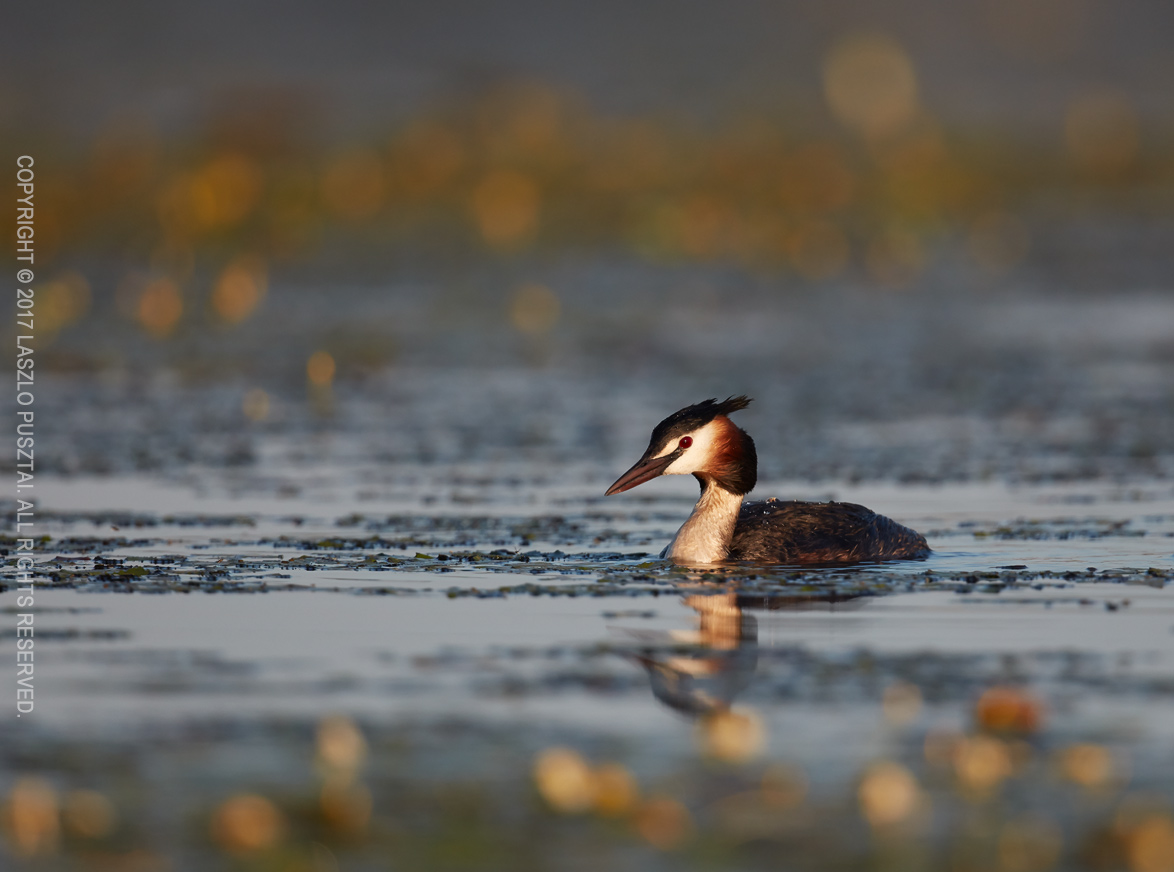
EOS R + EF 35 f/2 IS + LEE ProGlass IRND (15 stop if memory serves)

Exposure time for the above image was 80 seconds in bulb mode. Fortunately the R has a built-in bulb timer (although its user interface leaves me wanting), so you don’t have to time the shot manually (or use a TC-80N3 or equivalent controller). But triggering the exposure (long or short) is way more convenient, and less prone to camera shake, with a remote.

I have a Canon TC-80N3 for as long as I can remember. Unfortunately the R has an E3 socket, and getting an N3 to E3 adapter seems to be harder than flying to the Moon. Since I already got a BR-E1 bluetooth remote for the M50 (haven’t really used that camera before selling it and haven’t used the BR-E1 once with the M50), I thought that I would be able to use it with the R.

Technically yes, you can. But the Canon bluetooth (as well as the infrared) remote control user interface is so ill designed that you don’t really want to use it. The issue is that you are forced to set the 2s self timer/remote drive mode, otherwise the remote will not work. It is a royal pain to change it every time I switch between tripod mounted and handheld shooting (which happens a lot on vacation-type trips). Plus there’s no half-press on the remote’s button, which I use to exit image preview after a shot has been taken. It should work exactly like the normal cable release, and there’s no excuse why it isn’t.

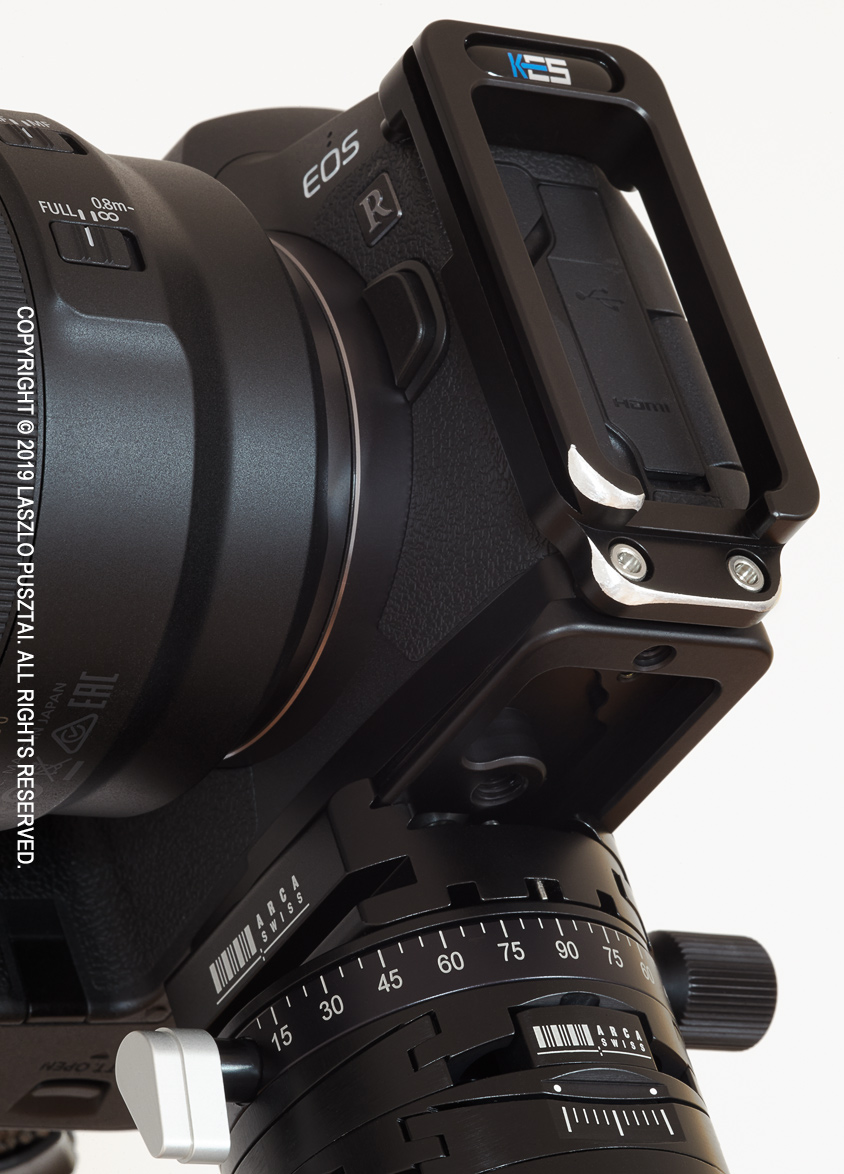
So this led me to the good old Canon RS-60E3. It’s tiny, inexpensive, weighs nothing, needs no battery, doesn’t generate electrosmog, and works exactly as you would expect it to work. What a relief after struggling with the bluetooth remote for a week! As an added bonus, the RS-60E3’s plug does not protrude from my Kirk L bracket. I highly recommend it (and also recommend to stay away from the BR-E1, unless you absolutely need to go wireless for triggering the camera from a longer distance).

Of course you can use a proper tethering app, like Kuuvik Capture. That is what I normally do, but no one wants to lug around an extra notebook on a vacation. Then there is the Canon Camera Connect app, which I don’t use because I don’t agree to Canon’s privacy policy, and because no Canon app lives up to my expectations (that’s why Kuuvik Capture was born).

I’m currently very happy with the RS-60E3. I’m sure it won’t last a decade, but it’s cheap enough so that I don’t care. Will just buy another if this one breaks.

  ☕ ☕ ☕

Did you enjoy this post? Consider buying me a coffee if so.

Building the “Travel” Tripod

A tripod is, and always was, an essential part of my kit. Capturing high resolution images for large prints demand stable support. Not to mention its importance as a compositional tool. While I’m absolutely satisfied with my “standard” tripod (a Gitzo GT3532LS with an Arca-Swiss d4 Classic geared head), there are occasions when either its size or its weight becomes prohibitive. So I was searching for the ideal lightweight support for a couple of years now.

My requirements were very strict, and no dedicated (means weak and short) travel or lightweight tripod satisfied it. My “travel” tripod has to be sturdy enough to support the Canon EOS 5DS R with a short tele, like the Zeiss Apo-Sonnar 2/135, in extreme conditions (strong wind, icy surfaces, etc). It must fit into cabin baggage (practically 53cm or shorter closed length). It has to be 130cm or higher when fully extended. The head must be geared (one doesn’t want to go back to imprecise and frustrating ballheads after years of shooting with an Arca d4 or Cube). And it should be around 2kg, head included.

Sounds pretty impossible? Well, you can’t buy such a thing off the shelf. You have to build it. And like any good tripod, it will be expensive. But like any good tripod, it will last a few decades.

Let me show the finished product first.

Gitzo GT2542 + Markins TH-230 + Arca-Swiss p0 Hybrid

Specs: 51cm closed (without head), 131cm fully extended (without head), weighs 1420g (tripod) + 615g (head) = 2035g, sturdier and dampens vibrations faster than my previous lightweight solution (a Gitzo GT2532S with the Arca p0 Hybrid head).

Actually, vibration dampening performance is halfway between the Gitzo GT3532LS and GT2532S Systematic tripods. To measure it, mounted my 500mm directly on the tripods (with no head), knocked one of the legs, and timed in 16x magnified live view how fast did all vibrations die. For the GT3532LS I got around 1.3-1.4 seconds. For the GT2532S, it was around 2 seconds. My “travel” tripod produced 1.6-1.7 seconds. Pretty impressive.

The operation

The Gitzo Mountaineer GT2542 does have pretty good legs, with specs close to my requirements. I’m looking at Gitzo, RRS and Novoflex offerings when it comes to tripods, and there isn’t another one that’s tall enough fully extended while short enough when closed.

But unfortunately Mountaineer tripods have a center column. Center columns are a work of the devil in my book. So it had to go. There were a couple of options here. You can just remove the center column and leave the head platform. Or better, you can remove the column and the platform, and install a Markins tripod base. Or even better, you can throw out the entire top spider and replace it with Markins’ new TH-230 tripod hub.

I chose the third option, because Markins markets this solutions as a way to reduce vibrations by 30%, and because of the potential ~200g weight reduction. While I hadn’t measured the original tripod’s performance, a quick test showed noticeably improved vibration reduction with the TH-230. And the actual weight saving is 300g.

It took about five minutes to remove the legs and attach them to the Markins spider. Markins even have a video showing the process.

By default the head mounting bolt tends to come loose as you change heads, so I had to apply a little bit of removable threadlocker to make it stick in the TH-230 (I had Vibra-Tite Blue 121 at hand, but Loctite Blue 242 will also do).

Unexpected things

I’m surprised how well machined the TH-230 is. It’s superior to even Gitzo’s craftsmanship. The military green (officially called natural green) color of the hub is a bit out of place, but not too disturbing. And finally, the legs spread a little wider with the TH-230.

The latter has a consequence that the fully extended tripod is 6.5cm shorter than it was with the Gitzo spider, despite the 4cm difference in the Markins and Gitzo spider heights (measures from leg tops to head mounting platform). So you lose 2.5cm here, but gain a tiny bit of stability in exchange.

Since I haven’t used a 4 section tripod for more than a decade, I was a bit shocked to experience how slow it is to extend and collapse the tripod. Exactly 50% more than a 3 section one (9 locks vs 6). This is the price you pay for compactness.

The head

It is my good old Arca-Swiss p0 Hybrid with classic (screw) clamp. It had been modified to remove those annoying top panorama unit detents, and is serving me for about two years now. I’m going to share my thoughts on and experience with the head soon.

I ended up using the p0 Hybrid not only because I already had it, but also because the other option (an Arca L60 plus an additional leveling base, such as a Novoflex MagicBalance) would a) increase total system weight, b) limit the movement range and c) reduce the maximum load capacity of the system.

Bottom line

Bought the Gitzo Mountaineer GT2542 for 540 EUR net (not including VAT), and the TH-230 for 190 EUR net. The p0 Hybrid sells for about 740 EUR net these days. Not inexpensive, but I would call it a fair price for the performance you get.

I’m pretty excited to put the “travel” tripod through its paces. It’s small and light enough to bring it with me not just when I hike with the 5DS R, but also to lug along the EOS R when just traveling casually.

  ☕ ☕ ☕

Did you enjoy this post? Consider buying me a coffee if so.

The EOS R Diary : Kirk L Bracket

I use L brackets for basically every camera I have (the only exception is the 7D Mark II, because I haven’t found a bracket that isn’t unwieldy). The first one that became available for the EOS R was Kirk’s BL-R, so I ordered it immediately. Some 5 weeks later, in early January, the bracket finally arrived.

It is a lightweight and slim bracket, but I had to carry out a few modifications to fix its shortcomings. You can see the completed version on the following image.

Customized Kirk BL-R bracket

First and foremost, had to round some corners that tend to punch a hole in your palm if you handhold the camera with the bracket installed. Once mounted, I almost never remove the bracket, so this is a big issue for me. It’s the same design flaw that plagues Kirk’s 5D3/5DS/5DSR bracket, and the very same fix: file off the offending sharp corners.

Another problem with the vertical arm is the posts designed to support the top of the bracket. Both of these posts supposed to touch the metal of the camera body, and I’m sure they will leave scuff marks. “Fortunately” one of them doesn’t even touch the metal (there’s a half mm gap). So I placed little gaffer tape pods on the end of both posts (more on the one that didn’t reach the camera). Now they do safely what they intended to do. I would expect Kirk to come up with a design where a large post rests on the rubber cover. There would be plenty of space for that, just above the port covers.

And lastly, removed the hex wrench and its holder mechanism from the base plate. I don’t see a point in including a wrench within a plate, but this seems to be the current “innovation”. This shaved off 9g, and the bracket now weighs a mere 82g. Almost half of the weight of my 5DS R bracket…

With these modifications in place, the BL-R performs very well. It adds a welcome weight to the camera, making it balance much better with the large and heavy RF 50/1.2 lens.

Speaking of large and heavy lenses. I expect upcoming high-end RF lenses also to be large and heavy, and would have loved to see a bracket with dual attachment points, just like Kirk’s 5D3/5DS/5DSR bracket. The bracket on my 5DS R is rock solid, with no movement of any kind, which cannot be said for any of the single attachment point brackets I’ve tried. Yes, the problem lies in the camera’s mounting screw, which allows for tiny little, but still noticeable movement. And I still have vivid memories of what happened when the tripod screw got ripped off from my 1D Mark II.

I would only recommend the BL-R bracket if Kirk fixes the aforementioned shortcomings. Or if you are willing to follow my path and fix them for yourself. For $120, the bracket isn’t expensive. But buying it for $120 and spending a few hours on making it usable turns it into an expensive piece of gear.

Grebe on the Marked Waterway

While this year we’ve rarely crossed our paths with great crested grebes, last year presented numerous opportunities to explore color contrast between these beautiful birds and their surroundings.

Grebe on the Marked Waterway

It was funny to observe that grebes travelled mostly between the flower strips, as if it was some kind of waterway marking.

The 5DS R produces magical environmental portraits, and the 500mm paired with the 1.4x teleconverter is about the perfect focal length for this purpose. If you haven’t done so, check out my former post on using this rig for grebe photography.

The EOS R Diary : Customizing Controls

I highly regard the contemporary Canon DSLR user interface design. It provides a great experience out of the box, with just the right amount of customization abilities. The EOS R clearly inherits a lot from this. And it is good. But is also inherits from the PowerShot / EOS M cameras, and from the prevailing over-customization mania, which isn’t.

Late Fall Sunset – EOS R + RF 50/1.2

All three of my current DSLRs (1DX II, 5DS R, 7D II) are configured to have the exact same control layout, so that I can pick any of them and everything is in the place I expect it to be. My goal with customizing the EOS R is to make it as much identical as possible to my DSLR setups.

Please keep in mind that this customization is designed for my still (mainly landscape) photography. I don’t shoot video.

If you haven’t done so, it is now time to read chapter 5 and chapter 7 of the EOS R user manual. I’m not going to replicate what’s there, and how to set the mentioned options.

Dials

The mail dial controls aperture in manual mode, as I use Av and M modes 99% of the time, so I prefer aperture to be on the same dial. Its direction is reversed, so that turning it to the right will add more light.

The quick control dial is used to set shutter speed in manual mode. Otherwise it is used to set exposure compensation. Its direction is reversed, too (there’s one setting that applies for both dials). As a side note, I disregard any camera with a dedicated exposure compensation dial that cannot be used for anything else. I’m glad Canon finally abandoned that concept even on the M series.

Feedback to Canon: +/- 3 stops of compensation range isn’t always enough. It should be +/- 5 stops, like on any recent single digit Canon DSLR.

The lens control ring is configured to set ISO, but only while metering is active. The ring on the RF 50/1.2 is a tad too loose to be used without an interlock. There’s one drawback for the latter: auto ISO cannot be set with the control ring this way.

Focus ring rotation behavior (ill-named as sensitivity in the menu) is linked to rotation degree. Honestly, I wouldn’t have bought the camera without this option. I find it totally impossible to manually focus with the rotation speed sensitive behavior.

Buttons

The EOS R team did a great job with minimizing the number of physical buttons. Well, actually went one button too far with removing seldom used stuff.

I strongly believe that metering and AF should be on separate buttons, so the shutter release half-press only initiates metering on my cameras. AF ON turns focusing on, with a side effect of also initiating metering. But the general idea is to be able to release the shutter without AF, and this configuration makes it possible.

M-Fn has AE lock and hold assigned. Like on all my cameras. This is really handy when shooting frames for a stitched image and want to ensure the same exposure for the entire series, but also enjoy automatic exposure setting to get into the ballpark of the final exposure.

In general, I prefer to place all-point, auto point selection AI Servo AF to the * button, but unfortunately it’s not an option on the EOS R. So it toggles between one shot and servo AF for me.

I configured the AF point button to switch directly between AF methods. This is something I use a lot, and I also limit AF methods to face+tracking, single, expand area (both) and zone AF.

Cross keys are set to move the AF point around, with the center Q/SET button set to reset the AF point position to the center of the screen. The erase button has the exact same functionality, but its way more natural to press the center of the cross keys to move to the center instead of finding another button.

While we are here, there are a few things where I would welcome a change in further firmware releases.

Feedback to Canon: During picture taking the erase button has the fixed functionality of resetting the AF point to the center. This is rather cumbersome, as I described above. Instead, the erase button should have assignable functionality during picture taking, for example one can assign the depth of filed preview to it (since there’s no physical DoF preview button on the camera – the place I think Canon went too far with button removal).

Feedback to Canon: During image playback, every single contemporary single digit DSLR can be configured to use the SET button as a magnification button. I would welcome this option on the R, or at least an option to be able to switch the SET button’s functionality with the magnify button.

The Mosquito Hut – EOS R + EF 35/2 IS

MODE is left at its default function. Let me stop here for a moment. There is sizable hysteria around Canon’s choice of the mode button instead of the mode dial. Well, the MODE button comes from 1-series DSLRs. And it is rather convenient if you shoot tethered. For example you can switch the shooting mode from within Kuuvik Capture. Try to do that with a mode-dial-equipped camera when it is mounted 4 meters high. Yes, I do prefer to have a MODE button.

I’m glad that there’s a video record button, and that I’m not shooting video. This button is a key element of my customization. It’s assigned function is DIAL FUNC. The R lacks the usual camera-top buttons like WB, drive mode, ISO, etc. DIAL FUNC is an amalgamation of those. After pressing the DIAL FUNC button, you can choose between different functions with the quick control dial, as well as different values of the chosen function with the main dial. Up to five functions can be selected for DIAL FUNC. I have ISO (for cases when the attached lens have no control ring, and for selecting auto ISO), drive mode, and metering mode (I usually leave it on evaluative, but there’s no way to set it via the menu).

And finally, the LCD illumination button is used for just that. No inadvertent switching between different top LCD information modes, thank you.

Touchable Thingies

A controversial topic, I must admit. Yes, the M-Fn Bar is a gimmick, and I would prefer a display mode selection switch in the same place. But touch and drag AF is genuinely useful. Actually so much, that I constantly find myself reaching for the LCD even on the 5DS R and 1D X II…

So let’s see first how I configure touch and drag AF. Positioning is relative, as I wasn’t able to develop a muscle memory for absolute positions. And only the right side of the screen is active, as I want to drag the AF point with my finger, not with my nose.

The M-Fn Bar is arguably a thing that needs to be worked around. It’s safety lock is upsetting, but without it you’ll definitely change settings inadvertently. But there’s a solution! The multi-function lock that I never ever used on any of my cameras before the R. So the LOCK button locks the M-Fn Bar for me (only works during shooting, and NOT during playback, though).

During picture taking, the M-Fn Bar’s assigned function is to zoom in and out on live view. This is a seldom used function for me on a travel camera. And on a tripod, I can safely disengage the lock with no fear to make an uncorrectable error.

During playback the right side of the control toggles between one and zero star rating.

Conclusion

The EOS R is a rather minimalistic camera. This isn’t bad. On the contrary, I enjoy shooting with it mostly because it lets me focus on the bare essentials. I know from experience how much thinking goes into making a camera minimalistic. So hats off for the EOS R team.

But you definitely have to think about your needs and configure the camera for those. The all too common “I want it all, just in case” thinking will not work here.

  ☕ ☕ ☕

Did this post help you? Consider buying me a coffee if so.

Turbulences

Water is an inexhaustible source of inspiration. It isn’t always fluid, it isn’t always blue. But it’s always changing and invites you to experiment. And along the way you may discover fragments of it’s hidden nature.

Turbulences

This image is part of my “Colors of a Lake” series, a long running project that explores unusual colors and forms of one of my favorite places.