This slightly faded photograph from the eighties shows my just-completed analog synth corner in the studio.
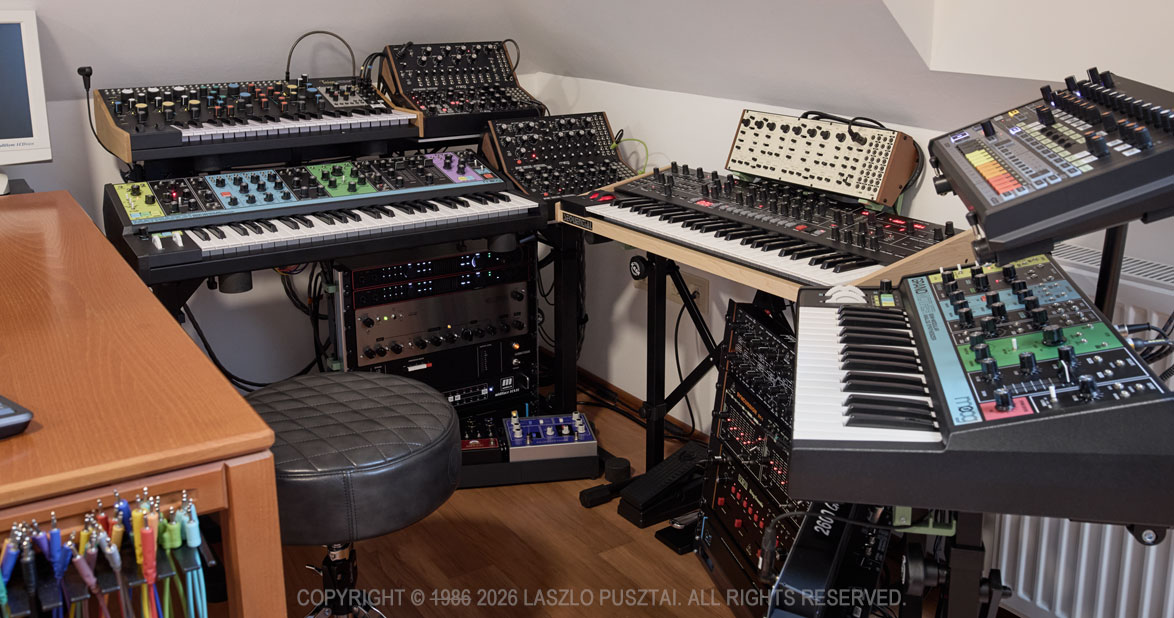
The hardware is finally complete and functional – and ready to roll!
Well, okay, it’s not from the 80s, but the synth corner is nevertheless ready for fun.
It took me two years to arrive at this point. 19 months of which had been spent on procurement and evaluation of not just synths, but all the required support gear. In mid-January this year it was time to hit the workshop to begin making all the required parts and cabling. The final assembly and testing was completed earlier this week.
I do find “studio tours” an immensely useful source of tips and tricks, and I hope mine will help out somebody somewhere. During the project I had encountered quite a few interesting challenges that nobody seems to talk about. I’m planning to go into detail of these in subsequent posts – this is being a global overview.
My initial goal with the synth corner was just to make a sonic playground. But in matter of weeks it became clear that I will need to develop custom parts and software to fill the gaps I was unable to cover with off-the-shelf solutions… And you know what an entrepreneur does in a situation like this: starts to make a slew of products. The first of which, the Mother Global Settings app, is available since last fall. Several more will follow later this year.
I also wanted to limit the space allocated for the synths and associated gear. Mainly to be able to keep everything wired in all the time and within reach. The space limit also helped to avoid boundless gear acquisition to some degree.
Enough introduction, let’s get down to the real stuff! I’m going to talk about four of the six tenets I consider when building a studio – acoustic treatment and software will be covered in later posts sometime.
Power
How you power your audio gear will have significant impact on sound quality. Fortunately the house I’m living in have rather clean power and great grounding, but short outages are quite frequent. So everything – including my Mac and monitor – is connected to a CyberPower CP1500EPFCLD UPS. Using a UPS also guarantees that all the devices are connected to the same wall outlet, so I haven’t experienced even the slightest ground loop issue from the power side of things. The whole setup idles at around 250W, and I rarely if ever go over 50% of the CyberPower’s maximum load.
Three CIOKS DC7 isolated power supplies and a CRUX extension provide ultra-clean power for synths and pedals where they are appropriate. For more power-hungry stuff I’m using a bunch of Moog’s new power bricks – those that ship with new devices post InMusic acquisition. There are a few cases where I’m using the original power supply shipped with the product: like the Taiga requiring 15V and the RD-8 requiring 18V at a higher power draw than CIOKSes can reliably provide. Another oddball exception is the Wellspring: to have a five year warranty, the included power supply must be used. Fortunately it is a good one.
Audio
A pair of Focusrite Scarlett 18i20 4th gen audio interfaces provide me 16 channels of 24bit / 192kHz audio. I’m used to the wonderful and spacious sound that 192kHz recording can provide in my former field recording experience, so that was something I definitely wanted here. All my synths and effect units have 100% analog signal paths, and these interfaces allow me to keep all the nuances in their output. The Scarletts have always-on, pretty transparent preamps on each channel. This is a huge space and cost saver, as some of my synths have a weaker output and benefit from a little boost.
Unfortunately 16 channels isn’t that much. To alleviate this problem, the Behringer modules (in racks below the Trigon-6 and the Grandmother), are connected to the Taiga’s otherwise unused right channel through a Nano Modules MAR mixer hosted in the Taiga’s Eurorack bay. This also gives me the flexibility to patch some of these synths directly to override the Taiga’s channels bypassing the mixer when needed.
You may have noticed that I don’t have a centerpiece patch bay. The Scarletts have 4 front overrides, and combined with the MAR mixer, this provides me enough flexibility.
But what about the effects? – you might ask.
I have three digitally routed effect loops. The main stereo loop hosts a chorus, a phaser, a delay and a reverb – in this order. The second one is just for the Spectravox. And the third one is for ad-hoc connected guitar pedals. Routing is done in REAPER with the appropriate delay compensation. This gives me the flexibility to separately record dry and wet, and to send already recorded material to the effects. At 24bit / 192kHz I haven’t noticed any audible difference between this approach and a fully analog signal path.
Monitoring is done through a pair of Genelec 8030C speakers, connected to the Scarlett’s monitor output. So there’s no direct analog monitoring, but I actually prefer to hear what I’m going to work with later on.
In case I need a real string sound, my guitar gets wired to one of the front hi-z inputs of the Scarletts. I usually put guitar pedals between the Strat and the Scarlett.
And finally, the elephant in the room: cabling. I prefer to use Vovox’s sonorus protect and sonorus direct cables wherever I can. But they are quite stiff, expensive and ordering custom lengths can take months. As a result I started to make my own cables. I literally spent days on auditioning different materials, and finally settled on using some of Sommer Cable’s fine cables, such as the Spirit LLX, Spirit XS. Surprisingly, I prefer to have some synths connected via the Onyx Tynee – despite this one doesn’t have the expansive sound stage of the former ones. Plugwise Neutrik and Sommer Hicon only.
Control (MIDI)
A Miditech midiface 16×16 gives me 16 DIN inputs and 16 DIN outputs. Which is plenty right now. The interface has a low-latency USB3 connection directly to my Mac Studio. I avoid USB MIDI because it doesn’t provide galvanic isolation and is a source of lots of nasty noise.
On the cabling front, just like with audio, I use a cable that is appropriate for the task at hand. This means a mixture of Roland RMIDI-G, Cordial ED and self-made (Sommer Goblin cable with Neutrik REAN plugs) cables.
Stands and Racks
Several K&M Omega and 18826 stands form the base of the support. The racks are open frame MikroTik SolidRack 10s.
You may have noticed little pistachio green things here and there on the photo. They are the top on an iceberg: I have dozens of 3D printed and aluminum extension parts to these stands and racks. There are additional shelves (like the ones under the Moog modules), stiffener bars, cable guides, even a pedalboard. Some of these are general things that I’m thinking of bringing to the market, and some are manufactured to my specific use case.
One thing you won’t find in the synth corner is cable clutter. I’m allergic to it. A bunch of 3D printed cable holders and guides help me keep everything organized and to keep power, control and audio at a safe distance from each other to avoid interference.
Next Up…
There is one specific device, one that I consider being a must for anybody working with synths or other audio gear. It is the subject of my next post.
Another consequence of the synth corner hardware being ready is that I can now focus on the software projects waiting for this to happen. There are no less than four new apps I’m working on right now. This is going to be a fun / busy / interesting year!


