Performance is a Key Kuuvik Capture Feature

Since I took over Kuuvik Capture last year, one of my top priorities is to provide the fastest, highest performance tool possible. While the original company arrangement did not allow for costly, time consuming optimizations required to reach the speed I wanted, now I can spend all my spare time on it. And the results are stunning. Just think the brutal improvements version 2 brought to the table…

These days I’m doing some groundwork that will make exciting new features possible in Kuuvik Capture (and also serve as a base for upcoming products). And improving performance along the way.

Kuuvik Capture 2.5 Beta

Kuuvik Capture 2.5 Beta

No more Windows leftover

Originally Kuuvik Capture was designed to be able to run on both OS X and Windows, and we used a bunch of readily available software components (Canon’s own SDK and libraw for example), which turned out to be a bag of ugly worms. I had spent several long days on wrapping those components to make them usable and reliable.

This “wrapper” was able to run on both operating systems. On top of this, the operating system specific “engine” connected the “wrapper” to the user interface and provided services to the “wrapper” (such as proper asynchronous camera communication – something that Windows completely lacks).

With version 2 I had already replaced these problematic components with my own code, but parts of the “wrapper” and the “engine” were still present. Since we decided to drop any and all Windows plans, there was no need for them – my Digital Camera Library and the user interface could talk directly. So I started to gradually remove them, which task is finished by now.

During the removal I had not just eliminated several thousand lines of code, but since there’s less machinery involved, camera communication became faster and consumes less battery. Image download from the 5DS R is 1% faster compared to version 2.4, and overall communication is up to 5% faster compared to 2.0 (measured on my mid-2012 15″ Retina MacBook Pro). This seems a small number, but think about it this way: you can take 1-5% more shots on a charge.

Even faster RAW decoding

I’m using a lossless jpeg decoder based on dcraw‘s routines to open the RAW files. This had one drawback: dcraw was not designed to be able to work on multiple images simultaneously – something I need for my future plans. Not to mention that I also had to work around this limitation in Kuuvik Capture.

Fortunately I found and fixed the issue, and my decoder not just works parallel on multiple processor cores, but also crunching numbers faster. I measured 5-6% faster file opens (with 50 megapixel files on my MacBook Pro).

When?

These improvements will be available in Kuuvik Capture 2.5 later this fall.
Kuuvik Capture 2.4 Released

The latest update to Kuuvik Capture is now available on the Mac App Store. First and foremost, we’ve added support for the brand new Canon EOS-1D X Mark II. This seems to be a great camera with a few quirks – more on the camera itself in a later post. You can connect it to Kuuvik Capture with USB, using the built-in Ethernet connection or via the WFT-E6 or WFT-E8 Wi-Fi transmitters.

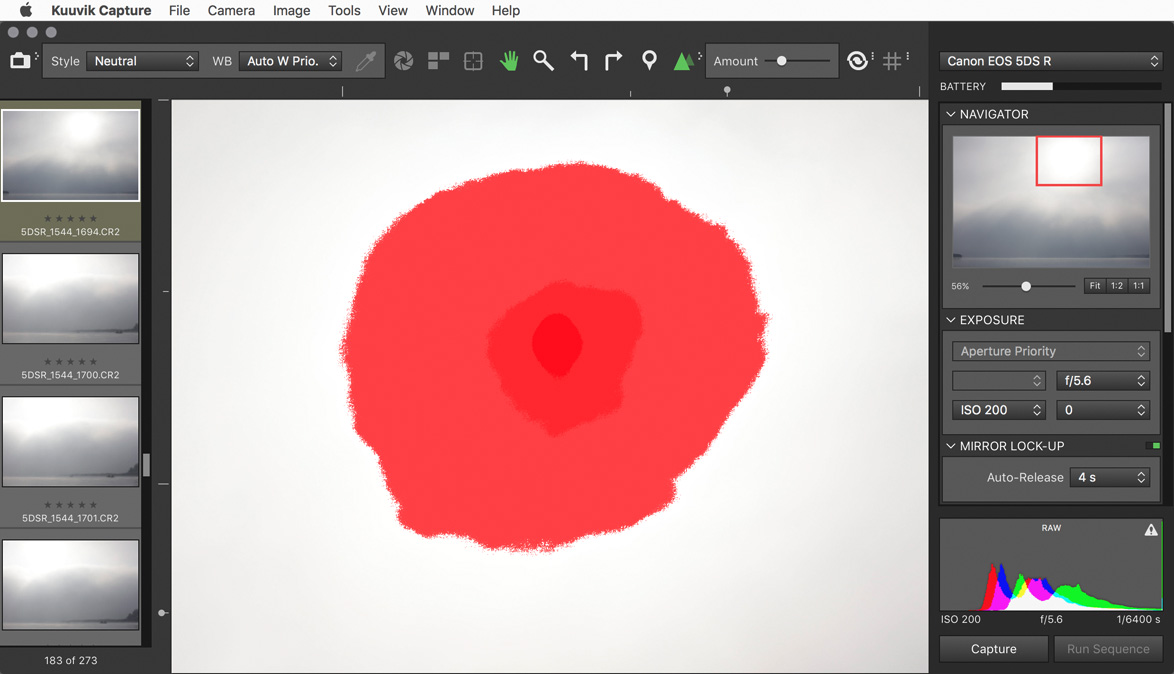
We also changed the way shadow and highlight clipping warnings look. In the past we had a hatched pattern that become denser as more channels got outside the exposure range of the camera. The problem was severe moiré and aliasing when you zoomed in and out. Beginning this version the exposure warnings are solid colored, getting more opaque as more channels are affected.

Multi-channel highlight clipping warning

This is an image from last fall, and shows how channels get clipped towards the sun in the frame. First green (the largest patch), then blue and finally red. The more channels are overexposed the less chance to do effective highlight recovery.

Last but not least, I’ve continued the multi-platform code removal process (mentioned in my former post), which brings performance improvements (and battery usage improvements) here and there. For example loading 20 megapixel images from the 7D Mark II got up to 0.1 seconds faster on a 11″ MacBook Air. And overall camera communication is a bit faster and smoother.

The update is free for existing Kuuvik Capture 2 customers. New users can download Kuuvik Capture 2 from the Mac App Store.

For more information about the app, please visit it’s microsite, or check out my posts.

Kuuvik Capture 2.3 Released

kc2icon@2xVersion 2.3, bringing Canon EOS 80D support to Kuuvik Capture 2 is now available on the Mac App Store.
Since Canon introduced quite a few changes with this body, I had to update both the camera control and the RAW decoder in my Digital Camera Library.

And at this point let me add a few personal comments on the 80D.

While the improved low ISO dynamic range is a welcome addition, this camera is a step back in a few regards. First, it’s not fast enough to support multi-point live view (formerly known as split view). It’s an unfortunate trend with Canon’s newest mid-range cameras: both the 70D and 700D were multi-point live view capable, and none of their replacements/successors are.

Second, the removal of the shutter count feature (it does not affect Kuuvik Capture per se, but indeed affects my ShutterCount app).

Third, Wi-Fi is still on the verge of being unusable. I’ve already mentioned sub-par 70D/6D Wi-Fi transfer speeds in the version 2.2 release announcement post. With the 80D, I was enthusiastic about the Easy Connection option, that is designed to create the camera’s own access point, and to allow using EOS Utility mode with no existing network needed. The idea is something you would expect in 2016, but the implementation is crap. And I’m not talking about the inability to specify a password for this network, but the extremely slow transfer speed. I measured speeds south of 30mps – which is half of the already slow speeds of the mid-range bodies.

Thus, I recommend to stick with using an existing Wi-Fi network and to avoid the Easy Connection option completely. Fortunately using an existing network is not slower than the 70D was (but it’s not faster either).

I took over Kuuvik Capture last year, and decided that I will not release a Windows version. This allowed me to remove former platform independent code and to do Apple-specific optimizations and speed up the app considerably. The code base is large, so this optimization process is still in progress – and this release also includes a few. They are not user visible, but you might notice them here and there. (For the technically inclined – I had eliminated a bunch of memory copy operations between the Digital Camera Library and the user interface.)

On the user-visible changes front, Split View had been renamed to Multi-Point Live View. I think it’s more clear what the feature does this way, plus Apple introduced a completely different Split View into OS X – and wanted to avoid any confusion.

The update is free for existing Kuuvik Capture 2 customers. New users can download Kuuvik Capture 2 from the Mac App Store.

For more information about the app, please visit it’s microsite, or check out my posts.

Focus Stacking with the Otus 1.4/28

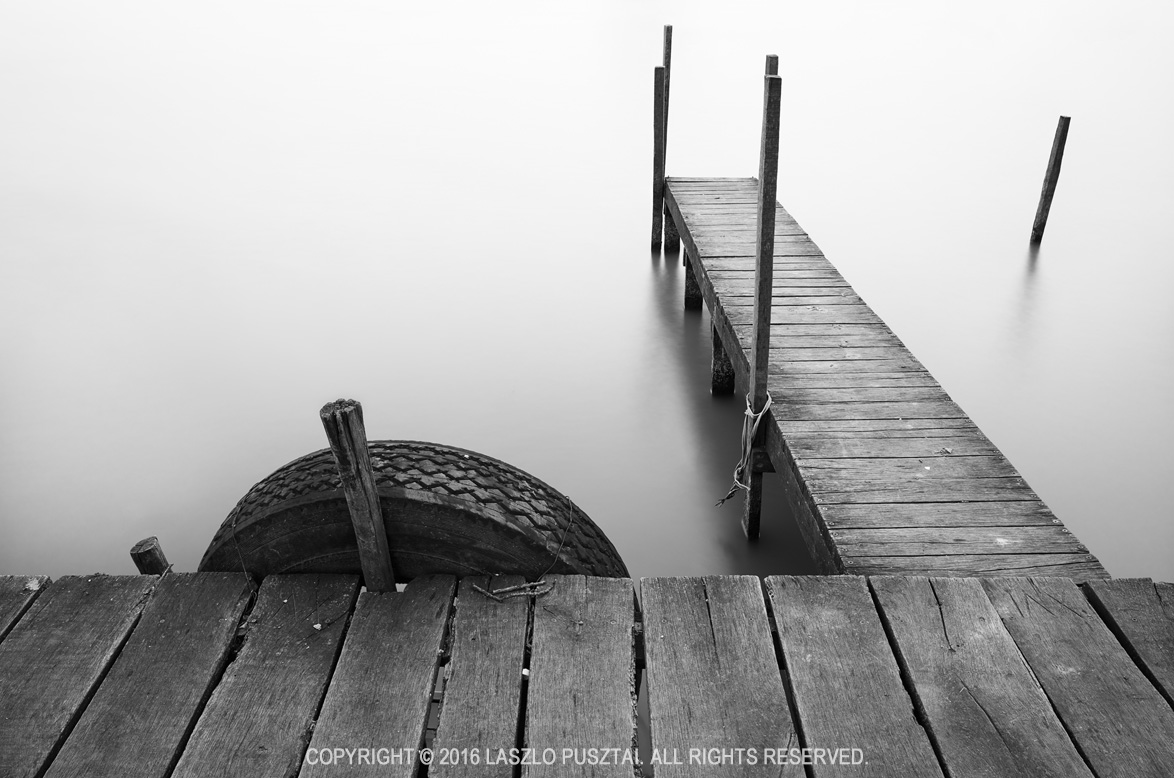
Last weekend I had a little time to play with the Otus 1.4/28. I was at Lake Tisza, but the light was suboptimal to put it mildly. So I decided to make a test shot to check how focus stacking will work with the Otus 28.

Why would you need focus stacking in the first place with such a wide angle? Well, if you have a brutal 50 megapixel sensor, with a lens that’s sharper in the corners than most lenses in the center, you don’t want to throw that resolution away by stopping down below the diffraction limit.

For this test I ended up using f/6.3 and taking 6 slices.

Early Spring Pier, Lake Tisza

Early Spring Pier, Lake Tisza

It was a quite a bit windy, and I wanted to smooth out the waves using the 10-stop LEE Big Stopper. I had to realize that I ran out of gaffer tape (unfortunately the Big Stopper on the Otus 28 leaves quite a gap at the sides), so I used my heavy cotton dark cloth to keep unwanted light from hitting the front element.

The dark cloth covered the entire camera, but it was quite easy to focus on the 11″ screen of my MacBook Air using Kuuvik Capture. The images were focus stacked in Photoshop CC.

And the result? Perfect front-to-back, corner-to-corner sharpness. It’s simply amazing.

Kuuvik Capture 2.2 Released with Wi-Fi Support

The latest update to my Kuuvik Capture camera remote control app went online earlier today. Although it looks like a small update on the surface, there’s a huge change under the hood. This version contains the 3rd generation of my digital camera library – with full Wi-Fi and Ethernet connection support.

You may remember that we had dropped the network camera option during the beta, because Apple’s PTP-IP (the protocol used to talk to the camera over Wi-Fi and Ethernet) implementation turned out to be unreliable under heavy load. Not to mention the side effect that Image Capture started every time we connected a camera.

So I took the challenge and developed a completely new PTP-IP transport component, debuting in Kuuvik Capture 2.2. If you think that it’ll appear in other apps in the future, then you’re on the right track… But let’s concentrate on Kuuvik Capture now.

Connecting your camera via Wi-Fi (or Ethernet)

First of all, you’ll need either a Wi-Fi equipped camera (6D, 70D), a built-in Ethernet socket (1D X, 1D C) or a separate Wireless File Transmitter (5D Mark III, 5DS, 5DS R, 7D Mark II, 1D X, 1D C) for this to work. Only Canon’s transmitters are supported, third party Wi-Fi remote control boxes will not work. Please check the tech specs for the full list of compatible equipment.

Canon cameras provide connectivity in several ways. The most complete is the EOS Utility connection mode. For this mode a camera needs to be paired to a given app on a given computer. Using two apps on the same computer? You need to pair the camera to them separately, and only one can be active at a time.

The computer side of this pairing process is dramatically simplified in Kuuvik Capture 2 compared to both version 1 and Canon’s EOS Utility.

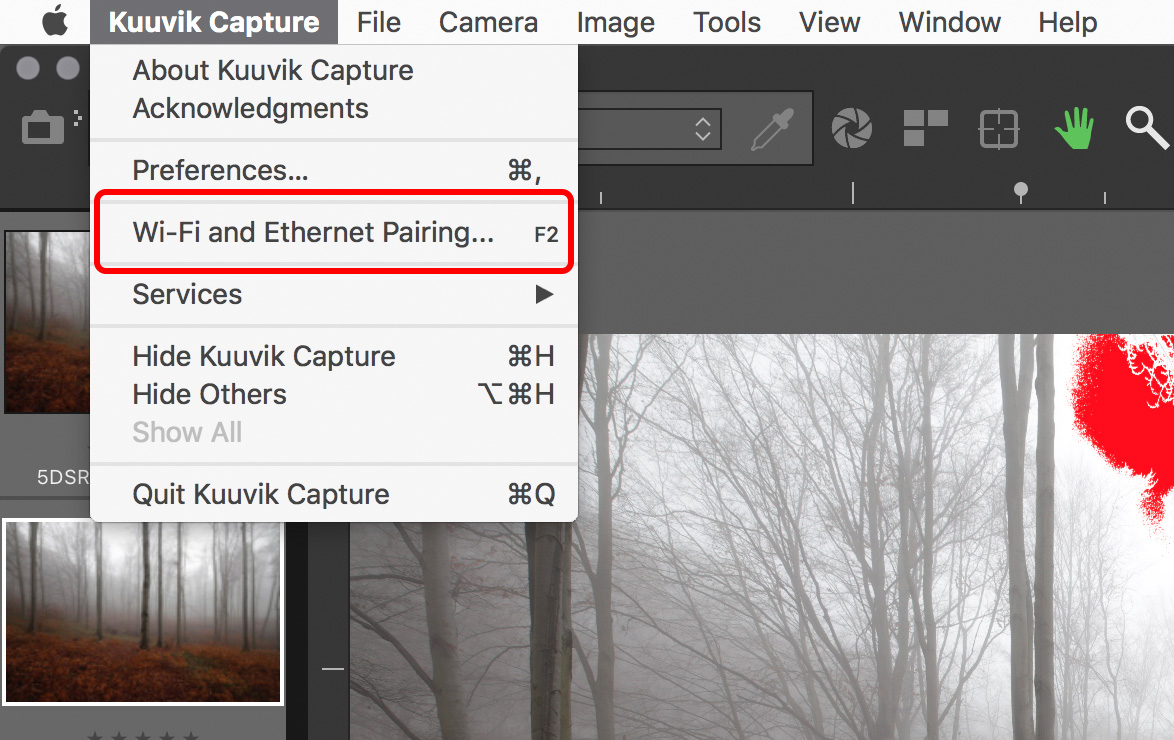
Kuuvik Capture now needs to be “pairing mode” to accept a pairing request coming from the camera. This mode is accessible through a new menu item (or by pressing F2).

networkPairing

Pairing can be initiated from the menu.

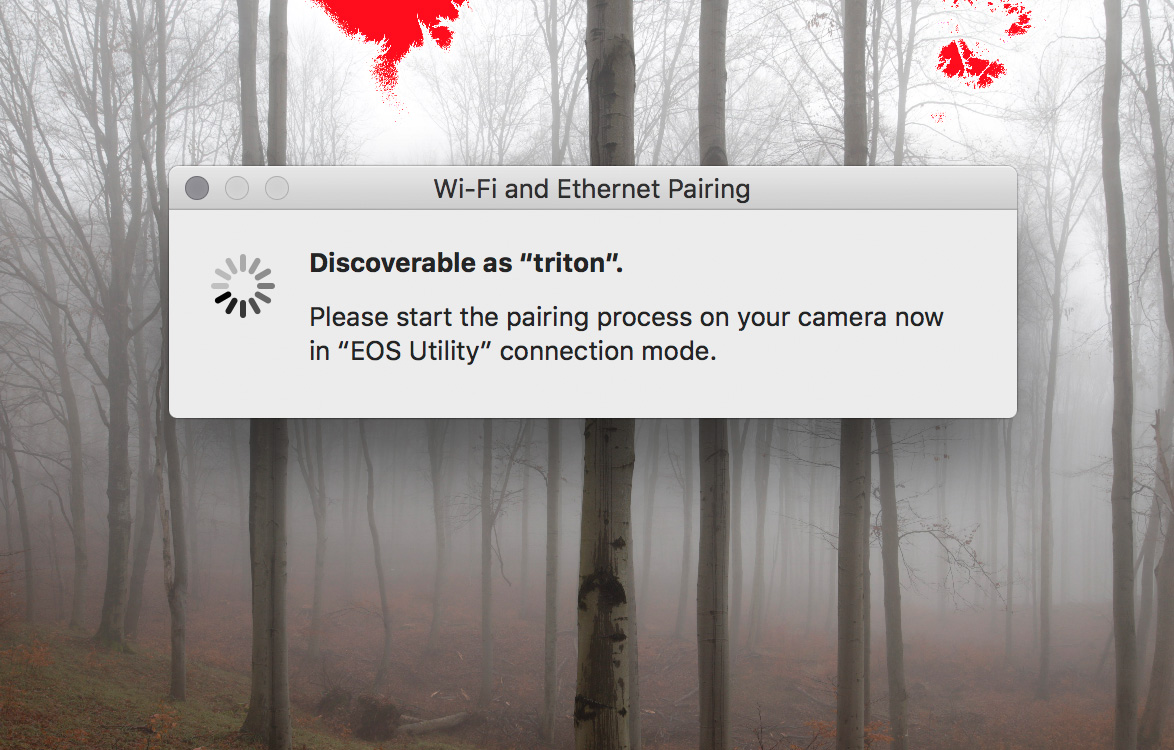
Kuuvik Capture displays the pairing window (shown below) while in pairing mode. This window also shows your computer’s name, which will appear on the camera’s LCD during the last pairing step, so you can double-check that you are pairing to the computer you were intended to.

networkPairingWindow

The pairing window. Kuuvik Capture is ready to accept pairing request only when this window is displayed.

And that’s all you need to do on the Mac.

Once in discoverable state, you can start the configuration process on your camera. The process consists of three large steps:

  1. Choose a connection mode.
  2. Configure your network.
  3. Do the actual pairing.

They are documented in your camera’s or wireless transmitter’s user manual, but there are a few important points to consider.

First, please don’t start any Canon app that may be mentioned in the manual. You are now pairing to Kuuvik Capture, and not to Canon’s apps.

For step 1, you must use the Connection Wizard on cameras where it’s available (e.g. 5-series, 7-series with the external brick), otherwise you won’t be able to complete step 3. On the 6D and 70D choose the Remote Control (EOS Utility) mode. On other cameras choose EOS Utility mode in the Connection Wizard.

In step 2, the camera will ask for network specific parameters (whether it’s wired or wireless, plus various options and a password specific to your network). This is the most complicated part of the entire process, but Wi-Fi setup is such a thing… I’d recommend to study the camera/transmitter manual beforehand.

Out in the field with no network to connect to? My previous post shows you how to create a fast and secure Wi-Fi network on your Mac!

The last step is the actual pairing. As the LCD indicates, this is your last chance to put Kuuvik Capture into pairing mode. It may take up to 1.5 minutes for the camera and your Mac to find each other.

camerapairing1

This is how the camera’s LCD will look like as soon as they found each other:

camerapairing2

Pairing should be done once (unless in the meantime you paired your camera to another app, another computer, or used another network). To deal with these different scenarios, the very last screen in the process (after clicking that OK button) lets you save up to 5 (3 for 6D/70D) setups into your camera’s memory. But if nothing has changed, Kuuvik Capture will find your camera automatically the next time you turn it on and connect to the network, so the pairing is not necessary every time you want to use a Wi-Fi or Ethernet connection.

When pairing has successfully completed, the camera’s LCD will turn black, the pairing window will disappear, and the camera’s name will show up in Kuuvik Capture’s camera selector.

Notes on Wi-Fi speed

It seems that Canon implements one of the lowest speed classes for each of their Wi-Fi implementations. This is 150mbps for the external 802.11n bricks (using only one spatial stream), and a shockingly low 60mbps for the 6D and 70D (despite they advertise it as 150). So don’t expect miracles and be prepared for 12-15 second downloads on these slower cameras. On the other hand, the external bricks are fast enough to be perfectly usable when the network signal is good.

Well, speaking of bad, flaky networks. While I absolutely hate to add new configuration options (one more thing for you to deal with), this time it was a must.

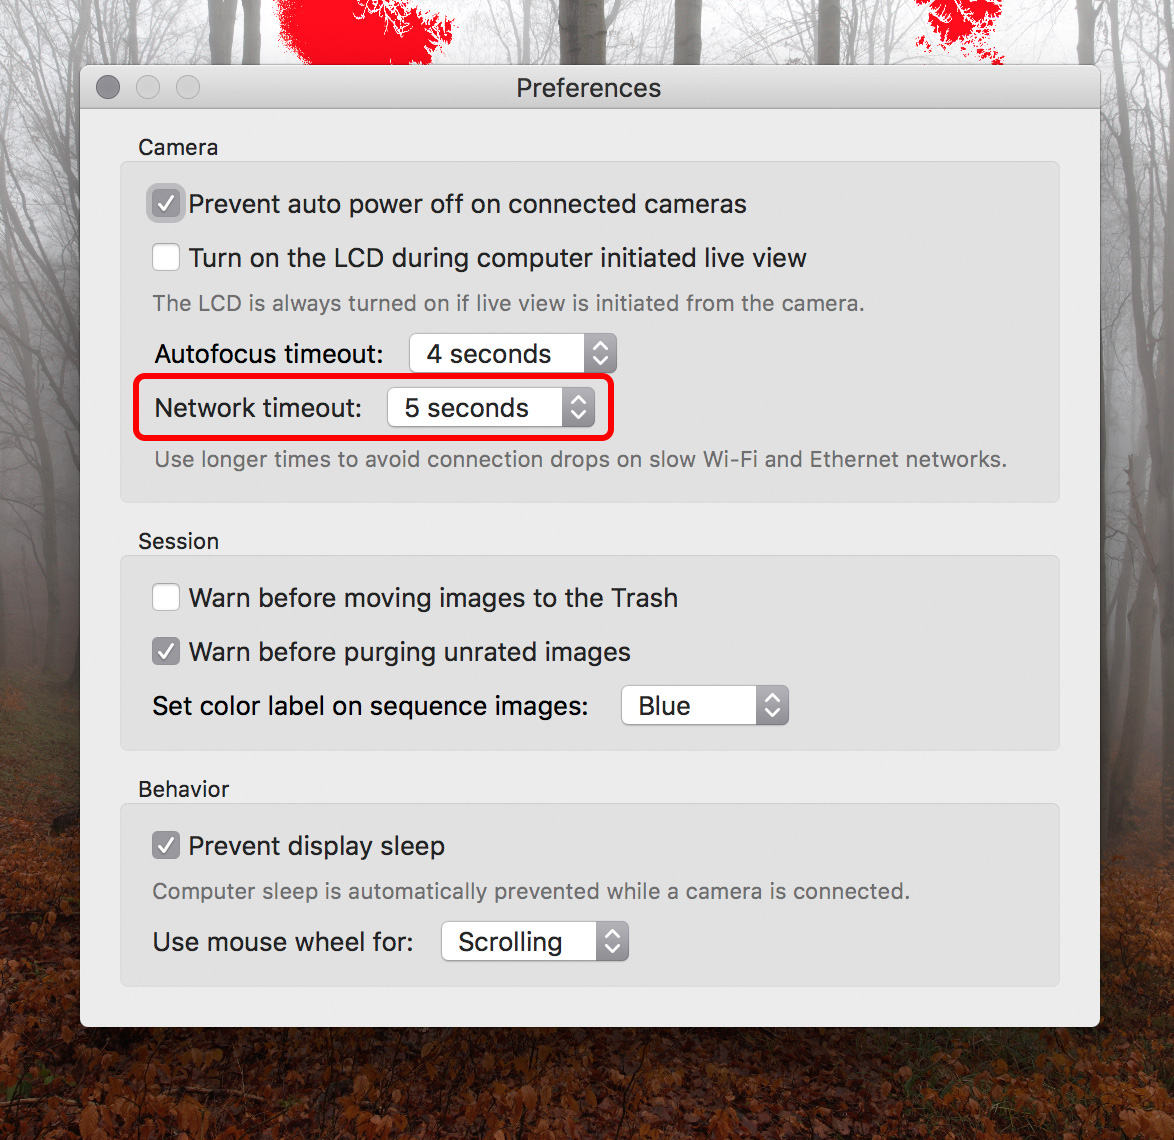
Wi-Fi networks can become unbeliveably slow (think longer distances and/or interference), causing the camera to disappear from Kuuvik Capture. A longer network timeout (a longer time allowance for intermittent network errors to clear) may solve this, but at the expense of delaying the detection of actual issues (such as when the battery dies). So the Preferences window now has an option to control this.

ntoPreference

The default is 10 seconds, which we found to be suitable for most Wi-Fi networks. You can go as low as 5 seconds or as high as 30 seconds. My personal preference is to go with the lowest number, and raise it in the presence of connectivity issues.

Other new features

There are two of them. Customers have asked for more, longer time options for mirror lock-up auto-release. So we’ve added 8s, 10s and 15s to the palette. Also the new white priority white balance mode introduced with the 5DS/R is now available on the white balance control.

Availability

The update is free for existing Kuuvik Capture 2 customers. New users can download Kuuvik Capture 2 from the Mac App Store.

For more information about the app, please visit it’s microsite, or check out my posts.

Creating a Wi-Fi Access Point on OS X

With Kuuvik Capture 2.2 around the corner, I’m going to post a few short tutorials on wireless “tethering” setups. Yes, the wireless connection option will make a return in version 2.2!

So let’s start with a solution to one of the most aching issues.

Imagine the following situation: you are out in the field, photographing an old castle. You want to place the camera on a crane to photograph from a high vantage point. The crane is higher than your longest USB cable can reach, so wireless connection would be the most appropriate solution.

First obstacle: all Canon Wireless File Transmitters (both built-in ones and external bricks) require an existing network to connect to in EOS Utility mode. Yes, it’s utterly stupid, since in other modes they can operate as an access point and create their own network. But other modes simply suck in terms of remote control features.

Back to our example: there’s no phone coverage (for the Personal Hotspot trick), there are no nearby networks of any kind to connect to. You could create an ad-hoc wireless network on your Mac, but setup is complicated and error prone (needs manual TCP/IP configuration on both the computer an on the camera), and in the last few versions of OS X there’s no way to create a secure Wi-Fi network (another utter stupidity). The lack of security is a total showstopper, so this isn’t the appropriate way to make the connection work.

There’s a neat trick, however. OS X has a built-in Internet Sharing feature that practically creates a Wi-Fi access point to share an existing network connection. The next obstacle is that you need the network you want to share to be in the “connected” state (think cable plugged in both to the computer and into a router). Unfortunately the built-in loopback interface (which is always connected and provides access to the local computer only) is not accessible from the Network preference pane in System Preferences (one more stupidity).

The key to the trick is to make the loopback interface appear in the Network pane. Actually, it’s pretty straightforward: launch the Terminal app and copy & paste the following two commands (working on both Yosemite and El Capitan):

sudo networksetup -createnetworkservice Loopback lo0
sudo networksetup -setmanual Loopback 172.20.42.42 255.255.255.255

Enter your password to allow these modifications if OS X asks for it.

Now your Network preference pane should list the brand new Loopback service:

network-loopback

It’s still listed as “not connected”, but don’t worry, that’s just a bug.

Side note: if you use multiple “network locations”, you need to repeat the above commands for each location. If you just use the Automatic location, then you can move to the next step.

Go to the Sharing preference pane, and on the list of services click Internet Sharing. If the service is already on, turn it off. Choose the Loopback service as the one you want to share your connection from. And share to computers using Wi-Fi.

sharing-1

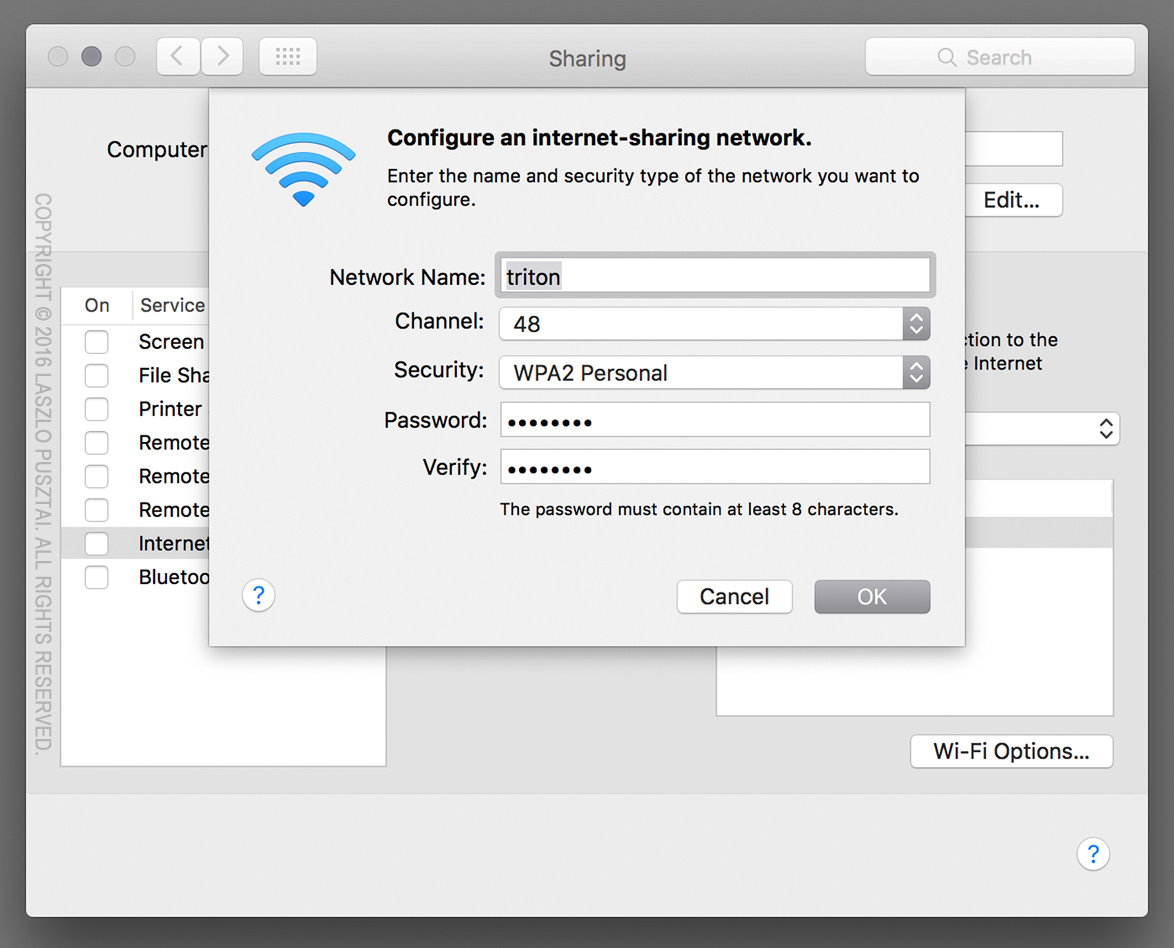
You can set up the shared Wi-Fi network (the network we’ll connect the camera to) by clicking the Wi-Fi Options button. Here is the Wi-Fi Options screen:

sharing-2

The network name is your computer’s name by default, but I’d recommend to enter a simple alphanumeric name (containing no special characters), as Canon cameras have issues with displaying characters outside of the simple letters and numbers range.

All other options are the usual Wi-Fi setup options. A few notes though. Channels 1-11 use the 2.4 GHz band, while 36-48 use the 5 GHz band. Transmitters in the 70D and 6D only operate on the 2.4 GHz band, while the external WFT-E7 brick operates on both. The 5 GHz band is faster and generally has less interference from other networks and appliances operating in the crowded 2.4 GHz band. For security, choose WPA2 Personal (the other option is None, which is unacceptable).

Once the Wi-Fi options are entered, you can start the sharing service. To do it, click the check box in front of its name in the list. OS X may ask to turn on your Wi-Fi radio if it was off, and will ask your confirmation to start the sharing service. After the service has been successfully started you’ll see a screen similar to the one below:

sharing-3

IMPORTANT: due to an OS X bug, your selection in the share from list may change to another (random) network service. So you must check whether it still shows the Loopback service after each start!

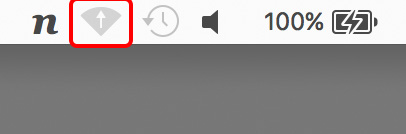
The Wi-Fi icon on the menu bar will change to the sharing icon once the sharing service is ready to accept connections.

sharing-on

And that’s it! Your personal access point is now ready. The steps to configure your camera will be discusses in an upcoming post.

  ☕ ☕ ☕

Did this post help you? Consider buying me a coffee if so.