Last Sunday morning thick fog greeted me at the lake. Despite the bad visibility (actually because of it), we sailed out to enjoy one of the best foggy shoots of my entire life.
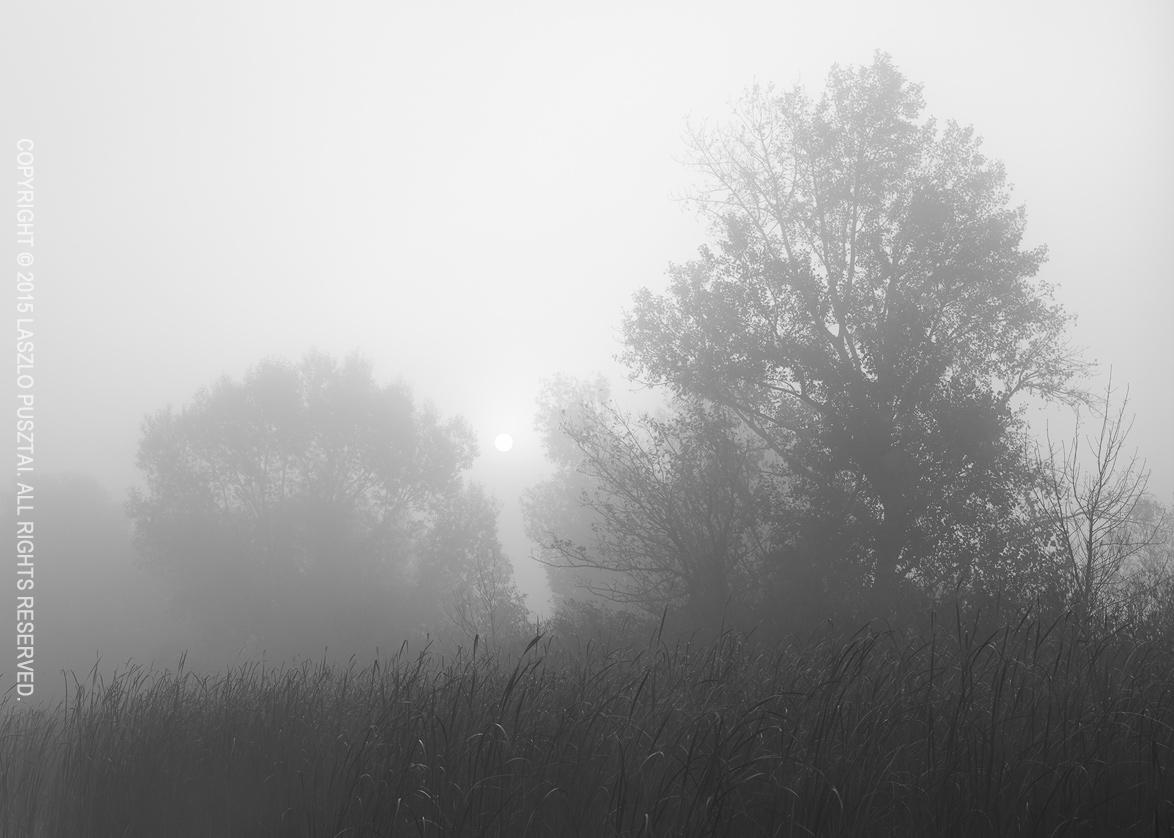
Foggy Sunrise
Shot with the Zeiss Otus 1.4/55 lens on the Canon 5DS R. Boy, this lens is magical. No chart or numeric test result will tell you that. You’ve gotta do yourself a favor and try one.
More to come.


 This is a screen shot made on my iPhone 6 Plus. You can see that Schneider iPro lenses are now supported, but the bigger news is Moment Wide lens support across the board.
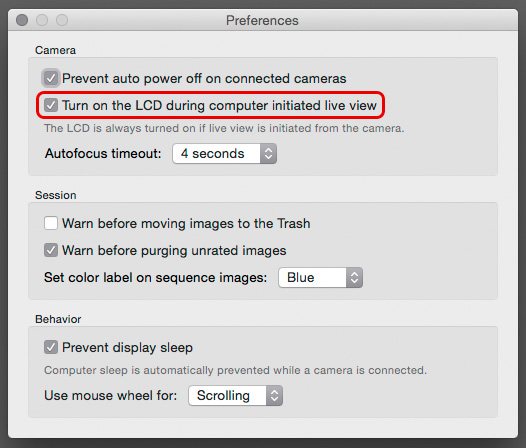 First, a new preference is added to control whether the camera’s LCD is turned on when you start live view from within Kuuvik Capture.


