The latest update to Kuuvik Capture is now available on the Mac App Store. First and foremost, version 4.3 brings support for all recent Canon EOS cameras: EOS RP, 250D aka Rebel SL3/Kiss X20/250D II, 4000D aka Rebel T100/3000D and the previously forgotten X90. (I agree, Canon went completely insane with camera naming…)
There’s more, though. Camera info management (should I say housekeeping?) was always a pain in the back for me. Setting the owner’s name for new cameras, updating copyright information each year (not to mention updating the copyright part of IPTC metadata) was a tedious process. Since I want to keep metadata in my cameras up to date (so that all images could carry the proper one from the beginning), it’s something mandatory for me.
Previous Kuuvik Capture (as well as ShutterCount) versions brought automated date/time/daylight savings time setting, and now we’ve extended it to copyright metadata. But let’s talks about the owner name first.
Setting the Owner Name
The camera owner’s name cannot be set from the camera itself, its only available to tethering/remote control apps. Why? Because if your camera gets lost (or stolen), chances are that the new “owner” had no chance to change it. So the device could be identified. This name is also embedded into all the images made with the camera, extending the ability to identify the original owner. It is not a perfect anti-theft measure, but might be helpful when recovering your lost property.
It’s pretty straightforward to set or change the owner name in Kuuvik Capture. Connect your camera, and click Camera > Settings > Edit Owner Name… in the menu.
The Copyright Information Template
While you can set both the author (aka artist in EXIF) and copyright properties from the camera, keeping the copyright info up to date when a new year comes takes some time. If you ever noticed a previous year’s copyright notice only when exporting the image from Photoshop – then this feature will be golden for you.
I always set the author to my name, and the copyright notice is something like:
Copyright (C) 2019 Laszlo Pusztai. All rights reserved.
This satisfies the requirements of several countries (some require the copyright symbol, others the “copyright” word to be present in the notice, and even some require to declare that you reserve your rights) and is something I have been using for decades. As you can see, the problem is keeping the year current.
The copyright information template can set both the author property and the copyright notice in new cameras, as well as keep the notice updated when a new year comes. You just have to connect your camera and it’s done automatically.
But you have to create a template first and instruct the app to apply it when a camera is connected. To create your template, bring up Preferences, and click Edit after the check box titled Apply copyright information template on the Camera tab. If you turn on the check box on for the first time it will automatically display the editor. Here’s how my template looks in the editor.
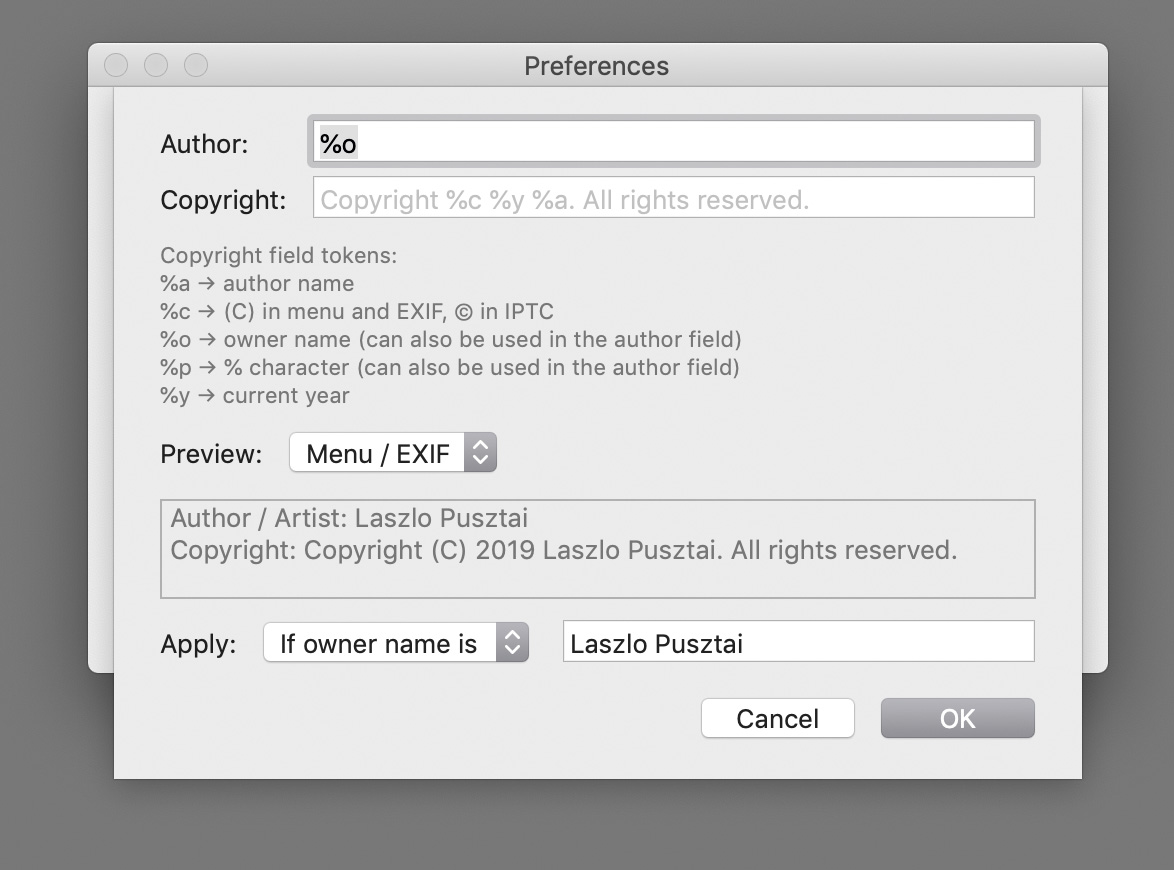
The Copyright Information Template Editor
The easiest way to set up your copyright info is to type your name in the Author field and click OK. The defaults will take care of creating the appropriate copyright notice in the format shown above. But you can also customize it.
One of the several tokens you can use is %o, which will be replaced with the owner name currently set in the camera. That is, I prefer to set the author to be the same as the camera owner (me). I leave the copyright field at its default. But if you have a long name, you may need to change it, as Canon cameras have a limit on how long the copyright notice could be. Jean-Baptiste Emanuel Zorg will definitely need to use a customized template… The Preview section will give you a live preview of how the expanded template will appear in the camera.
If your camera is IPTC capable (EOS R, 5D Mark IV, 1D X Mark II), then the app will also set up and activate IPTC metadata in the camera.
Let me stop here for a second. IPTC information you set must be separately activated with turning Add IPTC information on in the camera’s menu. Kuuvik Capture does it for you. But it always activates IPTC, and if you don’t want this, then you have to turn off applying the copyright information template.
If you already have IPTC metadata in place, then the creator and copyright fields will be updated. You can see how the IPTC fields will look like by changing the preview type to IPTC (instead of Menu / EXIF). The most important difference is that you can use accented characters in IPTC fields, but only ASCII is allowed for the camera menus (that will be written as EXIF fields into files). The app will automatically convert any non-ASCII characters entered into the author and copyright fields for the menu, including the copyright symbol itself. But will keep the accented ones in IPTC fields.
The template can be applied to all cameras unconditionally, or you can set up a filter limiting the application of the template to camera having a matching owner or artist name field. In case you regularly connect other people’s cameras and don’t want to mess up their copyright info. So I limit the template to my own cameras (where my name is the owner name). With this template, if I have a new camera, then only set the owner name, and the copyright info template takes care of everything else.
IPTC Export/Import
Speaking of IPTC info, you have the ability to export and import IPTC information from/to the camera. This function uses the same XMP files EOS Utility uses for its similar function, so you can freely mix and match the two apps to manage IPTC information. There’s an addition in Kuuvik Capture, though. While importing IPTC info, the copyright information template is applied to the imported file if the Apply copyright information template preference is set. So you can’t inadvertently import copyright info that’s inconsistent with the template.
The export and import functions are available under the Camera > Settings sub-menu.
I have a “default” IPTC info file, one that sets contact information in addition to the copyright related fields. I import this file to each new IPTC capable camera, and let the copyright info template take over after that.
Focus Bracketing with the EOS RP
The EOS RP introduced in-camera focus bracketing. Kuuvik Capture handles it as another type of camera controlled bracket. The camera’s focus bracketing settings are displayed in the app, but you can change them only on the camera. When camera controlled focus bracketing is active, hitting the Capture button will run the entire bracketing sequence. Note that the images are captured with electronic shutter, that is, they are prone to severe rolling shutter effect.
But since Kuuvik Capture has real, proper focus bracketing, I’d highly recommend to use that instead.
Availability
The update is free for existing Kuuvik Capture users. New users can purchase it in the Mac App Store.
I’ve also updated the eBook, which is available free of charge.
IMPORTANT: Please update to version 4.3.1 to resolve camera connection problems you may encounter with the original 4.3 release.


 The tool I’m referring to is called extended metadata tooltips.
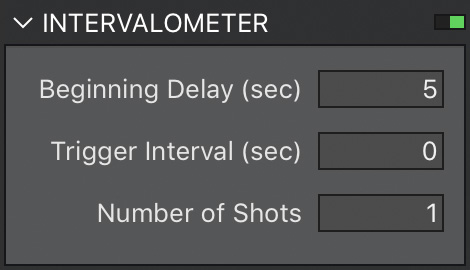 The app’s implementation is accessible through the intervalometer. In version 4 we’ve lowered the minimum for the Number of Shots field to 1 (it was 2 in previous versions). In this case Trigger Interval is ignored, and the app waits the time specified in Beginning Delay before capturing an image. It also works for brackets, and mirror-lock up (even in auto-release mode) just like the normal intervalometer functionality. Since this is an exposure sequence, you have to use the Run Sequence button (Cmd+R) instead of Capture. This is the method we recommend to use.
 A circular progress indicator on the RAW histogram’s panel lets you know how the loading goes forward. With the exception of a few operations (such as image deletion and purging) you are allowed to do anything during RAW loading. If you move to another image or capture a new one, loading is automatically cancelled, so you don’t have to waste your time on waiting for something that will be instantly thrown away.
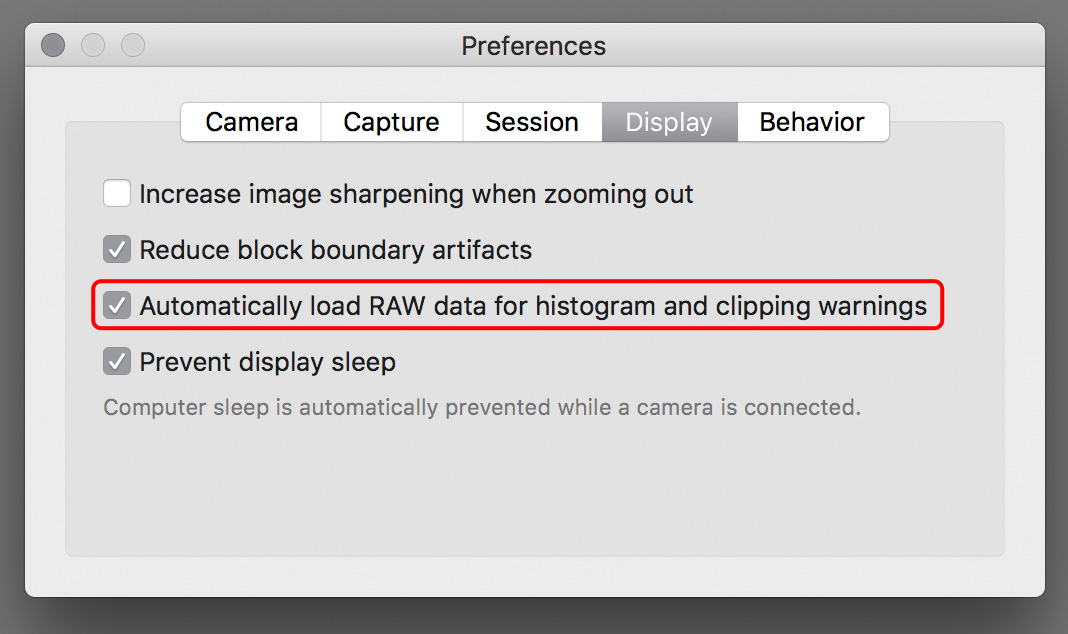
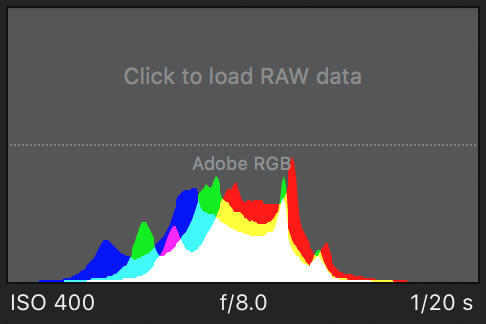 Should you need the histogram or the warning layers later on, you always have the option to load the RAW data manually. Just click the placeholder on the RAW histogram, or choose the Load RAW data command from the menu, or press Cmd+L.


